

Introducing The Lab Lounge: The Ultimate Membership for Film Photographers
Shutter Junkies is launching The Lab Lounge—our new membership program for film photographers! Enjoy $10 developing, free scans, free negative returns, priority processing, and film discounts. Limited-time offer: join for just $50/year.
If you love shooting film, you’re going to love what comes next.
Today, we’re excited to launch The Lab Lounge — a brand-new members-only club designed exclusively for photographers who want to save money, speed up their workflow, and enjoy a premium lab experience all year long. Whether you’re a hobbyist with a couple rolls a month or a die-hard film addict with a fridge full of gold-wrapped canisters, this membership was built for you.

What Is The Lab Lounge?
The Lab Lounge is our new annual subscription program that gives photographers access to major discounts, priority perks, and exclusive member benefits. It’s the easiest (and most affordable) way to make shooting film even more fun—and a whole lot cheaper.
As a member, you’ll get:
📸 $10 Film Developing (All Year!)
No matter what type of film you shoot, your developing cost drops to just $10 per roll—every time.
📁 Free Standard Scans
Every member gets free standard resolution scans included with every order.
📦 Free Negative Returns
We’ll send your negatives back at no extra charge—saving you the shipping fees that add up.
⚡ Priority Order Processing
Your rolls jump to the front of the line for faster turnaround times.
🎞️ Discounts on Film Purchases
Members get exclusive deals and pricing on select film stocks throughout the year.
In short… if you shoot film regularly, this membership pays for itself almost instantly.
Limited-Time Launch Discount
To celebrate the launch, we’re offering something huge:
💥 The Lab Lounge is normally $99/year — but right now, it’s only $50/year.
This 50% launch discount is available for a very limited time. Once the promotion ends, the price goes back to $99, and the discount won’t be returning anytime soon.
If you want to lock in the lowest price we’ll ever offer for this membership, now is the time to grab it.
Why We Created The Lab Lounge
Film photography isn’t just part of our business—it’s part of who we are. We’re always looking for ways to support our community, make shooting film more affordable, and help photographers keep creating.
The Lab Lounge lets us do exactly that.
It’s our way of saying thank you to all the shooters who trust us with their rolls day after day… and a way to give something extra back to the people who keep film alive.
Join Today & Start Saving
If you’re ready to start saving on every roll, get faster service, and enjoy exclusive perks all year long, this is your moment.
🎉 Join The Lab Lounge for just $50 (limited time only!)
Once the promotion ends, the membership returns to $99 per year—so don’t wait.
Whether you shoot one roll a month or twenty, The Lab Lounge was made for you. We can’t wait to welcome you inside.

Best Film Cameras for Beginners in 2025
Choosing your first film camera in 2025 doesn’t have to be overwhelming. This gear guide breaks down the best beginner-friendly film cameras—from simple point-and-shoots to classic SLRs and exciting new releases—so you can start shooting with confidence.
How to Choose Your First Film Camera
Before you fall in love with a specific model, it helps to decide what kind of beginner you are. Ask yourself:
Do you want “point, shoot, and vibes”… or to learn photography?
If you want easy fun and memories, look at simple reusable / half-frame cameras and instant cameras.
If you want to understand shutter speed, aperture, and metering, look at a 35mm SLR with manual controls.
How much do you want to spend up front?
New reusable / half-frame cameras often run roughly $40–$150.
New “serious” film cameras like the Pentax 17 are more like entry-level digital camera money.
Used SLRs can still be had for sensible prices… but some classics are overpriced due to hype.
New vs used
New cameras: usually reliable, easy to return, but fewer models and mostly fixed-lens compacts.
Used cameras: more choice and better image quality for the price, but you’re gambling on 30–50-year-old electronics.
Format & running costs
35mm full-frame: the standard, easiest to find film & processing.
Half-frame 35mm: twice as many photos per roll, smaller negatives, slightly grainier prints.
120 / medium format: gorgeous quality but bigger, pricier, and not where most beginners should start.
Instant (Instax / Polaroid): film is more expensive per shot, but you get a print in your hand within a minute.
With that in mind, let’s walk through the best beginner options in 2025, broken down by how you’ll actually use them.
Category 1: Best “Just for Fun” 35mm Cameras (New, Cheap, Easy)
These cameras are perfect if you want to shoot film without thinking about f-stops, metering, or vintage repairs.
1. Kodak Ektar H35 / H35N – Best First Film Camera for Total Beginners
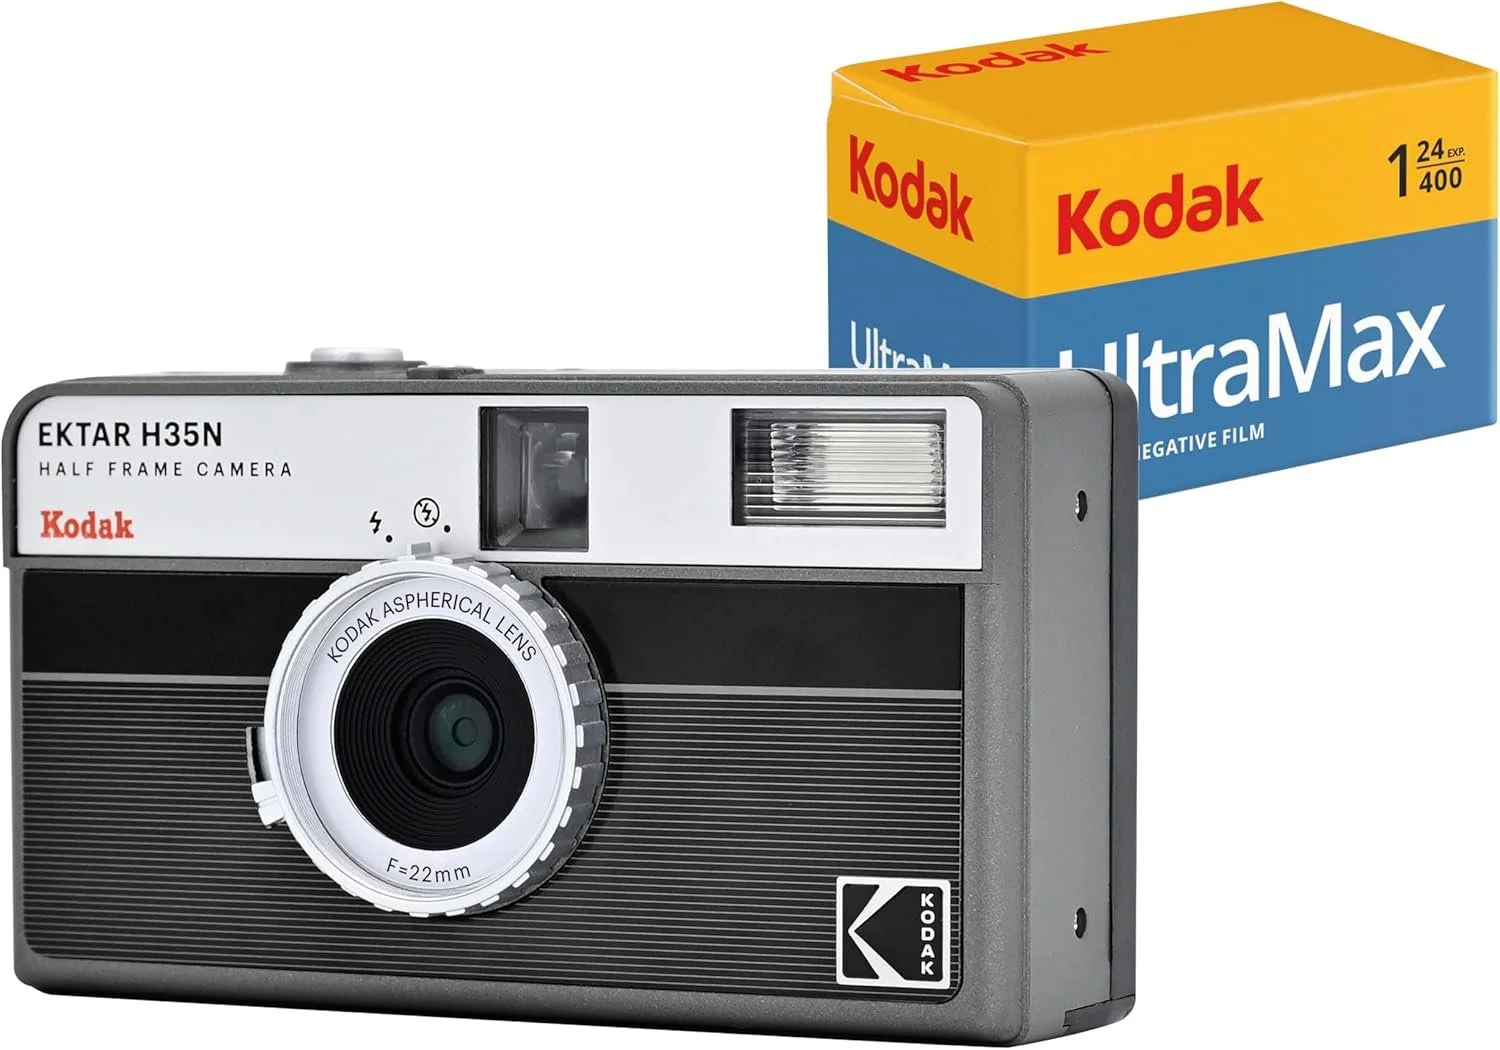
The Kodak Ektar H35 (and its newer sibling, the H35N) is one of the most widely recommended beginner cameras right now — and for good reason. Tech and photo guides highlight it as an ideal entry-level film camera: simple, affordable, and half-frame, so a 36-exposure roll gives you 72 photos.
Why it’s beginner-friendly
Half-frame format: You get double the shots from each roll, which matters a lot when film and lab costs are high.
Fixed everything: No worrying about shutter speed or aperture — the camera handles it for you.
Tiny & lightweight: Easy to toss in a bag, bring to concerts, parties, or vacations.
Flash built in: Helps a ton in indoor or evening situations where basic plastic lenses would otherwise struggle.
Downsides
Image quality is good enough for casual use, but nowhere near what you’d get from a solid SLR with a proper 50mm lens. Multiple reviewers point out that image quality is basic and low-light performance is limited without flash.
No real creative control: you can’t practice manual exposure or depth of field.
Who it’s for
People who say: “I just want cute film photos without learning all the technical stuff.”
Great for teens, casual shooters, and travel journaling.
2. Ilford Sprite 35-II / Long Weekend Reusable – Best Budget Reusable 35mm
Guides to affordable 35mm cameras usually group the Ilford Sprite 35-II, Long Weekend Reusable 35mm, and similar “simple reusable” cameras together. They’re basically upgraded disposable cameras you can reload.Moment
What they offer
Full-frame 35mm rather than half-frame, so each shot uses a normal-sized frame.
Single fixed lens, fixed shutter speed (typically around 1/120s) and fixed aperture (often f/8).
Manual wind and rewind that gives you the classic film feel.
Usually very lightweight plastic bodies, often for under $50–$70 new depending on brand and retailer.Moment
Pros
Simple, durable, and cheap.
Great way to get used to loading film and working within limitations.
Perfect for bright daylight, beach days, and street shooting in good light.
Cons
Weak in low light; you’ll rely on flash more often.
One fixed lens, no control over shallow depth of field.
Plastic optics mean softer images and occasional vignetting.
Who it’s for
Shooters who want film vibes, not technical mastery.
Parents or friends who want a low-stress camera to pass around at parties or holidays.
Category 2: Best Instant Film Camera for Beginners (Prints in Your Hand)
If you care more about having a physical print right now than about negative scans later, instant cameras are a blast — and incredibly beginner friendly.
3. Fujifilm Instax Mini 12 – Best Instant Camera for First-Timers
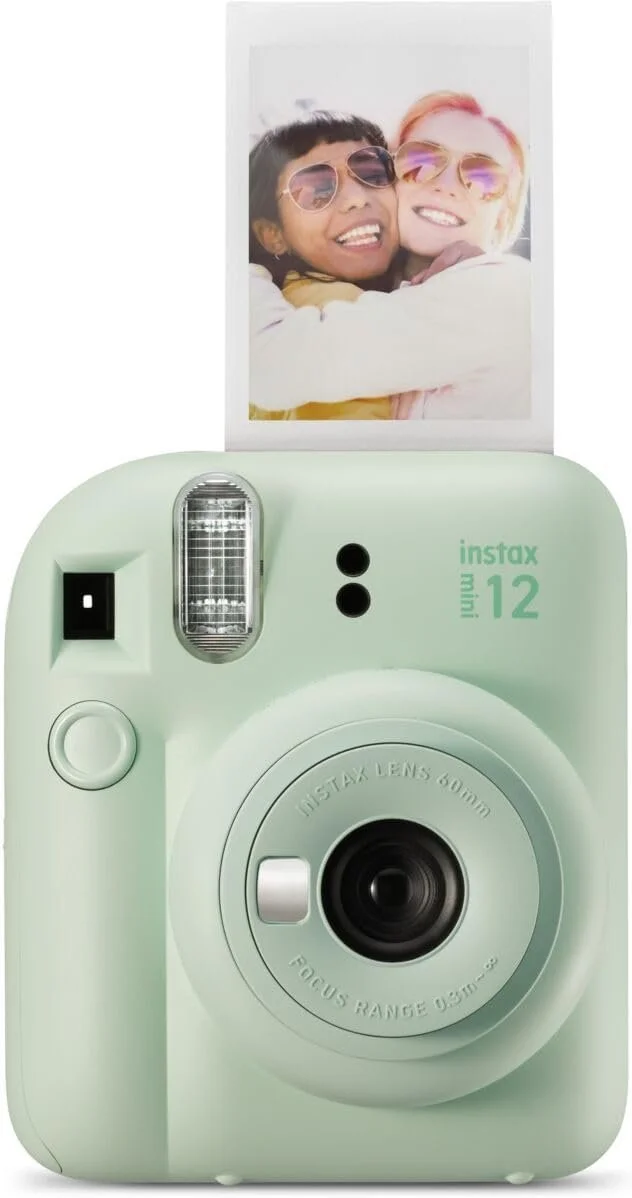
The Instax Mini 12 is widely recommended as the best beginner instant camera: digital camera and photo sites list it as the top budget instant pick, praising its simplicity, affordability, and surprisingly good image quality.
Fujifilm’s own spec sheet backs this up — it has automatic exposure, built-in flash control, and a very simple “twist to turn on, twist again for close-up mode” operation.
Why it’s great for beginners
Zero settings to worry about: The camera meters light and controls flash automatically. You just frame and press the button.
Close-up / selfie mode: Twist the lens and you get a closer focusing distance (around 30–50 cm), which is perfect for selfies and detail shots.
Cheap(er) instant film: Instax Mini film is one of the more affordable instant formats, with small credit-card-sized prints.
Fun colors and design: It’s deliberately cute and approachable, which helps people not be intimidated by “a camera.”
Downsides
You pay more per shot than with 35mm film, even though there’s no lab fee.
Tiny prints — great for journaling and sharing, but not the same look as 4x6 darkroom prints.
No exposure compensation: you get what the camera decides.
Who it’s for
People who want immediate physical keepsakes at parties, weddings, or family events.
Great first camera for kids and teens; easy to use & fun to share.
Category 3: Best Brand-New “Serious” Film Camera – Learn on Something Modern
If you want a camera that feels like “real gear” in 2025 but don’t want to roll the dice on a 40-year-old SLR, there is finally a real option again.
4. Pentax 17 – Best New Film Camera for Enthusiast Beginners
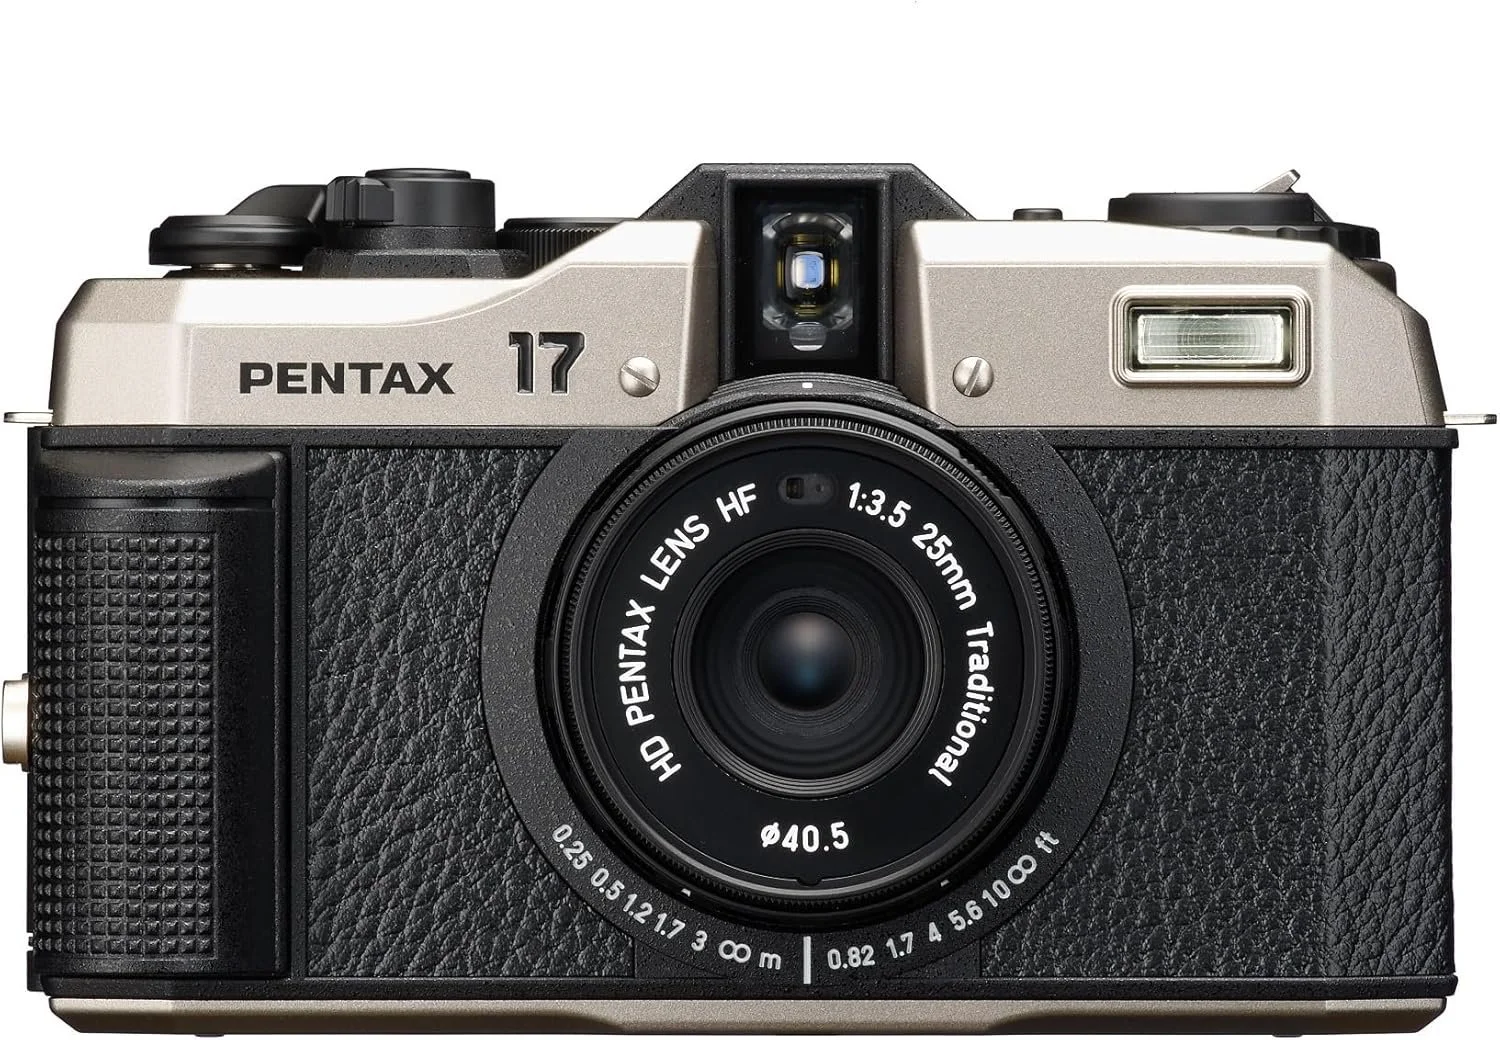
The Pentax 17 is a big deal: it’s the first brand-new 35mm film camera from a major manufacturer in almost 20 years. Ricoh (Pentax’s parent) designed it as a compact, retro-styled camera that still gives you a traditional film experience: manual film advance, mechanical dials, and a fixed lens.
Key specs & features
Half-frame 35mm: shoots 17×24 mm frames, so you get 48 frames from a 24-exposure roll and 72 from a 36-exposure roll.
23mm f/3.5 fixed lens (roughly a 37mm equivalent field of view).
Zone focusing: you select focus distances using icons (portrait, group, landscape, macro, etc.).
Program and manual-style exposure modes: the camera uses a built-in meter to set exposures, but settings are chosen with traditional dials rather than menus.
Recent reviews describe the Pentax 17 as lightweight, reliable, and fun, emphasizing that it feels like a modern take on a classic film compact rather than a gimmick.
Pros
Brand-new manufacture: as of late 2025 it’s in active production, with support and warranty options — rare in the film world.
Half-frame economy: again, double the photos per roll, really handy in 2025 film pricing.
Manual feel without vintage headaches: you still get to advance film and choose focus zones, but without sticky shutters or foam seals from the 1970s.
Cons
More expensive upfront than the plastic beginner cameras or most used SLRs.
Half-frame negatives are smaller, so big prints will show more grain than full-frame 35mm.
Fixed lens; if you dream of swapping lenses, this isn’t it.
Who it’s for
Someone who wants a new, serviceable, and stylish film camera with a tactile shooting experience and doesn’t mind paying extra.
Great for travel, street, and everyday photography where a compact camera is a plus.
Category 4: Best Used 35mm SLRs for Beginners (for Learning Photography)
If your goal is to truly learn exposure and manual control, nothing beats a 35mm SLR with a normal prime lens. The used market is full of options, and photo publications still highlight some classics as student/beginner favorites.Digital
A couple of important notes before specific recommendations:
Some “famous beginner cameras” like the Pentax K1000 and Canon AE-1 have become overpriced relative to comparable alternatives, and some have known reliability issues (like failing capacitors in certain models).
Late-era autofocus SLRs (mid-1990s to early 2000s) are often cheaper and more reliable than older all-mechanical icons, and they still shoot 35mm film just fine.
With that in mind, here are solid categories and examples, rather than “you must buy this one exact body.”
5. Pentax ME Super / Other Pentax M-Series – Classic Compact Manual SLR
Guides to film cameras often call the Pentax ME Super a great starter SLR: compact, relatively inexpensive, and offering a good balance between automatic and manual controls.
Why it works for beginners
Aperture priority + manual modes: you can start with auto exposure and then switch to manual when you’re ready.
Bright viewfinder and excellent Pentax-M 50mm lenses that are plentiful and reasonably priced.
Smaller and lighter than some chunkier SLRs, easier to carry all day.
Things to watch
These are still decades-old cameras. Light seals and electronics can fail, so it’s worth buying from a reputable seller or budgeting for a CLA (clean, lube, adjust).
The meter and shutter rely on batteries — not a big deal, but if the electronics die, you’re stuck.
Who it’s for
Beginners who definitely want to learn exposure and focusing, and who enjoy mechanical dials and levers.
People who like the idea of building a small Pentax lens kit over time.
6. Canon AE-1 Program / Minolta X-700 & Friends – The Popular Classics (with Caveats)
Articles on “best 35mm cameras” almost always mention Canon AE-1, AE-1 Program, Minolta X-700, and similar 1970–1980s SLRs as great teaching tools: full manual controls, plus shutter-priority or program modes.
They are excellent to shoot with:
Big, bright viewfinders.
Plenty of compatible 50mm f/1.4 or f/1.8 lenses that offer beautiful, sharp images.
Very tactile; they feel like “real cameras,” which can motivate new shooters.
However, more critical voices in the film community have pointed out that these specific bodies are often over-recommended and overpriced, and some have known reliability issues (for example, capacitor failures in some Canon and Minolta models).
Takeaway:
If you find a Canon AE-1 Program, Minolta X-700, Olympus OM-1, etc. in verified good working order at a sensible price, they can be fantastic first SLRs. Just don’t feel like you have to chase one of these names; lesser-known models from the same brands often give you 95% of the experience for half the cost.
7. Late-Era Autofocus SLRs – The Underrated Beginner Bargains
One of the best beginner hacks in 2025 is to look at late-1990s and early-2000s autofocus SLRs from Canon, Nikon, Minolta, and Pentax. Reviews of cameras like the Minolta Maxxum 5 point out that these “plastic fantastics” have sophisticated meters, multiple exposure modes, and are often dirt cheap on the used market.
Why they’re great for learning
Full manual control + auto modes: You can start on Program mode and gradually move to aperture priority and full manual.
Accurate metering: These cameras benefit from decades of refinement in exposure systems, making it easier to get usable negatives while you learn.
Cheap bodies, decent lenses: Because they’re not “cool retro,” bodies are very affordable, and basic zooms or 50mm primes are accessible.
Trade-offs
Mostly polycarbonate (plastic) construction — they don’t feel as “retro” as an all-metal SLR.
Heavier reliance on electronics; if they die, repair may not be worth it.
Design is more “early 2000s DSLR” than “vintage film charm,” which some beginners care about.
Who it’s for
Beginners who prioritize results and learning over the nostalgia factor.
Anyone who already owns compatible lenses (e.g., Canon EF or Nikon F-mount) from digital gear.
Category 5: Fun & Experimental Cameras (Holga & Toy Cameras)
Once the basics are covered, you might want to lean into the lo-fi, unpredictable side of film.
8. Holga 120N / Holga 135 – Best for Embracing Imperfection
Many “best beginner film camera” lists include cameras like the Holga 135BC or Holga 120N as great ways to explore film without perfectionism. They’re cheap, plastic, and famous for lens quirks, light leaks, and vignetting.
Pros
Encourage experimentation: multiple exposures, motion blur, and weird framing.
Extremely simple controls — often just a couple of aperture icons and a single shutter speed.
Teach you to stop worrying about technical perfection and chase interesting light and subjects instead.
Cons
Not ideal as your only camera if you need predictable results.
Image quality is intentionally soft and distorted.
For 120 models, medium-format film is pricier and processing is less common than 35mm.
Who it’s for
People who already have (or plan to get) a more conventional camera, but want a fun sidekick.
Creative shooters who love “happy accidents.”
Practical Buying Tips for 2025
Regardless of which category you lean toward, a few practical tips will make your first film camera experience much better:
Budget for film and processing, not just the camera
Even with half-frame cameras that stretch your roll, film prices and lab costs add up. Plan on at least a few rolls plus developing when you buy.If buying used, favor working condition over famous names
A lesser-known Pentax, Minolta, or Nikon that’s been recently serviced will outperform a famous model with a gummed-up shutter every time. Articles calling out “overhyped beginner cameras” exist for a reason.Get a normal lens (around 35–50mm)
For SLRs, a 50mm f/1.8 (or similar) is usually inexpensive and optically excellent. Guides to 35mm classics repeatedly highlight these lenses as ideal for learning composition and exposure.Check battery types and availability
Many older cameras use common button cells; some use discontinued mercury cells that require workarounds. Double-check before you buy.Start with one camera and one lens
It’s tempting to collect, but you’ll learn more by shooting multiple rolls through a single setup, seeing how it behaves in different light.
So… Which Camera Should You Buy?
Here’s a quick summary based on goals:
“I want easy film vibes and lots of photos per roll.”
→ Kodak Ektar H35/H35N or similar half-frame reusable.“I want prints in my hand right away for parties, weddings, and family stuff.”
→ Fujifilm Instax Mini 12 — simple, cheap to run (for instant), and highly recommended for beginners.“I want a new, reliable camera with a classic feel.”
→ Pentax 17 – the only truly modern 35mm camera from a major brand, with half-frame economy and a tactile shooting experience.“I want to really learn exposure and manual control.”
→ A used 35mm SLR with a 50mm lens: think Pentax ME Super or similar, or an underrated late-era autofocus SLR from Canon, Nikon, Minolta, or Pentax.“I already have a main camera and want something weird and creative.”
→ Holga or other toy cameras; they’re a great second camera for experimentation.
Whichever path you choose, the most important step is simple: shoot regularly. Load a few rolls, make mistakes, and learn what kind of images genuinely make you excited to pick up the camera again. In 2025, there’s no single “best” beginner film camera — but there is a best one for how you want to shoot.

Shutter Junkies Photo Lab Brings Back 1-Hour Film Processing to Greenville, TX
Film photographers in Greenville, TX now have access to true one hour photo developing again. Shutter Junkies Photo Lab has officially relaunched 1-Hour Film Processing every Saturday from 9am to 12pm—offering fast, local developing for 35mm film, disposable cameras, and C-41 rolls without the long wait times of mail-in labs.
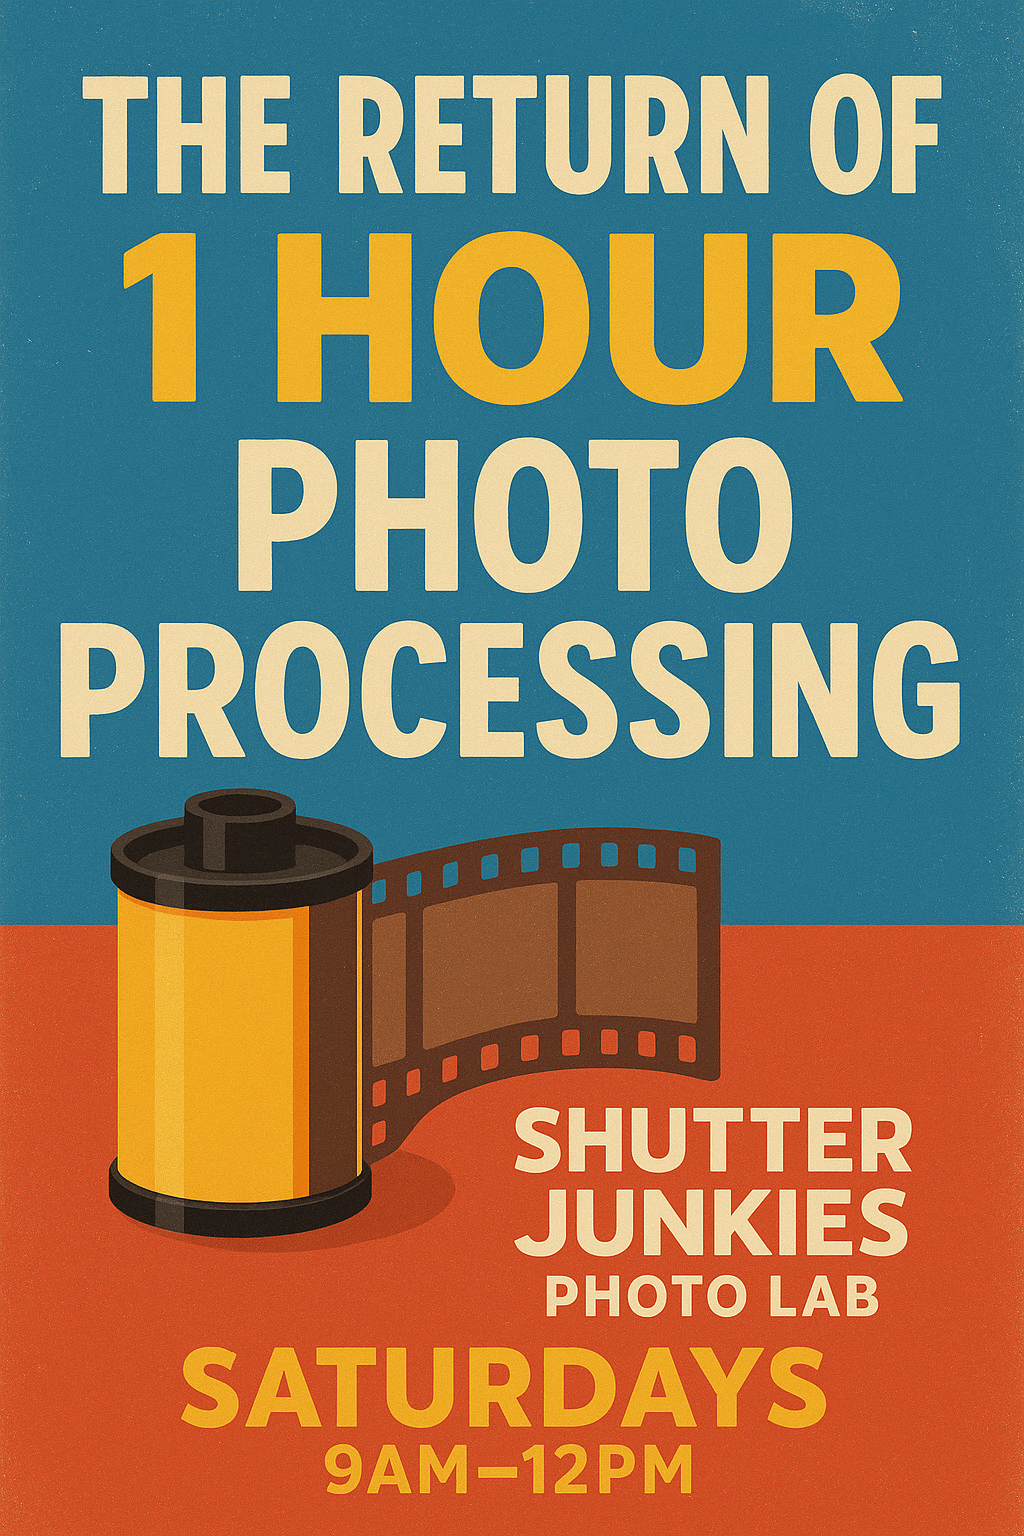
Greenville, TX — Film photography lovers in Hunt County have a new reason to celebrate. Shutter Junkies Photo Lab, the area’s independently owned and operated film developing lab, is officially bringing back 1-Hour Photo Processing every Saturday from 9:00 AM to 12:00 PM. This return of fast film developing service is especially exciting for local photographers who shoot 35mm film, disposable cameras, and 120 film and want their images processed the same day—without shipping, delays, or big-box chain headaches.
Shutter Junkies Photo Lab has quickly become a trusted name in North Texas for high-quality film developing, professional scanning, and fast turnaround times. Located in Greenville, TX, the lab serves customers across Quinlan, Royse City, Caddo Mills, Rockwall, Commerce, Farmersville, and the entire DFW metro area. With the re-launch of One Hour Film Processing, the lab is bringing back the nostalgic convenience that film photographers have been missing for years.
A Modern Take on Classic One Hour Photo Service
With film photography experiencing a major resurgence—especially among teens, young adults, and professional photographers—quick developing options have become harder to find. Most big retailers have discontinued same-day processing or ship film off-site, leaving customers waiting weeks.
Shutter Junkies Photo Lab recognized the need for reliable, fast, and local one hour photo developing and has invested in the equipment and workflow needed to bring the service back to life.
“We love film, and we love serving the film community here in Greenville,” said the owner of Shutter Junkies Photo Lab. “Offering one hour film processing again means customers can walk in with a roll of 35mm film and walk out with their digital scans the same day. It’s fast, it’s local, and it keeps the magic of film photography alive.”
Customers can bring in:
35mm color film
35mm disposable cameras
Most C-41 consumer films
120 film (non-1-hour, but still fast turnaround)
The new One Hour service will be available every Saturday from 9 AM to 12 PM, allowing customers to drop film off early and pick up their scans before lunch.
Strengthening the Film Community in Greenville and Beyond
Shutter Junkies Photo Lab has quickly become the go-to spot for anyone searching for:
Film developing near me
Professional photo lab in Greenville, TX
DFW film developing
Greenville one hour photo
Hunt County film processing
With the revival of one hour photo developing, the lab aims to connect with even more photographers in the community—from high school students shooting film for fun, to families wanting memories processed the same day, to professionals who rely on fast turnaround.
Local photographers no longer need to drive to Dallas or rely on mail-in labs. Everything can be handled right here in Greenville, Texas.
Why One Hour Film Processing Matters
While digital photography dominates most of today’s world, the demand for high-quality 35mm film developing has never been stronger. Many customers choose film for its nostalgic look, unique colors, grain, and the excitement of waiting to see their images.
The return of one hour photo developing means:
No more waiting days or weeks
No shipping film off to big labs
No fear of lost or damaged rolls
Same-day scans for social media or printing
Local support and knowledgeable staff
Whether you’re shooting Kodak Gold, Ultramax, Portra, Fuji 200, Lomo 800, or a disposable camera from a local store, Shutter Junkies can handle it.
Visit Shutter Junkies Photo Lab in Greenville, TX
Local photographers are encouraged to stop by during Saturday One Hour hours:
📍 Shutter Junkies Photo Lab
2970 Interstate 30, Suite 600
Greenville, TX 75402
🕘 1-Hour Processing Hours:
Saturdays — 9:00 AM to 12:00 PM
Customers outside the area can also mail in their rolls using the lab’s website:
🔗 www.shutterjunkies.org
About Shutter Junkies Photo Lab
Shutter Junkies is a family-owned independent photo lab serving Greenville, Hunt County, and the entire Dallas–Fort Worth area. The lab specializes in:
Film developing (35mm, 120, 110, disposable cameras, APS/Advantix)
High-resolution scanning
Prints and enlargements
Photo gifts and custom orders
Fast turnaround and exceptional customer service
With a passion for keeping film photography alive, Shutter Junkies combines traditional darkroom expertise with modern scanning technology for clean, high-resolution, beautifully detailed images.

The 10 Best Used 35mm Film Cameras (and who they’re perfect for)
If you’re shopping for a vintage camera - these 10 vintage film cameras are the best performing and most sought after cameras on the market today!
Hunting for a used 35mm film camera can feel like thrifting for a leather jacket—half the fun is in the chase, and the “right” one is the one that fits your style and budget. Below are ten time-tested winners you can still find on the used market. I’ve mixed manual-focus SLRs, autofocus sleepers, rangefinders, and pocketable compacts so there’s something for every kind of shooter. For each pick you’ll get a quick vibe check, what it does brilliantly, and what to watch out for before you click “buy.”
1) Pentax K1000 — The Forever Student Camera

Why it’s great: The K1000 is the gateway drug of film SLRs: fully mechanical, straightforward, and built like a brick. One needle-in-the-viewfinder meter, one shutter speed dial, one ISO ring—done. The Pentax K-mount lens ecosystem is huge and affordable, from the classic 50mm f/2 to gorgeous SMC primes.
Best for: Beginners, teachers, and anyone who wants a no-nonsense camera that just works.
Pros
All-mechanical shutter (fires without batteries)
Vast, inexpensive K-mount lenses
Simple meter you can learn in 5 minutes
Cons
No aperture-priority or program modes
Meter uses now-old LEDs/needle; check accuracy
Prices have climbed thanks to its reputation
Buying tip: Budget for a CLA (clean, lube, adjust) if the advance feels gritty or the meter is jumpy.
2) Canon AE-1 Program — The Crowd-Pleaser
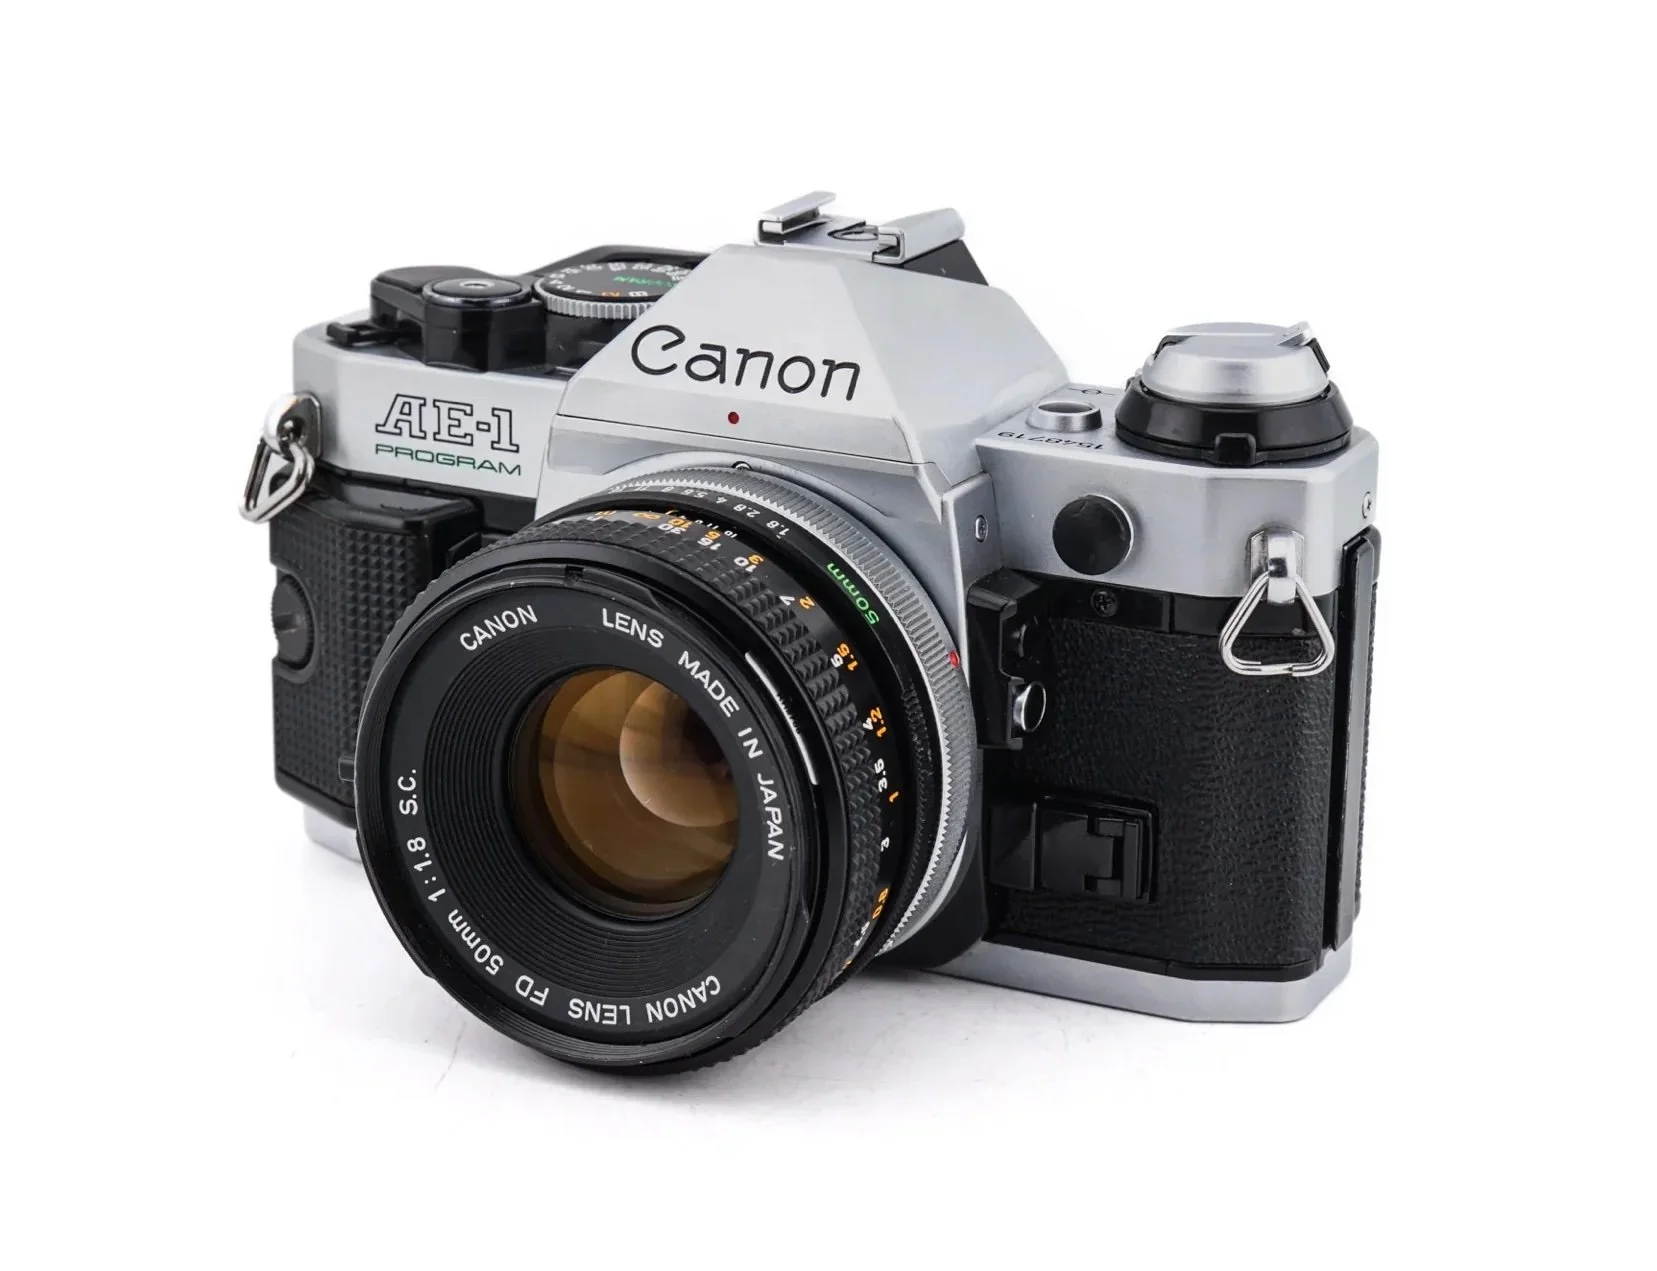
Why it’s great: The AE-1 Program modernized SLR shooting for the masses: Program and shutter-priority modes with a bright finder and punchy Canon FD glass. It’s a step up in automation while keeping that classic feel.
Best for: Shooters who want dependable auto exposure with manual control nearby.
Pros
Program mode for point-and-shoot simplicity
Excellent, affordable FD lenses (28/2.8, 50/1.4, 135/2.8)
Easy to find bodies and parts
Cons
The infamous “shutter squeak” (serviceable, but listen for it)
Requires battery for shutter
FD mount is orphaned (not a con if you’re staying in film land)
Buying tip: Dry fire on all speeds. A sluggish mirror return or squeal means it’s due for service.
3) Nikon FM2 (or FM2n) — The Tank with a Stopwatch
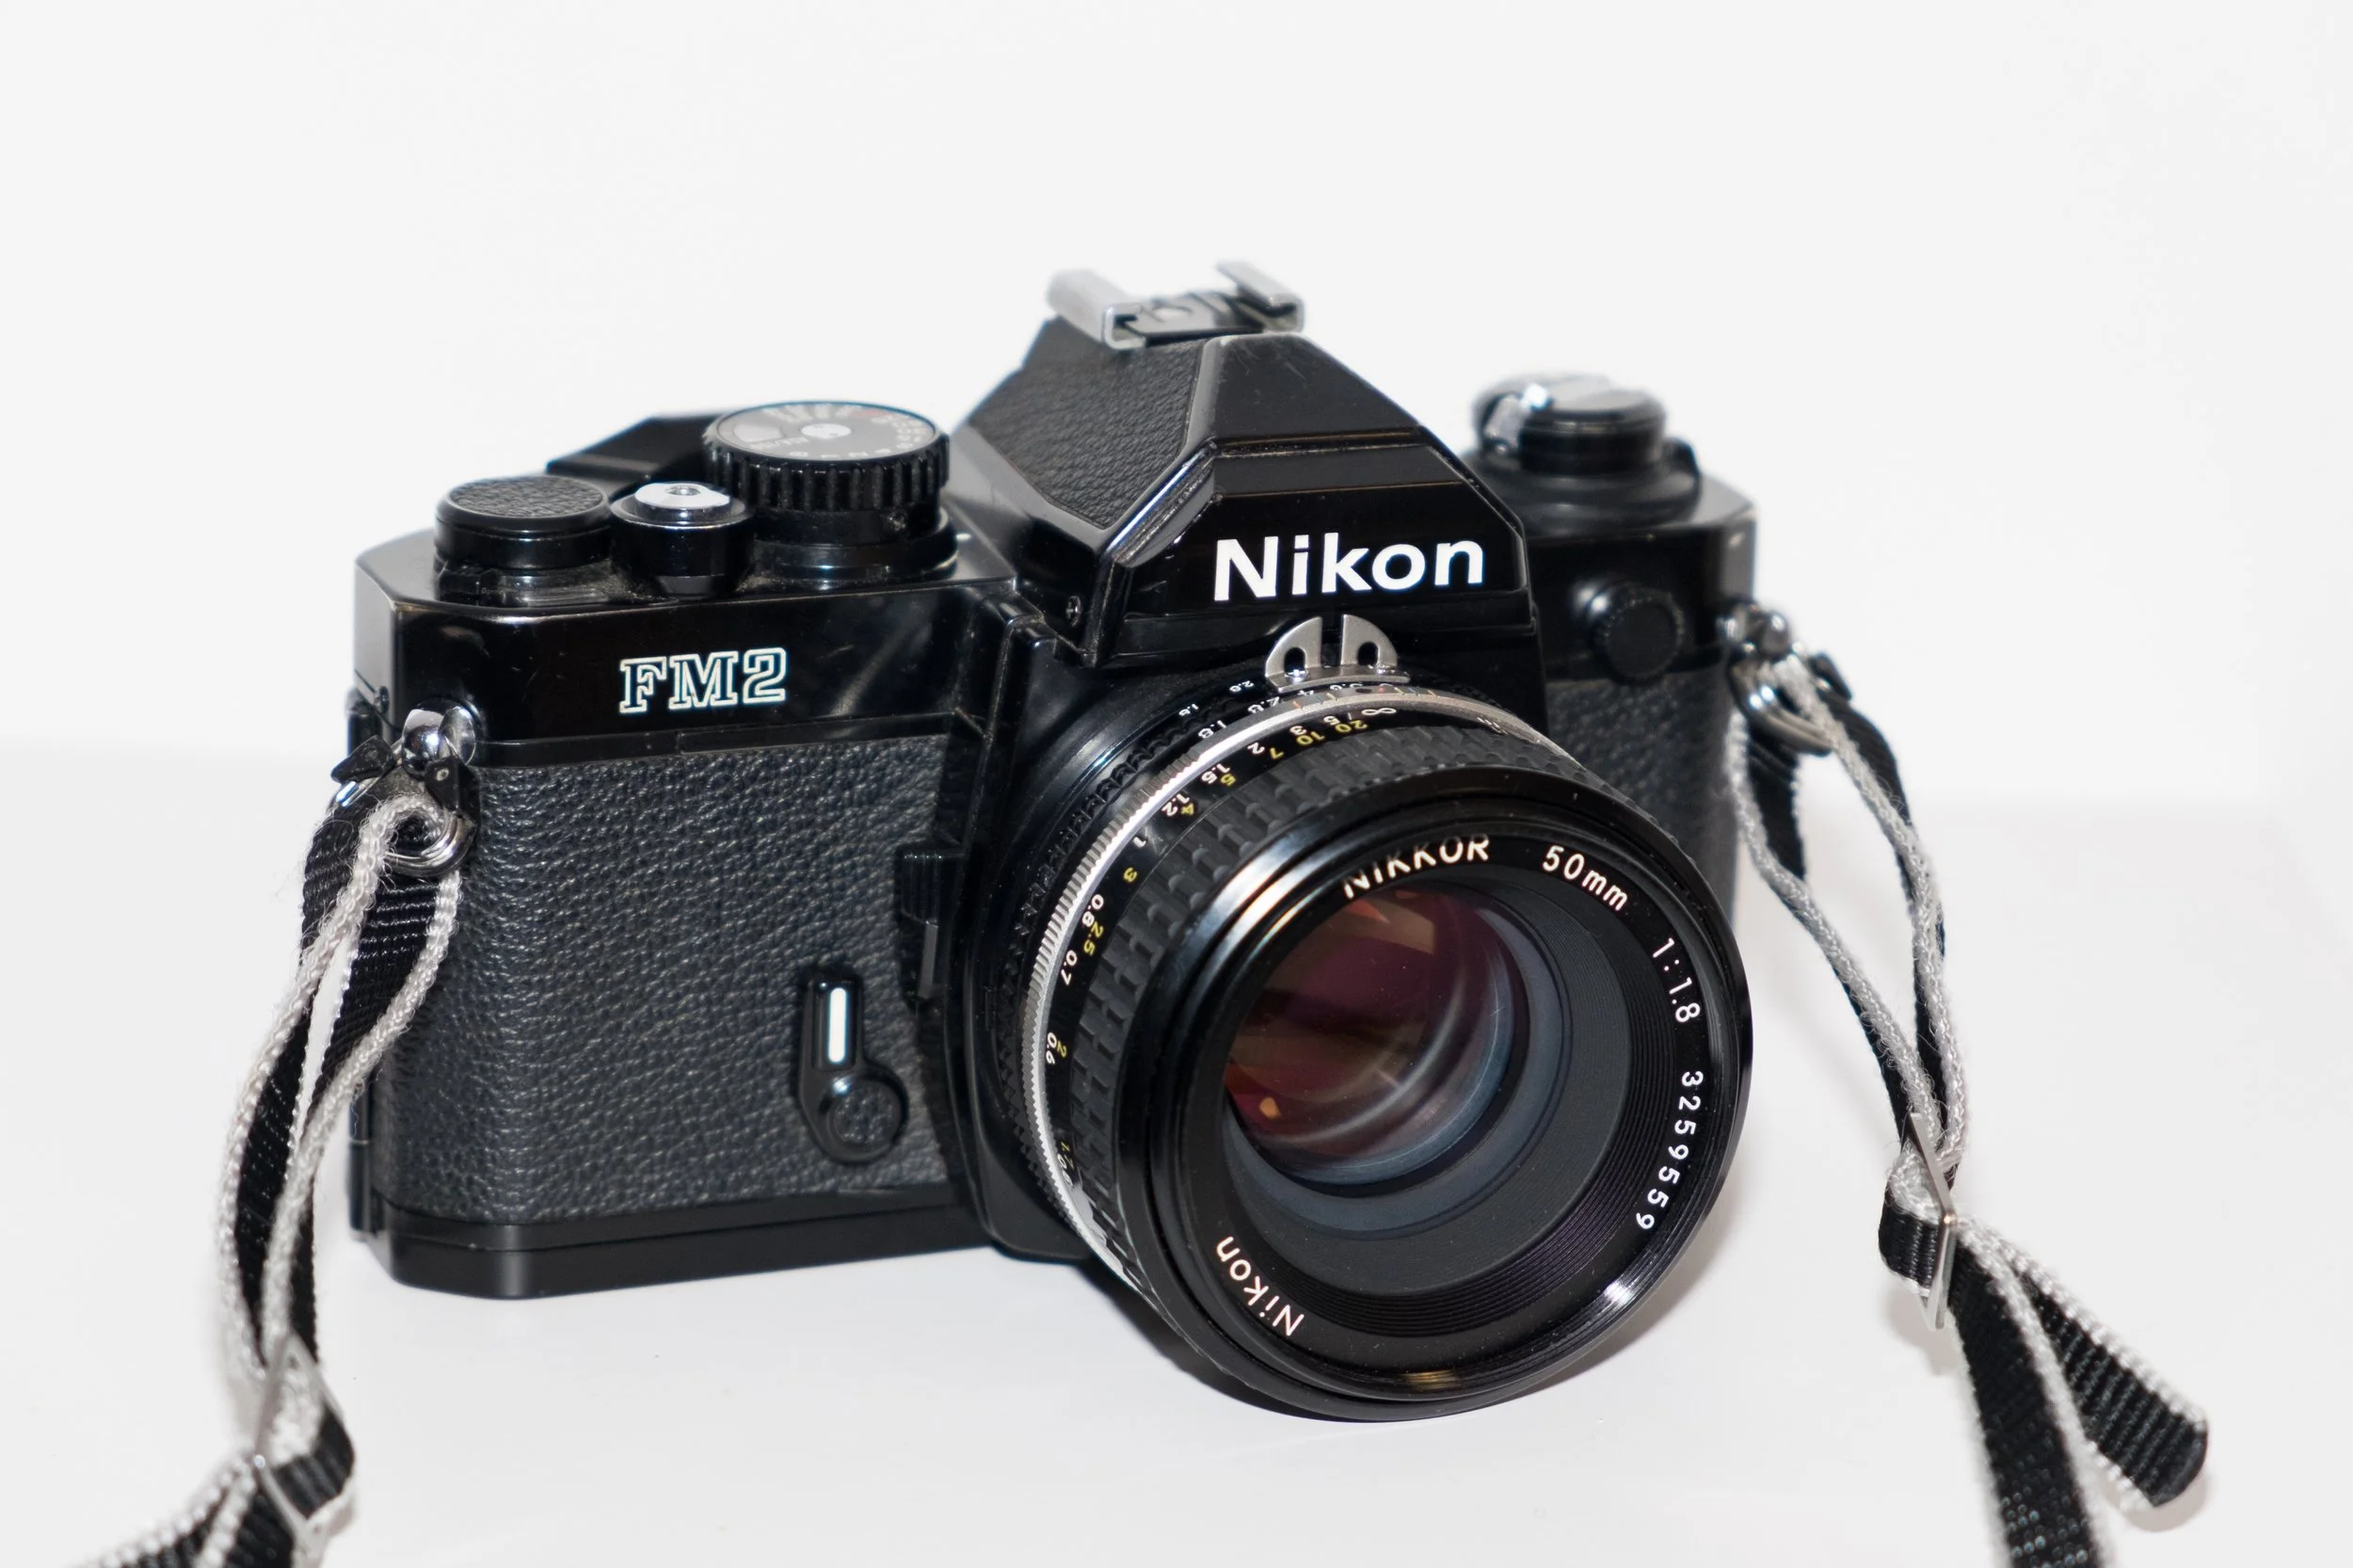
Why it’s great: A pro-grade, fully mechanical Nikon with 1/4000s top speed and 1/250s flash sync. If you love manual focus and precision, the FM2 is a lifetime camera that’s happy in rain, cold, and chaos.
Best for: Street shooters, travel photographers, and anyone who wants indestructible reliability.
Pros
Mechanical shutter, meter sips power
1/4000s + 1/250s sync is fantastic for daylight flash
Access to Nikon F-mount glass from budget to legendary (AI/AI-S)
Cons
No auto exposure
Good copies aren’t cheap
Meter readout is basic LEDs (some prefer a needle)
Buying tip: Confirm the lens mount indexing (AI/AI-S) and avoid pre-AI lenses unless they’ve been converted.
4) Olympus OM-1 (or OM-1n) — The Compact Classic

Why it’s great: Small, quiet, and elegant. The shutter speed ring around the lens throat makes for fast, intuitive control. Zuiko primes are sharp, lightweight, and underrated.
Best for: Minimalists, hikers, and anyone who wants an SLR that feels like a rangefinder.
Pros
Tiny for an SLR; whispery shutter
Beautiful Zuiko prime lenses (28/3.5, 50/1.8, 85/2)
All-mechanical operation
Cons
Designed for mercury PX625 cells; plan a meter mod or adapter
Light seals often need replacing
OM system accessories can be more niche to source
Buying tip: Ask if the meter has been converted or calibrated for modern 1.5v cells.
5) Minolta X-700 — The Aperture-Priority Overachiever
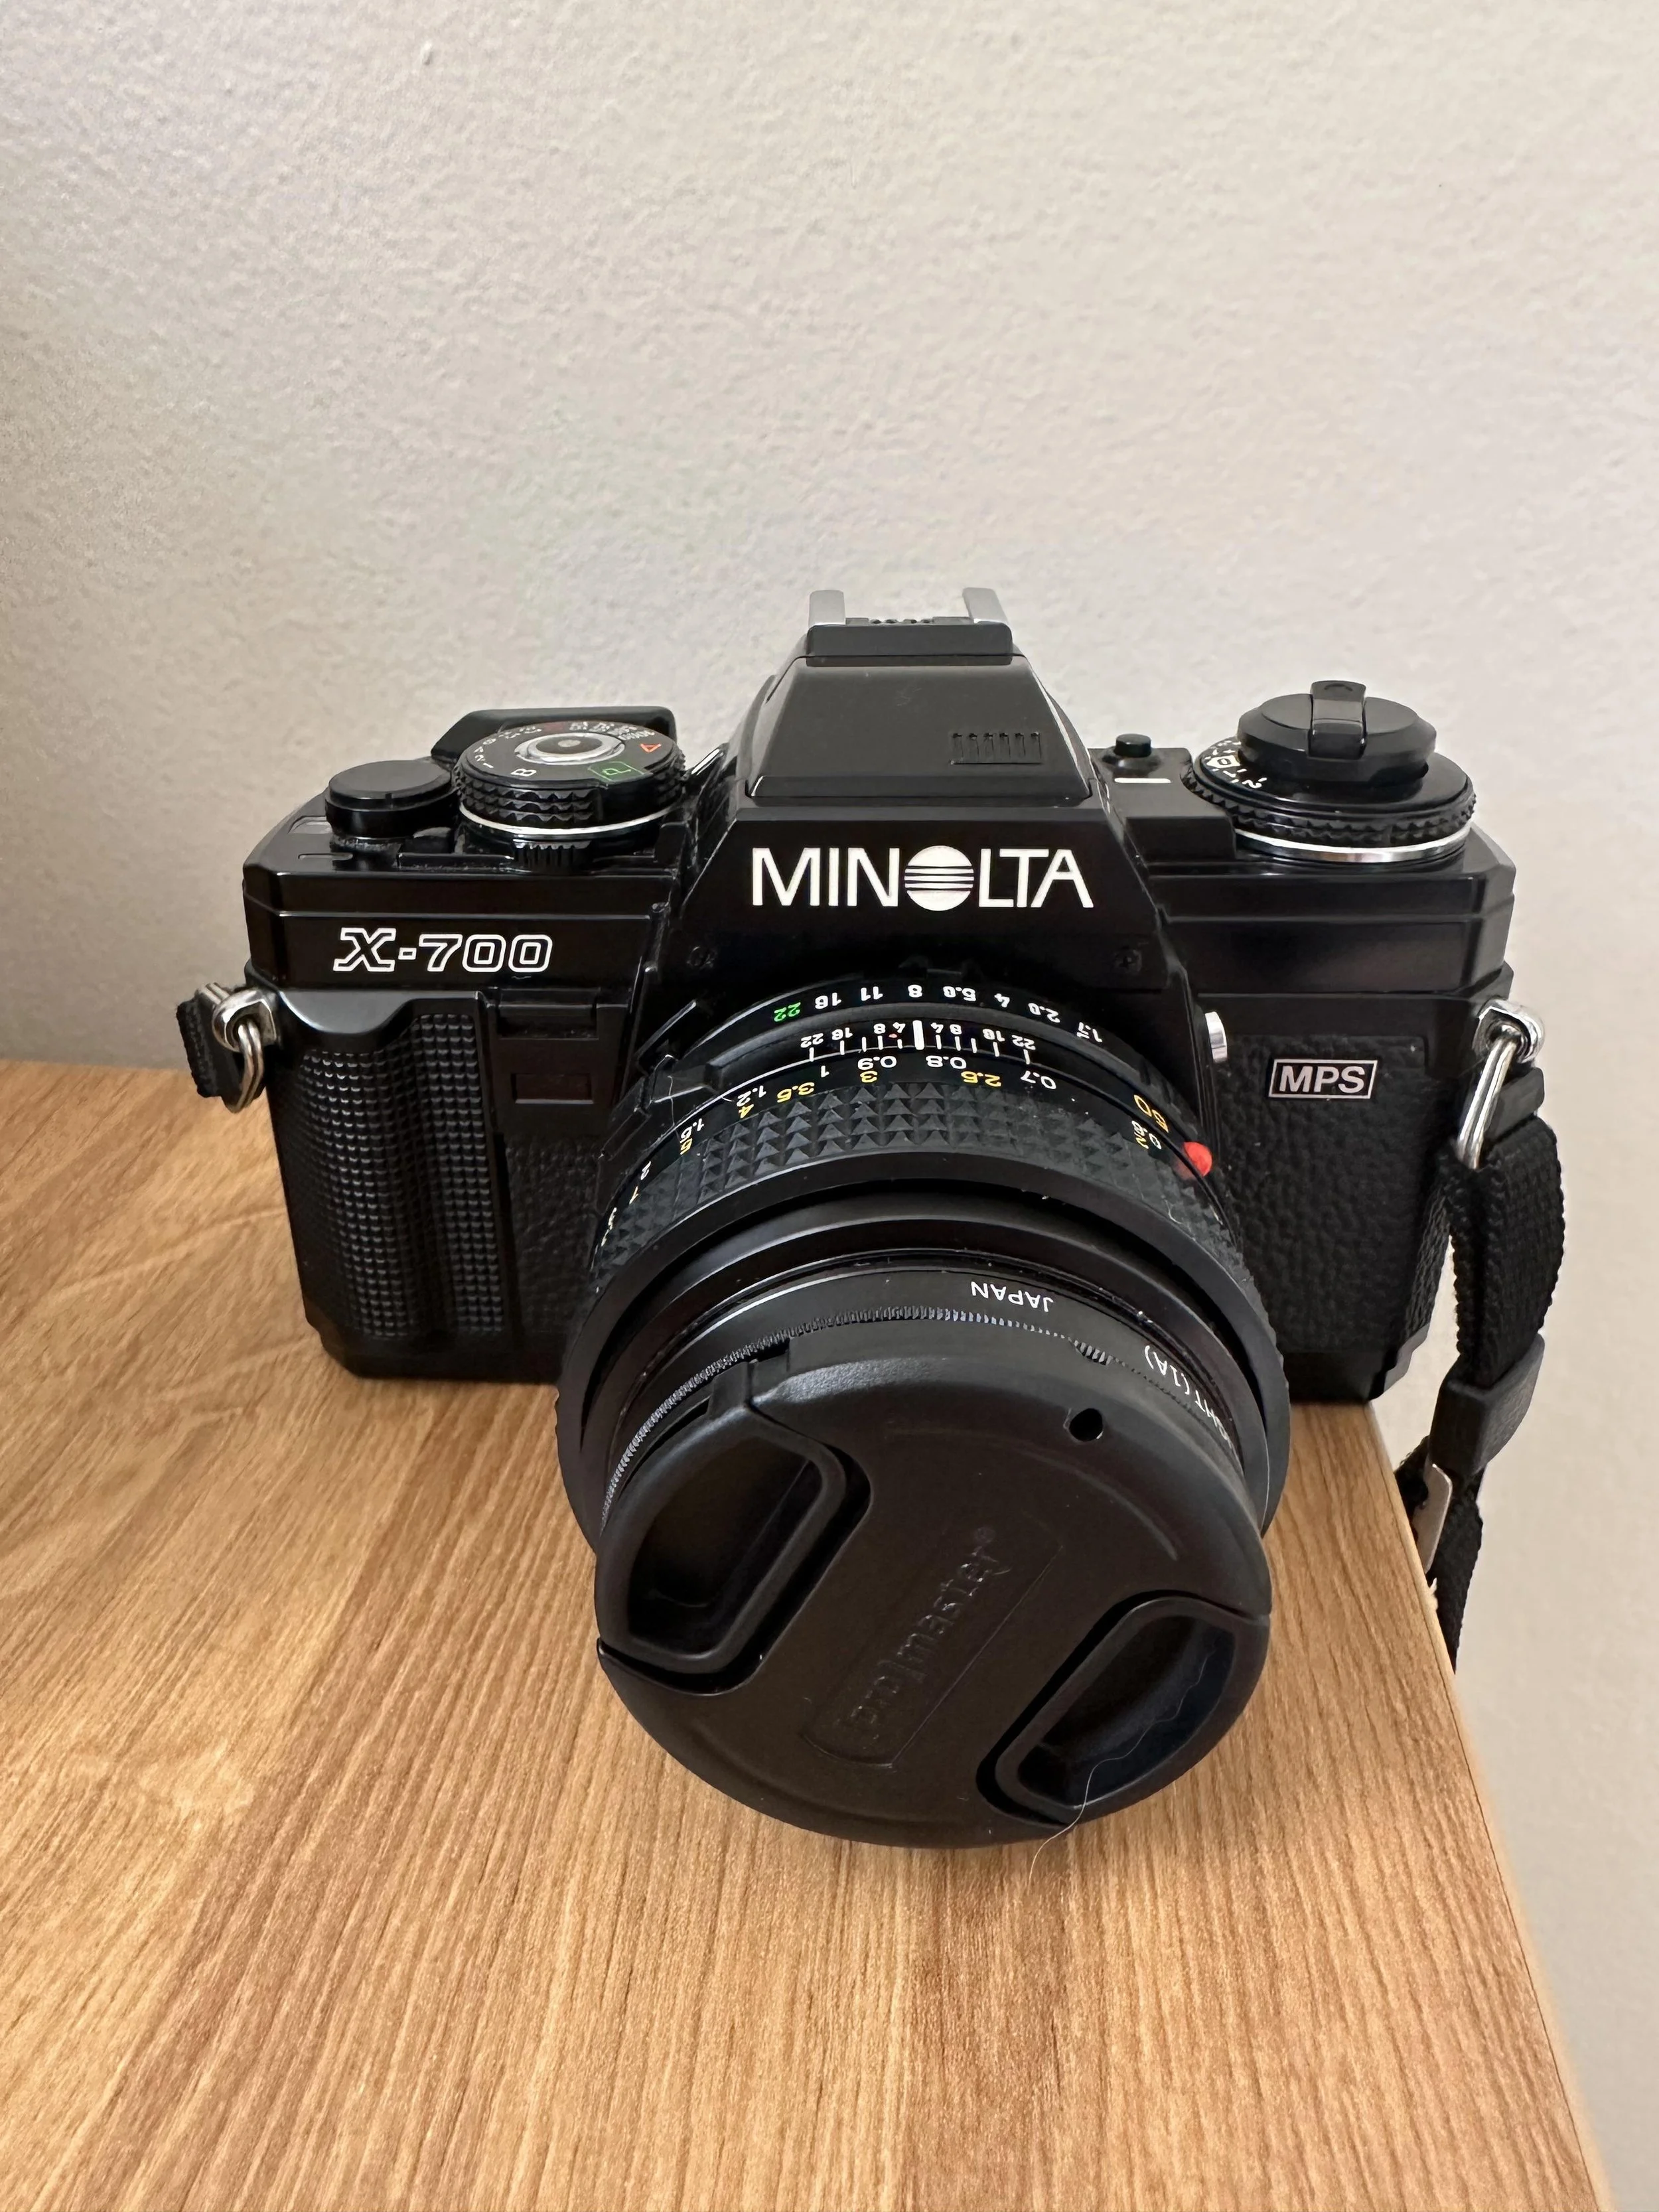
Why it’s great: APEX-priority joy with a bright finder and superb Minolta Rokkor glass. It adds Program mode, TTL flash, and an easy user experience—without Leica prices.
Best for: Creatives who want aperture priority and gorgeous color rendering from classic Rokkors.
Pros
Aperture priority + Program mode
Great ergonomics; crisp viewfinder
Rokkor primes are stellar and good value
Cons
Common capacitor failure (power-up issues)
Battery dependent for all shutter speeds
Slightly plasticky compared to earlier Minoltas
Buying tip: Look for documentation of a capacitor replacement; it’s a known longevity fix.
6) Canon EOS-3 — Autofocus Sleeper with Pro DNA

Why it’s great: If you want modern AF in a film body, the EOS-3 is a beast: fast AF, 45 AF points, 1/8000s shutter, and compatibility with EF lenses (including L-glass). Eye-controlled focus is a party trick that actually works for many users.
Best for: Action, portrait, and wedding shooters who already own EF lenses—or want modern performance.
Pros
Top-tier AF and metering for film
1/8000s + advanced flash system
EF lens compatibility (huge ecosystem)
Cons
Larger, heavier body
Some features need custom functions learning curve
Batteries are 2CR5 (easy to get, but not AAA-cheap)
Buying tip: Check the rubberized coating and command dial for wear; test eye-control calibration if possible.
7) Nikon F3 — The Pro Workhorse with Soul
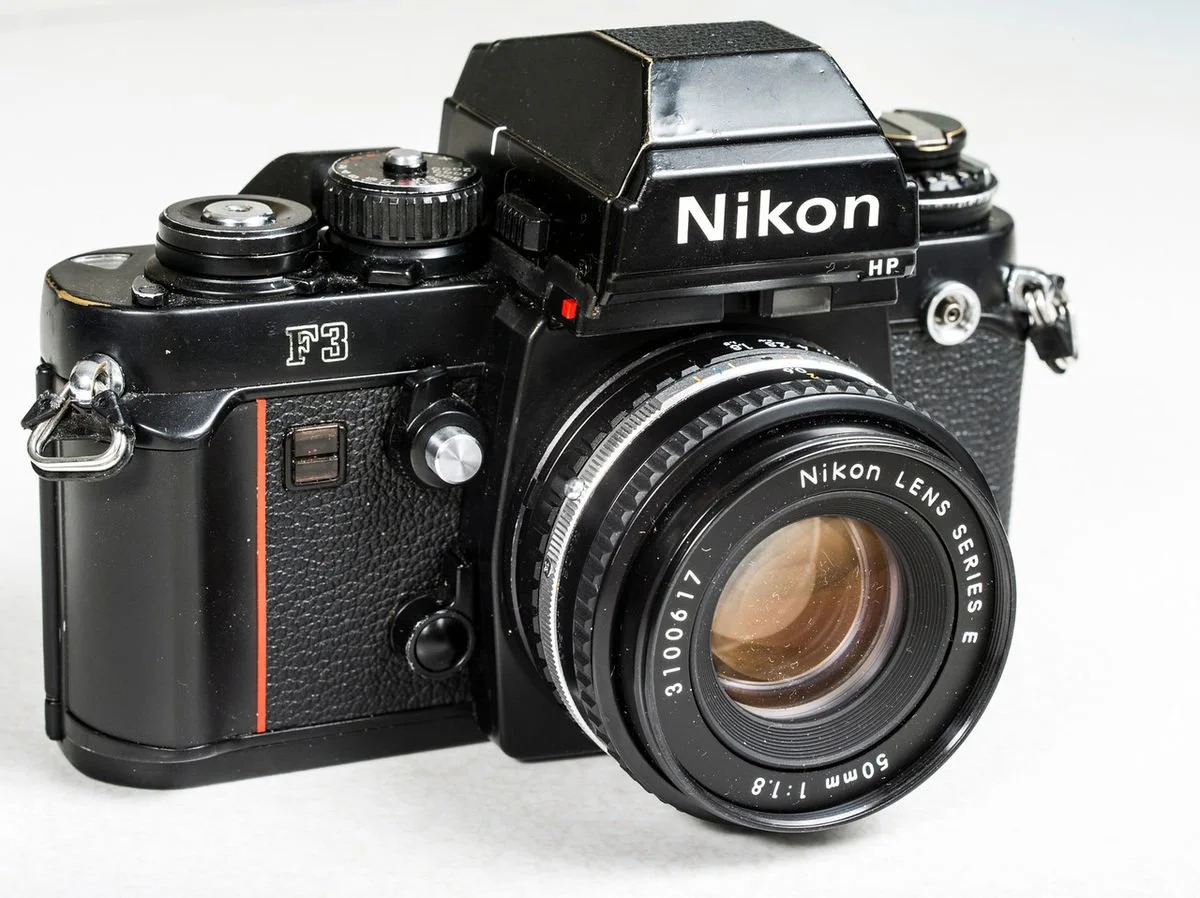
Why it’s great: Designed by Giugiaro, built for newsrooms and war zones. The F3 offers aperture priority with a buttery manual experience and a huge system of finders, backs, and screens if you like to tinker.
Best for: Serious shooters who appreciate modularity and a dense, premium feel.
Pros
Pro build and silky controls
Aperture priority + full manual
Extensive accessories; crisp 80/20 center-weighted meter
Cons
LCD in finder can fade with age
Requires batteries for shutter (mechanical backup at 1/60 “M90”)
Heavier than consumer bodies
Buying tip: Inspect the prism LCD and light meter accuracy; many F3s are still spot-on if cared for.
8) Canonet QL17 GIII — The Street-Smart Rangefinder
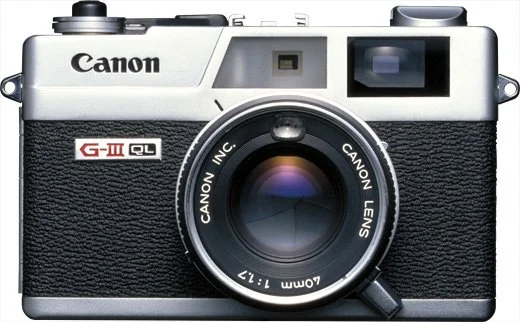
Why it’s great: A fixed-lens 40mm f/1.7 rangefinder that slides into a coat pocket, focuses quickly, and looks classy. Leaf shutter = quiet. Perfect for candid family shots and urban wandering.
Best for: Street photographers and travelers who want small, quiet, and sharp.
Pros
Fast 40/1.7 lens with pleasing rendering
Quick-load film system is genuinely handy
Shutter is near-silent; great for indoor low light
Cons
Mercury battery era (meter workarounds needed)
Rangefinder patch can be dim; check alignment
Minimum focus not as close as SLRs
Buying tip: Ask about a meter conversion or plan to use a handheld/phone meter. Verify rangefinder contrast.
9) Olympus XA (or XA2) — The Pocket Spy
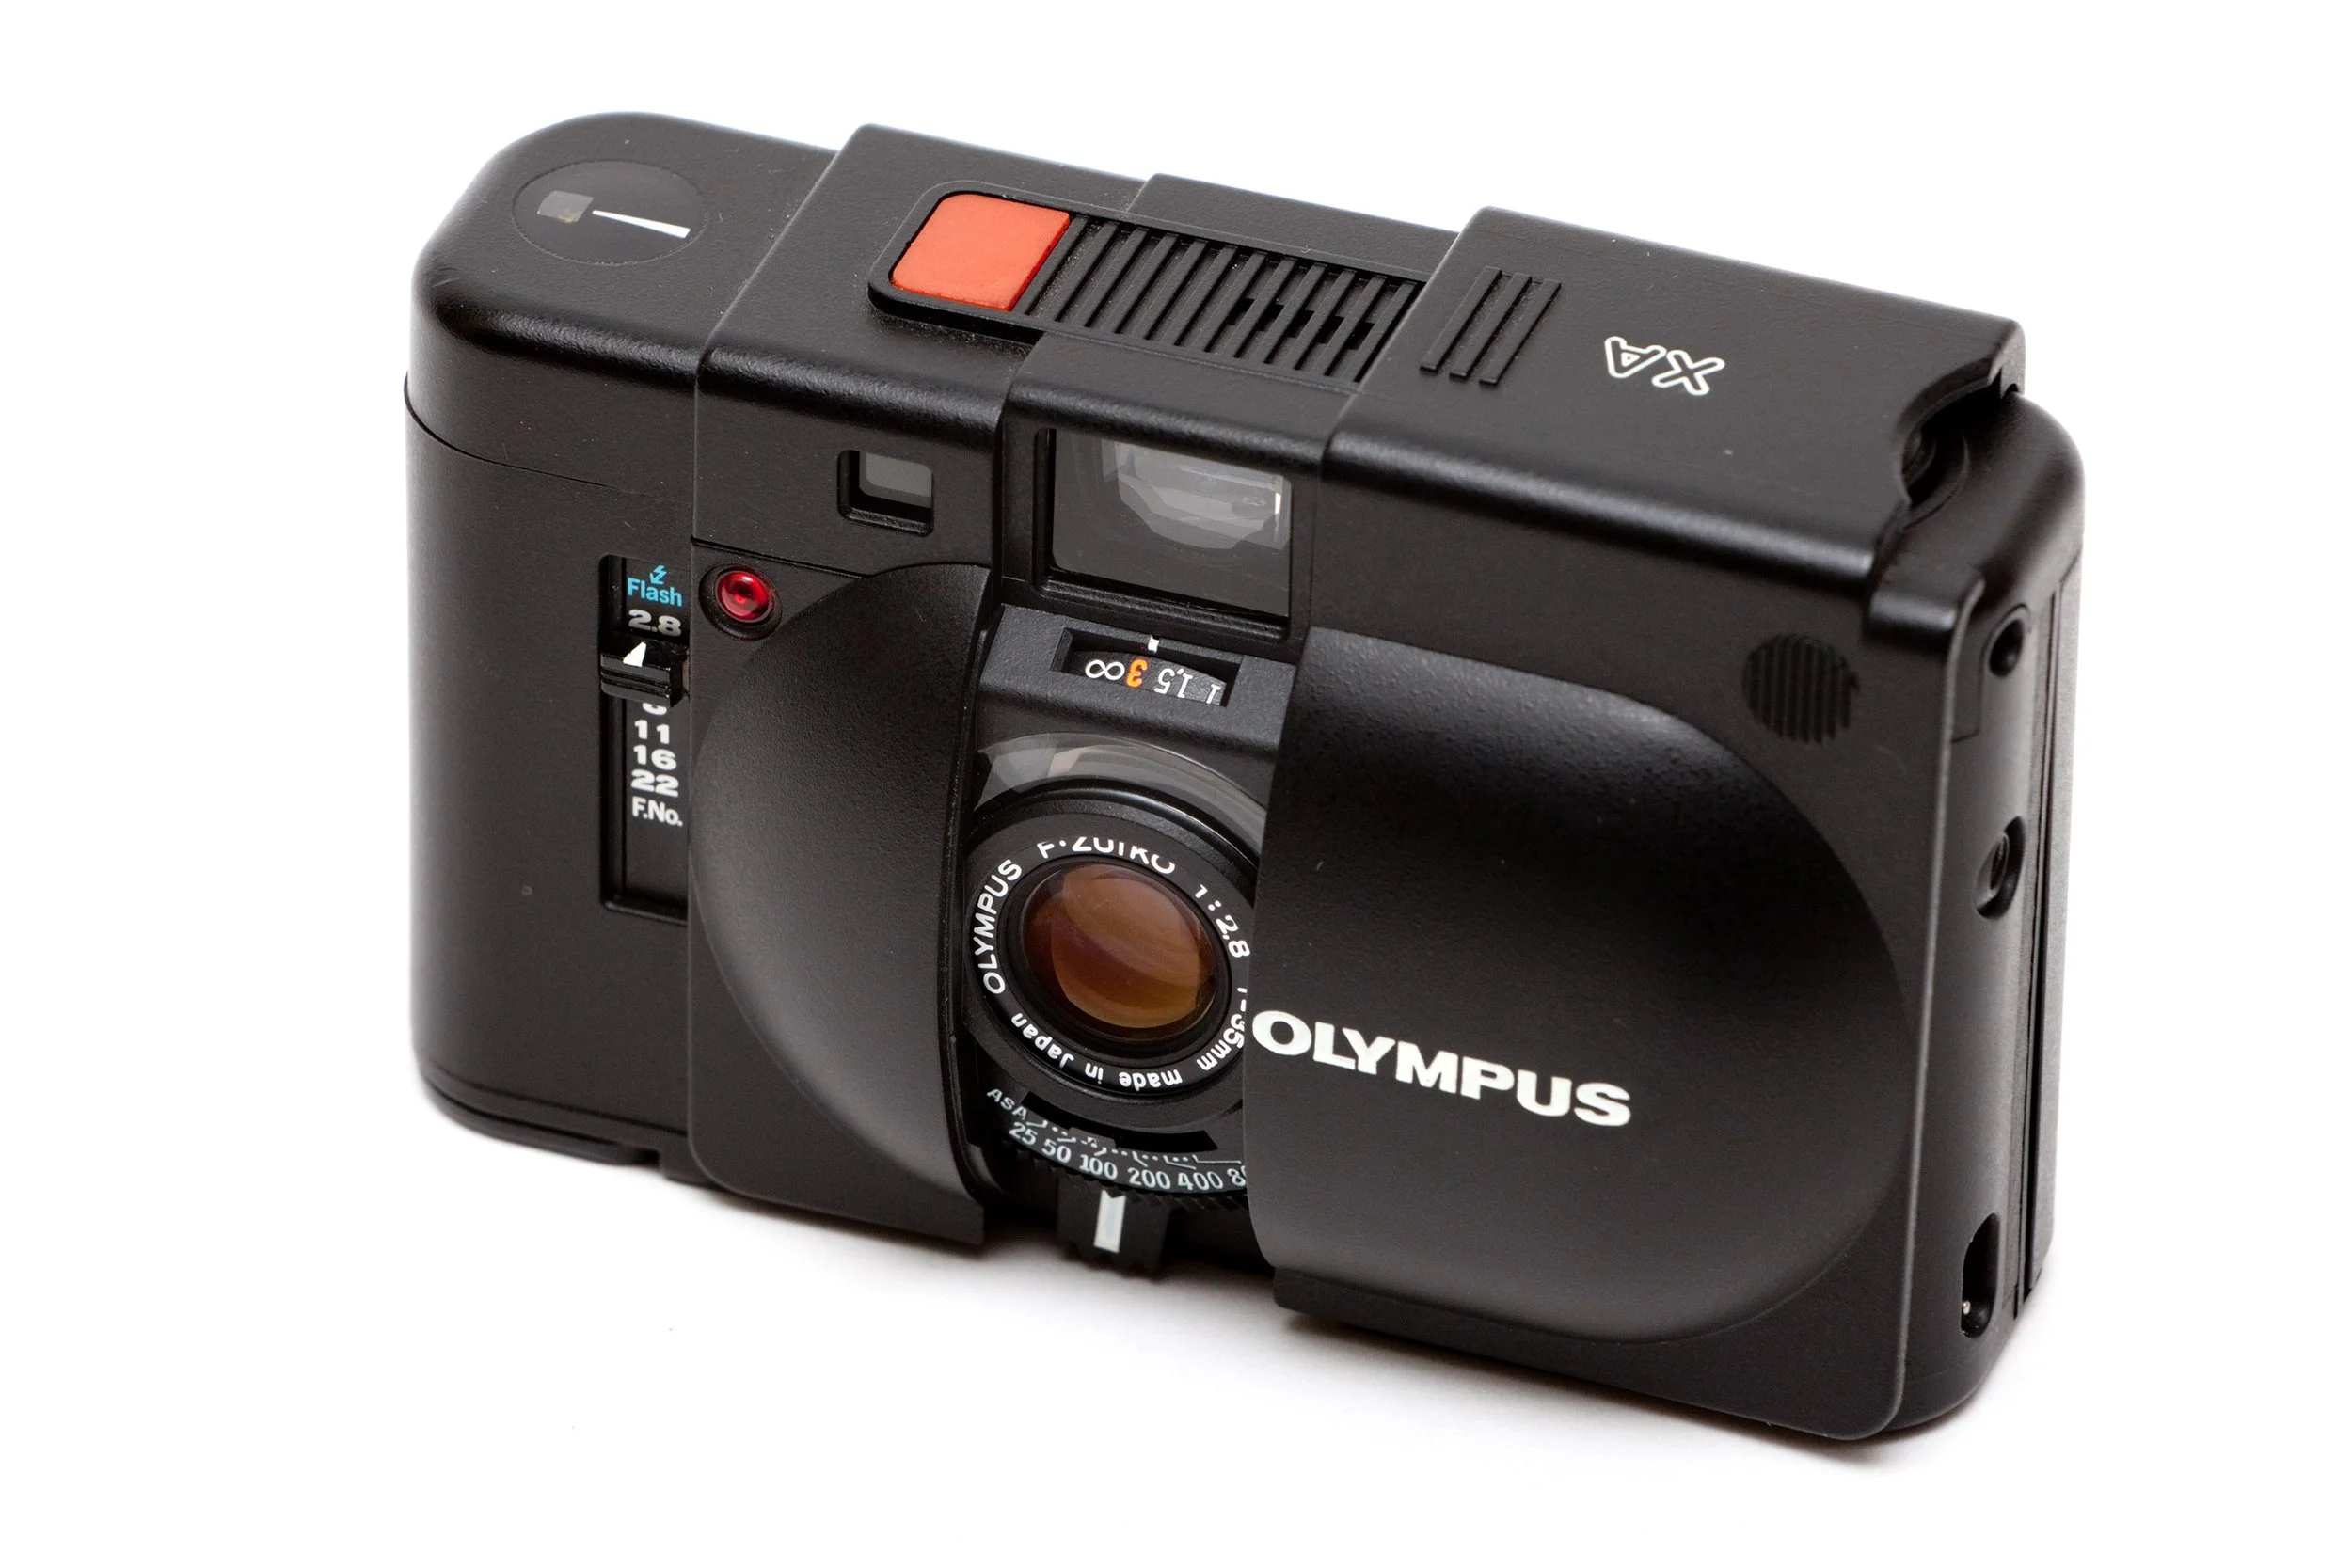
Why it’s great: A true pocket camera with a sliding clamshell, off-the-charts stealth factor, and a surprisingly sharp 35mm lens. The XA (rangefinder) gives you aperture priority and focus; the XA2 is zone-focus simplicity.
Best for: Everyday carry, concerts, and travel where you want “invisible” shooting.
Pros
Fits in jeans pocket with room to spare
Quiet leaf shutter; zero intimidation factor
XA has a real rangefinder; XA2 is point-and-shoot simple
Cons
Rangefinder baselength is short; critical focus takes practice (XA)
Fragile feeling if abused; keep it in a pouch
Flash is a detachable accessory (A11/A16)
Buying tip: Ensure the clamshell slides smoothly and the light meter responds quickly to changes.
10) Yashica T4 (or T4 Super/T5) — The Cult Compact
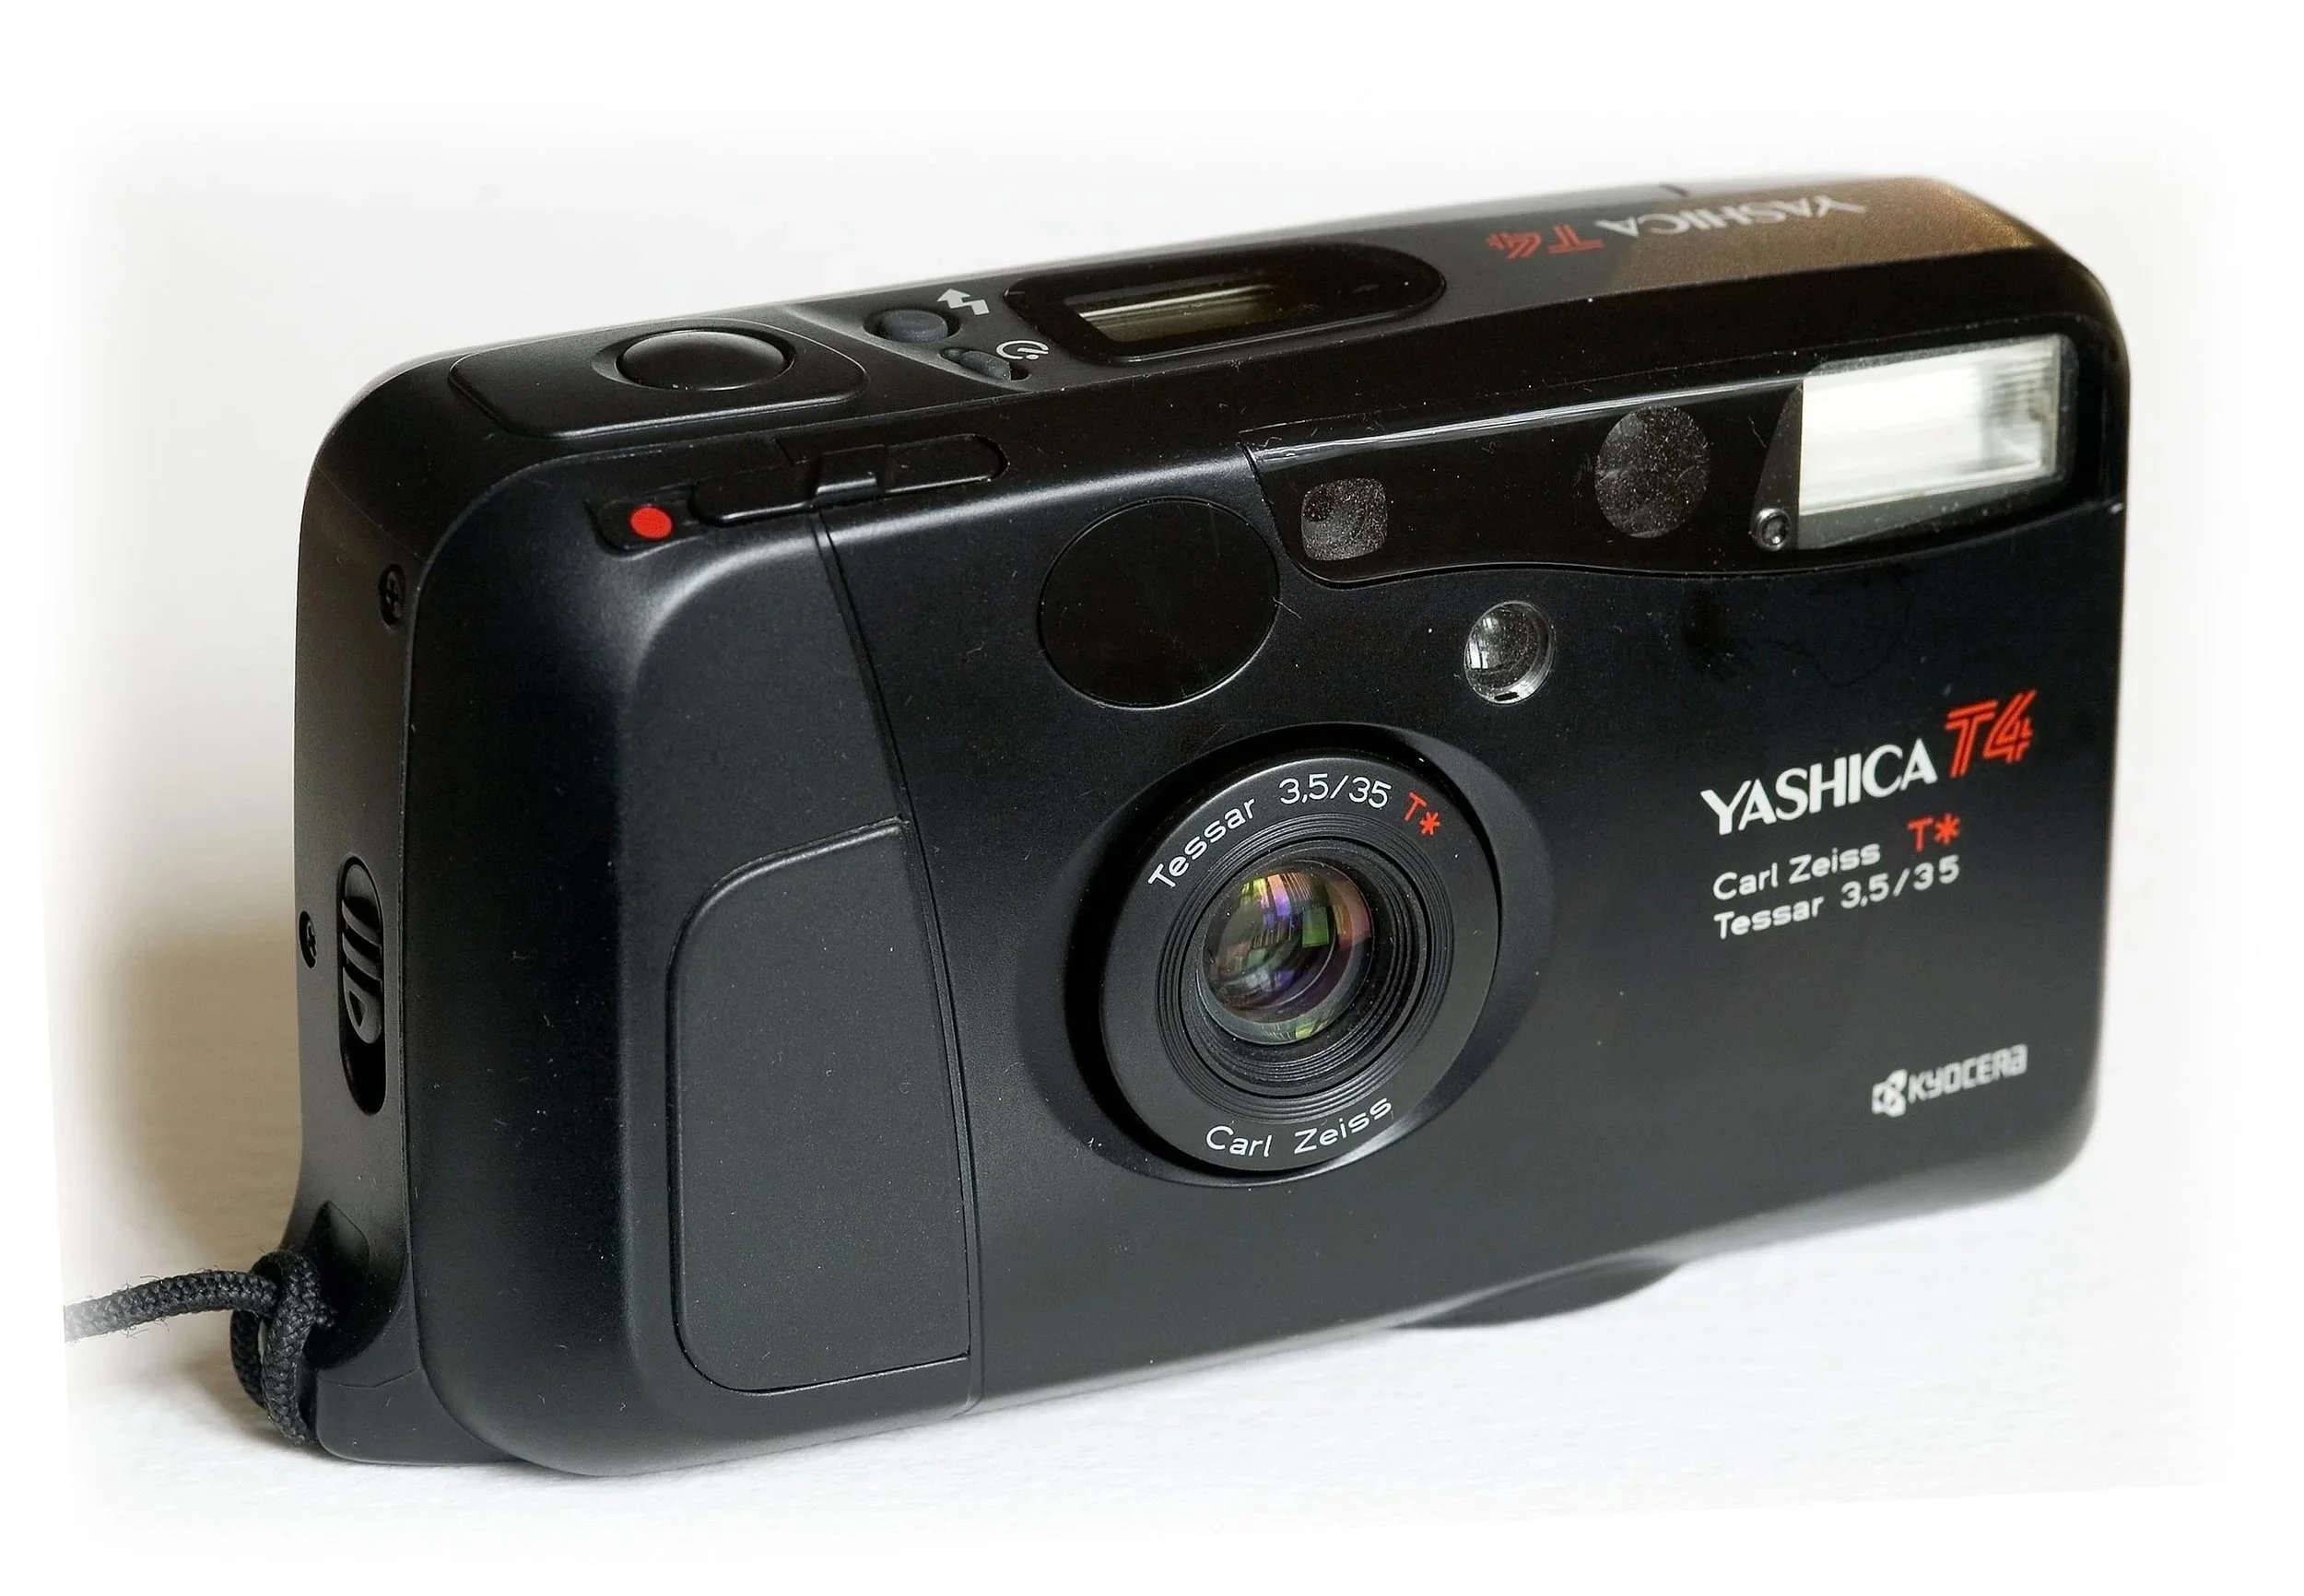
Why it’s great: Beloved for its Zeiss Tessar 35mm f/3.5 lens and straightforward automation, the T4 turns everyday scenes into punchy, high-contrast prints. Weather-resistant, with a quirky waist-level “Super Scope” on the T4 Super/T5.
Best for: Point-and-shoot fans who want great glass without thinking too hard.
Pros
Zeiss Tessar lens is crisp with great micro-contrast
True pocket camera with auto everything
Weather-sealed enough for drizzle and beach days
Cons
Prices can be… ambitious
Fully automatic exposure can fight you in tricky light
Electronics are not service-friendly
Buying tip: Test the flash charge time and AF confirmation; pass on bodies with LCD bleed or corrosion.
Choosing the Right Body for You
On a tight budget?
Pentax K1000, Minolta X-700, or Olympus OM-1 bodies with a 50mm prime deliver pro-looking results for less. Your money goes further on glass here than with Nikon/Canon pro lines.
Want autofocus and speed?
Canon EOS-3 is a bargain pro experience, especially if you already own EF lenses. It’s the easiest jump from modern digital to film without relearning everything.
Prefer small and discreet?
Olympus XA/XA2 or Canonet QL17 GIII rule the compact, quiet niche. The Yashica T4 adds true point-and-shoot ease with stellar optics.
Crave pro feel and longevity?
Nikon FM2/FM2n (mechanical precision) or Nikon F3 (pro sophistication) are lifetime keepers with tons of lens options.
What to Check Before You Buy
Light seals & mirror foam: Crumbling foam = light leaks and goop. Replacing seals is cheap and DIY-able.
Shutter accuracy: Listen for hesitations at slow speeds; inconsistent exposures suggest a service is due.
Meter behavior: Aim from bright window to dark room—the needle/LEDs should respond smoothly.
Battery type: Some classics were designed for mercury cells. Plan for adapters, recalibration, or handheld metering.
Common model quirks:
AE-1 Program: shutter squeak (serviceable)
X-700: capacitors (replace and forget)
OM-1: meter battery conversion
T4: electronics/lcd health is make-or-break
Lens condition: Shine a flashlight through—look for haze, fungus threads, separation, or oily aperture blades.
Lenses: Where the Magic Happens
Even the best body is just a film transport without good glass. A few no-brainer starting points:
50mm normals: Cheap, fast, and sharp on every system (Pentax 50/1.7, Canon FD 50/1.4, Nikon 50/1.8 AI-S, Minolta 50/1.7).
Wides: Olympus 28/3.5 Zuiko and Nikon 28/2.8 AI-S are stellar values.
Portraits: Canon FD 85/1.8, Minolta 85/2, or Nikkor 105/2.5 for classic rendering.
Film Stocks That Pair Nicely
Everyday color: Kodak Gold 200 or Ultramax 400 for warm, punchy family photos.
Fine-grain color: Kodak Portra 160/400 for skin tones and latitude.
Black & white: Ilford HP5+ (for flexibility) or Kodak Tri-X (for that timeless grit).
Experiment: Cinestill 800T for neon nights or any ECN-2 stock if your lab (hi! 👋) processes it properly.
Final Frames
The “best” used 35mm camera is the one that makes you want to take it everywhere. If you’re learning exposure, grab a Pentax K1000 or Nikon FM2 and build muscle memory. If you want modern convenience, the Canon EOS-3 feels like a DSLR that happens to shoot film. Craving stealth? Pocket an Olympus XA or Yashica T4 and capture life as it happens.
Whichever you choose, give it fresh light seals, load a roll you’re excited about, and get out there. And when you’re ready to see those frames shine, send them to Shutter Junkies Photo Lab—we develop 35mm (C-41, B&W, and ECN-2), scan with care, and ship nationwide. We’ll treat your new-to-you classic like it’s our own.
Developing Disposable Cameras: A Step by Step Guide
What happens when you send your disposable camera into the lab to be developed? In this step by step guide, we walk you through the entire process to give you a better idea of what is happening!
Disposable cameras have been gaining popularity for the past 10 years and today, they are as popular as they ever were back in the day. Disposable cameras have become popular at weddings, travel with kids to summer camp, snap the first photos of newborns at the hospital, and everything in between. But after you’ve taken the last picture on your disposable, what happens next?
We’ve got several guides on where to take your disposable camera once you’re ready to develop it. This blog post is going to look at the developing process so that you can understand what happens during the process. From dropping it off at your lab to getting the digital images or prints, we’ll walk you through the entire process.
Step 1 - Choose Your Film Lab
For many first time disposable camera shooters, this is the most difficult and confusing step. There’s an entire rich culture in the film world that is a little overwhelming for anyone new to disposable cameras and film. The process, the options, the turn-around time, and understanding a lot of strange terms film photographers use can be confusing. There are a few things to consider when it comes to choosing your film lab, and we will discuss each one briefly.
Should I Mail in My Disposable Camera, or Find a Local Lab
After the film apocalypse in the early 2000’s, most of the film labs went out of business. Unless you live in a big city or an area with a lot of artistic and creative influence, there’s a really good chance that there won’t be a local film lab near you. A quick Google or AI search for “Film Labs Near Me” will help you locate any close by. Many local film labs are ran by passionate individuals who deeply love film and are working hard to keep film alive. But as I can tell you from experience, that is a very very difficult process. You may run into long lead times or higher prices, or both at the local film lab as constant changes to our industry and unpredictable price increases have made the film lab business a difficult one to maintain. Some smaller or new local film labs may struggle with quality and customer service also. There are many posts on Reddit about really poor service or just awful developing at smaller local labs. However, every lab is different and if you’ll take the opportunity to get to know the individuals in the lab and do some research on reviews and customer feedback, you’ll have a much better experience in choosing a lab that will do a good job for you.
A temptation exists, for the sake of convenience, for many to head to a big box store like CVS, Walgreens, or Walmart to get your film developed. However, this almost always results in a negative experience for many customers. I can’t tell you how many photographers have come in with their disposable cameras telling us that it was going to take 8 weeks or that they were just told flat out that they weren’t accept disposable cameras to develop at that time. And even when they take the disposable cameras to develop, the turn around times are often double the amount of time quote and none of the three return your negatives (they destroy them after scanning).
Walmart, CVS, and Walgreens send their disposable cameras off to a factory somewhere else to get developed and scanned. If there was ever a problem or a mix-up, it would be impossible to recovery or rescan your images. While there are some customers who have a good experience taking their disposable cameras into the CVS, Walmart, or Walgreens, I’ve heard so many complaints that I honestly can’t recommend using them at all.
If local labs aren’t an option, for whatever reason, there are many mail-in film labs that exist and are amazing. Many of the mail-in labs have been in business for many years and have a proven track record of quality and reliability. The majority of our film and disposable camera developing comes from our mail-in film developing service. We love our customers, no matter where they are from and like all of the other mail-in labs, do our absolute best to return the best quality images and customer service we can to them. The DarkRoom, Shutter Junkies Photo Lab, House of 35, and many other mail-in labs are out there. However, the downside to using a mail in lab is that you have to pay for postage and wait a little longer for the package to make the trip from you to them. The upside to using a mail-in lab is that generally they stay much busier and have a more refined and higher quality service than most local-only film labs. We would definitely recommend you considering a mail-in film lab as an option for getting your disposable camera developed.
Step 2 - The Lab Gets to Work
Once your disposable throw away cameras arrive at the lab, there are several steps that have to take place to convert the latent image on your film into a digital or printed image. Here’s a detailed breakdown of everything we do in our lab:
Your package has to be opened and contents inspected and we need to identify who the package came from.
We confirm the quantity, types of disposable cameras included, and details of your order
An order envelop is created with your details
Your throw away camera has to be inspected for damage or issues. We also check to see if all of the pictures have been taken.
We break open the disposable camera - yes, we have to break them open with a screwdriver. Once opened up, we can pull the film out and remove the battery. Newer cameras are set aside to re-use and older cameras are recycled
We have to extract the film leader from the 35mm film cartridge contained inside.
We trim the film leader and add a twin check tag (a little sticker that comes in twos with a four digit number. And is adhered to your film and the other to you order envelop
Your film is placed in a line of film to be developed and your order envelop moves to the next step
Your order develop is sent for data entry where we take any notes we’ve added during receiving and the twin check numbers and we enter that information into our database. This helps us to identify and keep everyone’s order sorted. At this point, the system sends an automated email to you to let you know that your order has been received and in-processed.
For most of our disposable cameras, the film is taped to a leader card and ran through our Noritsu V30 developer. The film moves throughout all of the chemicals and is monitored by a technician at all times.
The film comes out of the machine dry, where the technician inspects each roll for quality and then hangs the film on a film hanger to be scanned.
Another technician takes each hanging roll of film and checks it again the order envelope and then sets the scanner to the required settings for the order.
As the roll is scanned, the technician examines the images to check for correct color balance and framing. A scanning technician has to be good at quick and accurate color correction, a skill that takes quite a while to master!
Your digital images are saved to our storage device and if you ordered prints, the digital images are transferred over our laser photo printer where you images are printed oh photographic paper and then developed much like your film was developed!
Your images are inspected one more time and then set in the upload queue.
Your negatives are sleeved and returned to you (if you selected that option at check-out).
Your prints are ran and packaged and mailed back to you.
Step 3 - View Your Digital Images
Almost every lab uses an online gallery system. These systems generally send you an email automatically once your order completes with a secure link for you to view and download your images. Many more professional labs use some of the same systems, what are just branded and look a little bit different, but they all function the same. Here are a few things to be aware of once you receive your digital gallery link from your lab!
Your Gallery Probably has an Expiration Date
Our lab, handles literally millions of individual images each year. That’s a lot of data to try to keep up with and in order to keep all of our systems working efficiently and keep your images secure, your galleries expire and the images are deleted. Our lab, Shutter Junkies Photo Lab keeps galleries open for 30 days. Some labs keep your galleries online longer and some shorter. There is usually an option to create an account and store the images permanently, so ask your photo lab about that option. Our lab will allow you to create an account for free and store your images permanently so you don’t lose them, but you do have to set that option up before the gallery expires. Once you have an account, all future disposable camera images you send in to be developed can easily be saved to your account. We do not charge for this feature, but some labs do charge an annual fee.
You can Order Prints from Your Online Gallery
Almost every lab gives you the option to order prints from you online gallery after the images are scanned. This is usually a fast and easy process and gives you the option to have your images printed in several different sizes and on a variety of papers and products!
You Should Download Your Images to at Least One Device
Accidents, glitches, and even data losses can occur so it’s absolutely necessary to download your images to a local device (phone, tablet, computer, etc) as soon as possible. And make a back-up copy somewhere else if you can. I cannot tell you how many individuals download their images to their phone only to have them disappear or get lost or the phone gets destroy and there is no cloud back-up. Even if you download them and then re-upload them to a Google Drive, at least you have a back-up!
From Moments to Memories - Disposable Cameras are a Great Too
That pretty much covers the entire process. While some people consider disposables just to be nothing more than a throwaway camera, I can tell you that some of the most amazing and beautiful moments in peoples lives are captured daily on disposable cameras. They have a unique look, and unique feel, and are so much fun to use. Our lab processes hundreds of them each day and I can tell you that they are a reliable and simple way to get photos without the risk or distractions a smart phone provides. And knowing more about how the process of developing them works and how your labs process your little throw away cameras hopefully will give you a little more piece of mind!
If you have any questions, you can always reach out to us at info@shutterjunkies.org . And if you’re ready to get started developing your disposable cameras, we’d be happy to help you out! Just click the button below to get started.
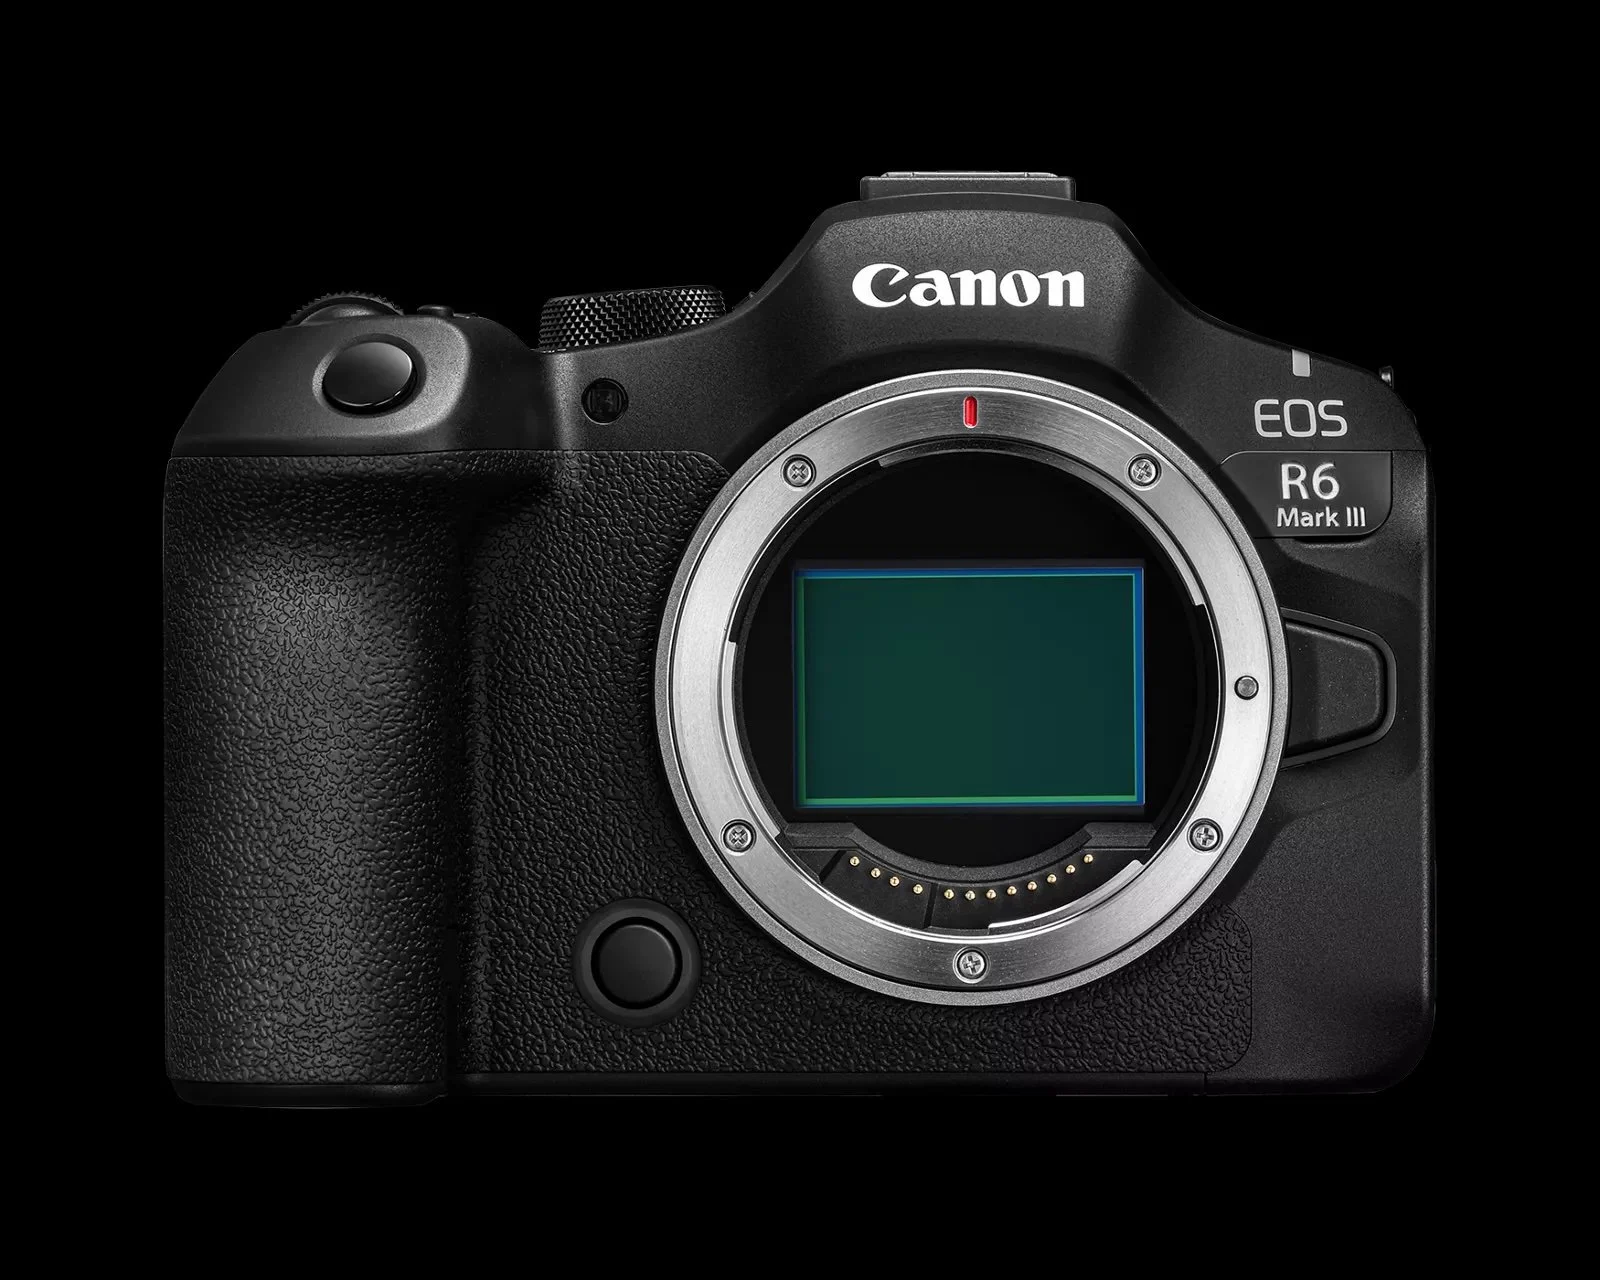
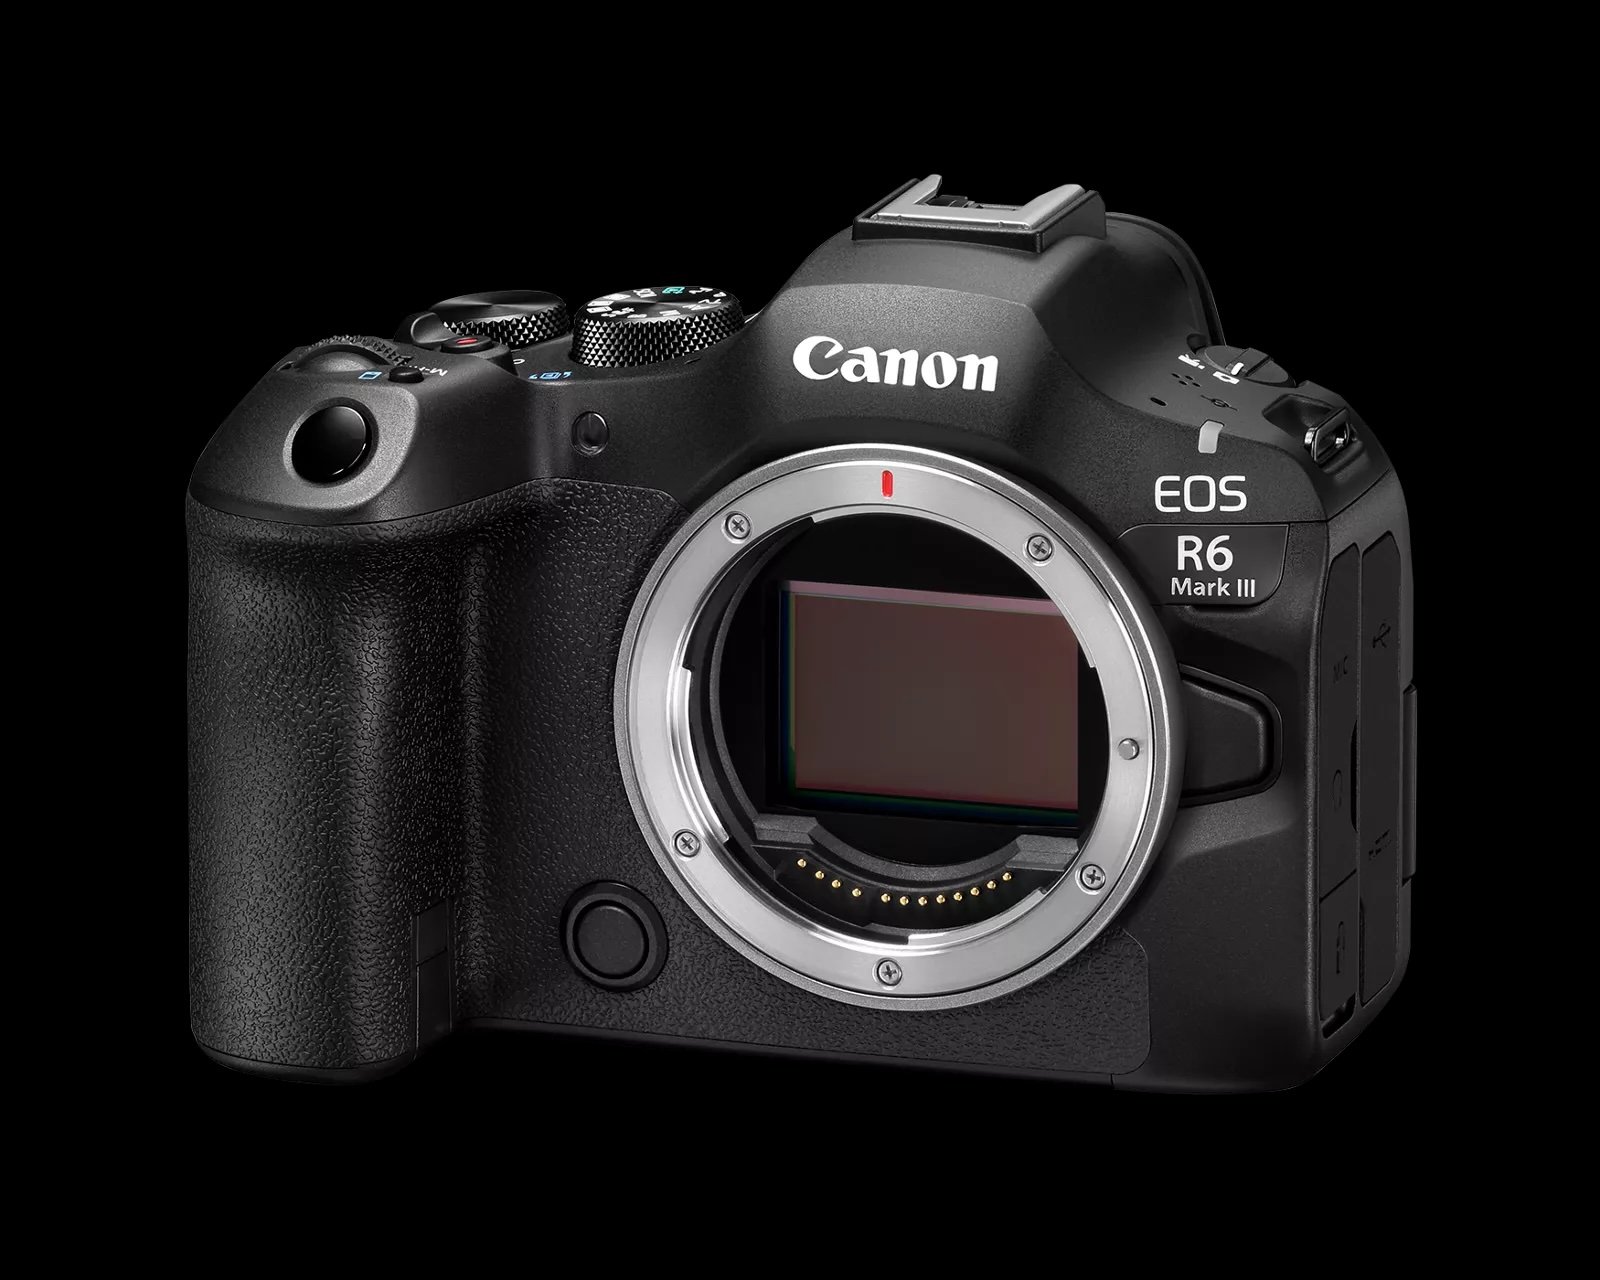
Meet the Canon EOS R6 Mark III
Canon just dropped the EOS R6 Mark III, a powerhouse full-frame camera with higher resolution, 7K RAW video, and smarter autofocus. Whether you’re a hybrid shooter, portrait photographer, or content creator, this upgrade offers serious performance gains for those ready to level up their gear.

If you’re a photographer who follows the full-frame mirrorless arms race, you’ll be excited to hear that Canon has officially announced the EOS R6 Mark III. This is the next iteration of the very popular R6 line and brings several meaningful upgrades that are worth a look.
What’s new (and notable)
Here are some of the key new features and improvements:
Higher resolution stills
The R6 Mark III steps up to a 32.5-megapixel full-frame sensor, compared with the previous generation’s ~24 MP class. That means more detail, more cropping latitude, and more flexibility for clients who want large prints or aggressive cropping.


Hybrid photo/video chops
This model leans hard into the hybrid shooter territory:
Up to 7K RAW (60 fps) video recording, plus open-gate mode (using full sensor) for maximum flexibility in post.
4K up to 120 fps for slow-motion work.
For a portrait/kids/family/headshot photographer, this means when you want to tie in moving-image content (behind-the-scenes, short-form social clips), you’ve got serious muscle under the hood.
Faster bursts & advanced AF
The R6 Mark III maintains a blistering electronic shutter burst rate (up to ~40 fps) even with that higher resolution sensor. The autofocus system gets a big bump too: tracking of people, animals, even vehicles, with smart subject-recognition and improved low-light AF sensitivity.
In real-world terms, if you do any fast-moving subjects (kids running, pets, outdoor family sessions, sports/action portrait work) this is a huge plus.
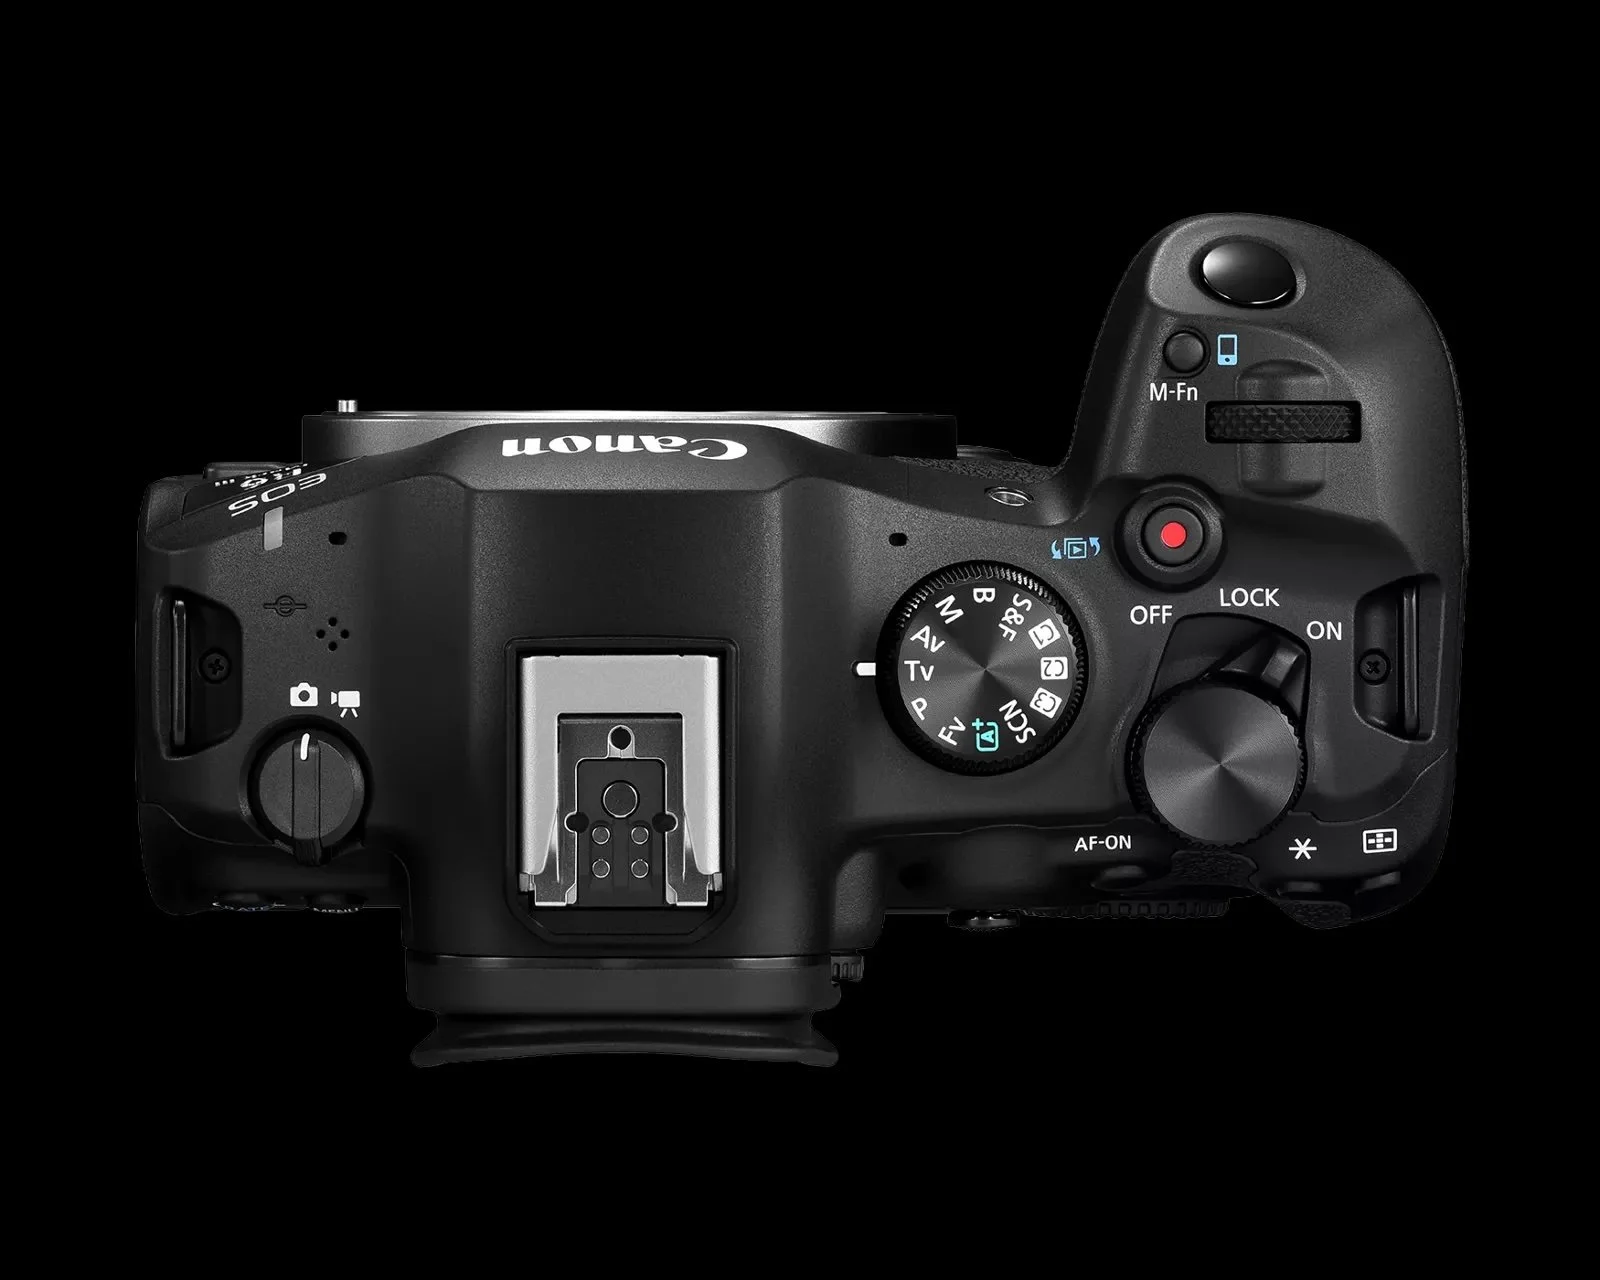
Dual card slots + workflow advantages
The new body supports a dual-card setup with one CFexpress Type B slot (for high throughput) and one SD slot. That gives you the flexibility of serious pro workflows while maintaining backwards-compatibility with existing card ecosystems.

Image stabilization & robust build
Canon reports a very strong in-body image stabilization (IBIS) system (up to ~8.5 stops, according to some coverage). That means sharp hand-held images in lower light, very beneficial when you’re shooting events, indoor sessions, or ambient-light portraits without flash. Build, ergonomics and Canon’s RF-mount lens ecosystem continue to shine.
Who should consider upgrading (or buying)?
Ideal upgrade-candidates
Photographers doing hybrid work: If you are already doing stills and video (maybe short-form videos for families, behind-the-scenes, reels, social content) the R6 Mark III is a powerful one-body solution.
Action-oriented portrait work: If you frequently shoot kids/family sessions with movement, pets, siblings, or outdoor sessions where tracking fast motion matters, the improved AF + high-burst rate + high resolution give you an edge.
Print-heavy workflows: If you deliver large prints, wall art, or want extra resolution for cropping/retouching, the 32.5 MP sensor gives you more headroom.
Existing Canon RF shooters: If you already own RF-mount lenses (or are invested in Canon’s system) this makes a lot of sense. Staying in the ecosystem means your lens investment continues to pay off.
Who might wait or skip
Still-only shooters on a budget: If your primary work is headshots/portraits in controlled lighting, and you’re happy with ~24 MP stills, then the previous generation (R6 Mark II or even R6) might suffice and save you money.
Legacy non-Canon users: If you’re using another ecosystem (Sony, Nikon, etc), this upgrade is less compelling unless you’re switching systems.
Low-budget business builders: If your business is just starting and you don’t yet need ultra-high specs, investing the savings in marketing, lighting, or client experience might be more impactful than jumping for the latest body.
Final thoughts
The Canon EOS R6 Mark III is a compelling upgrade — it doesn’t reinvent the wheel, but it significantly refines and elevates the hybrid-capable full-frame mirrorless toolset. If you’re a photographer who wants to do more than stills (video, hybrid workflows), who shoots fast-moving subjects (kids/family sessions, outdoor), or who wants large print flexibility, this camera is a strong contender. If you’re more stills-focused and budget-conscious, you may find better value in your current gear and invest savings elsewhere.
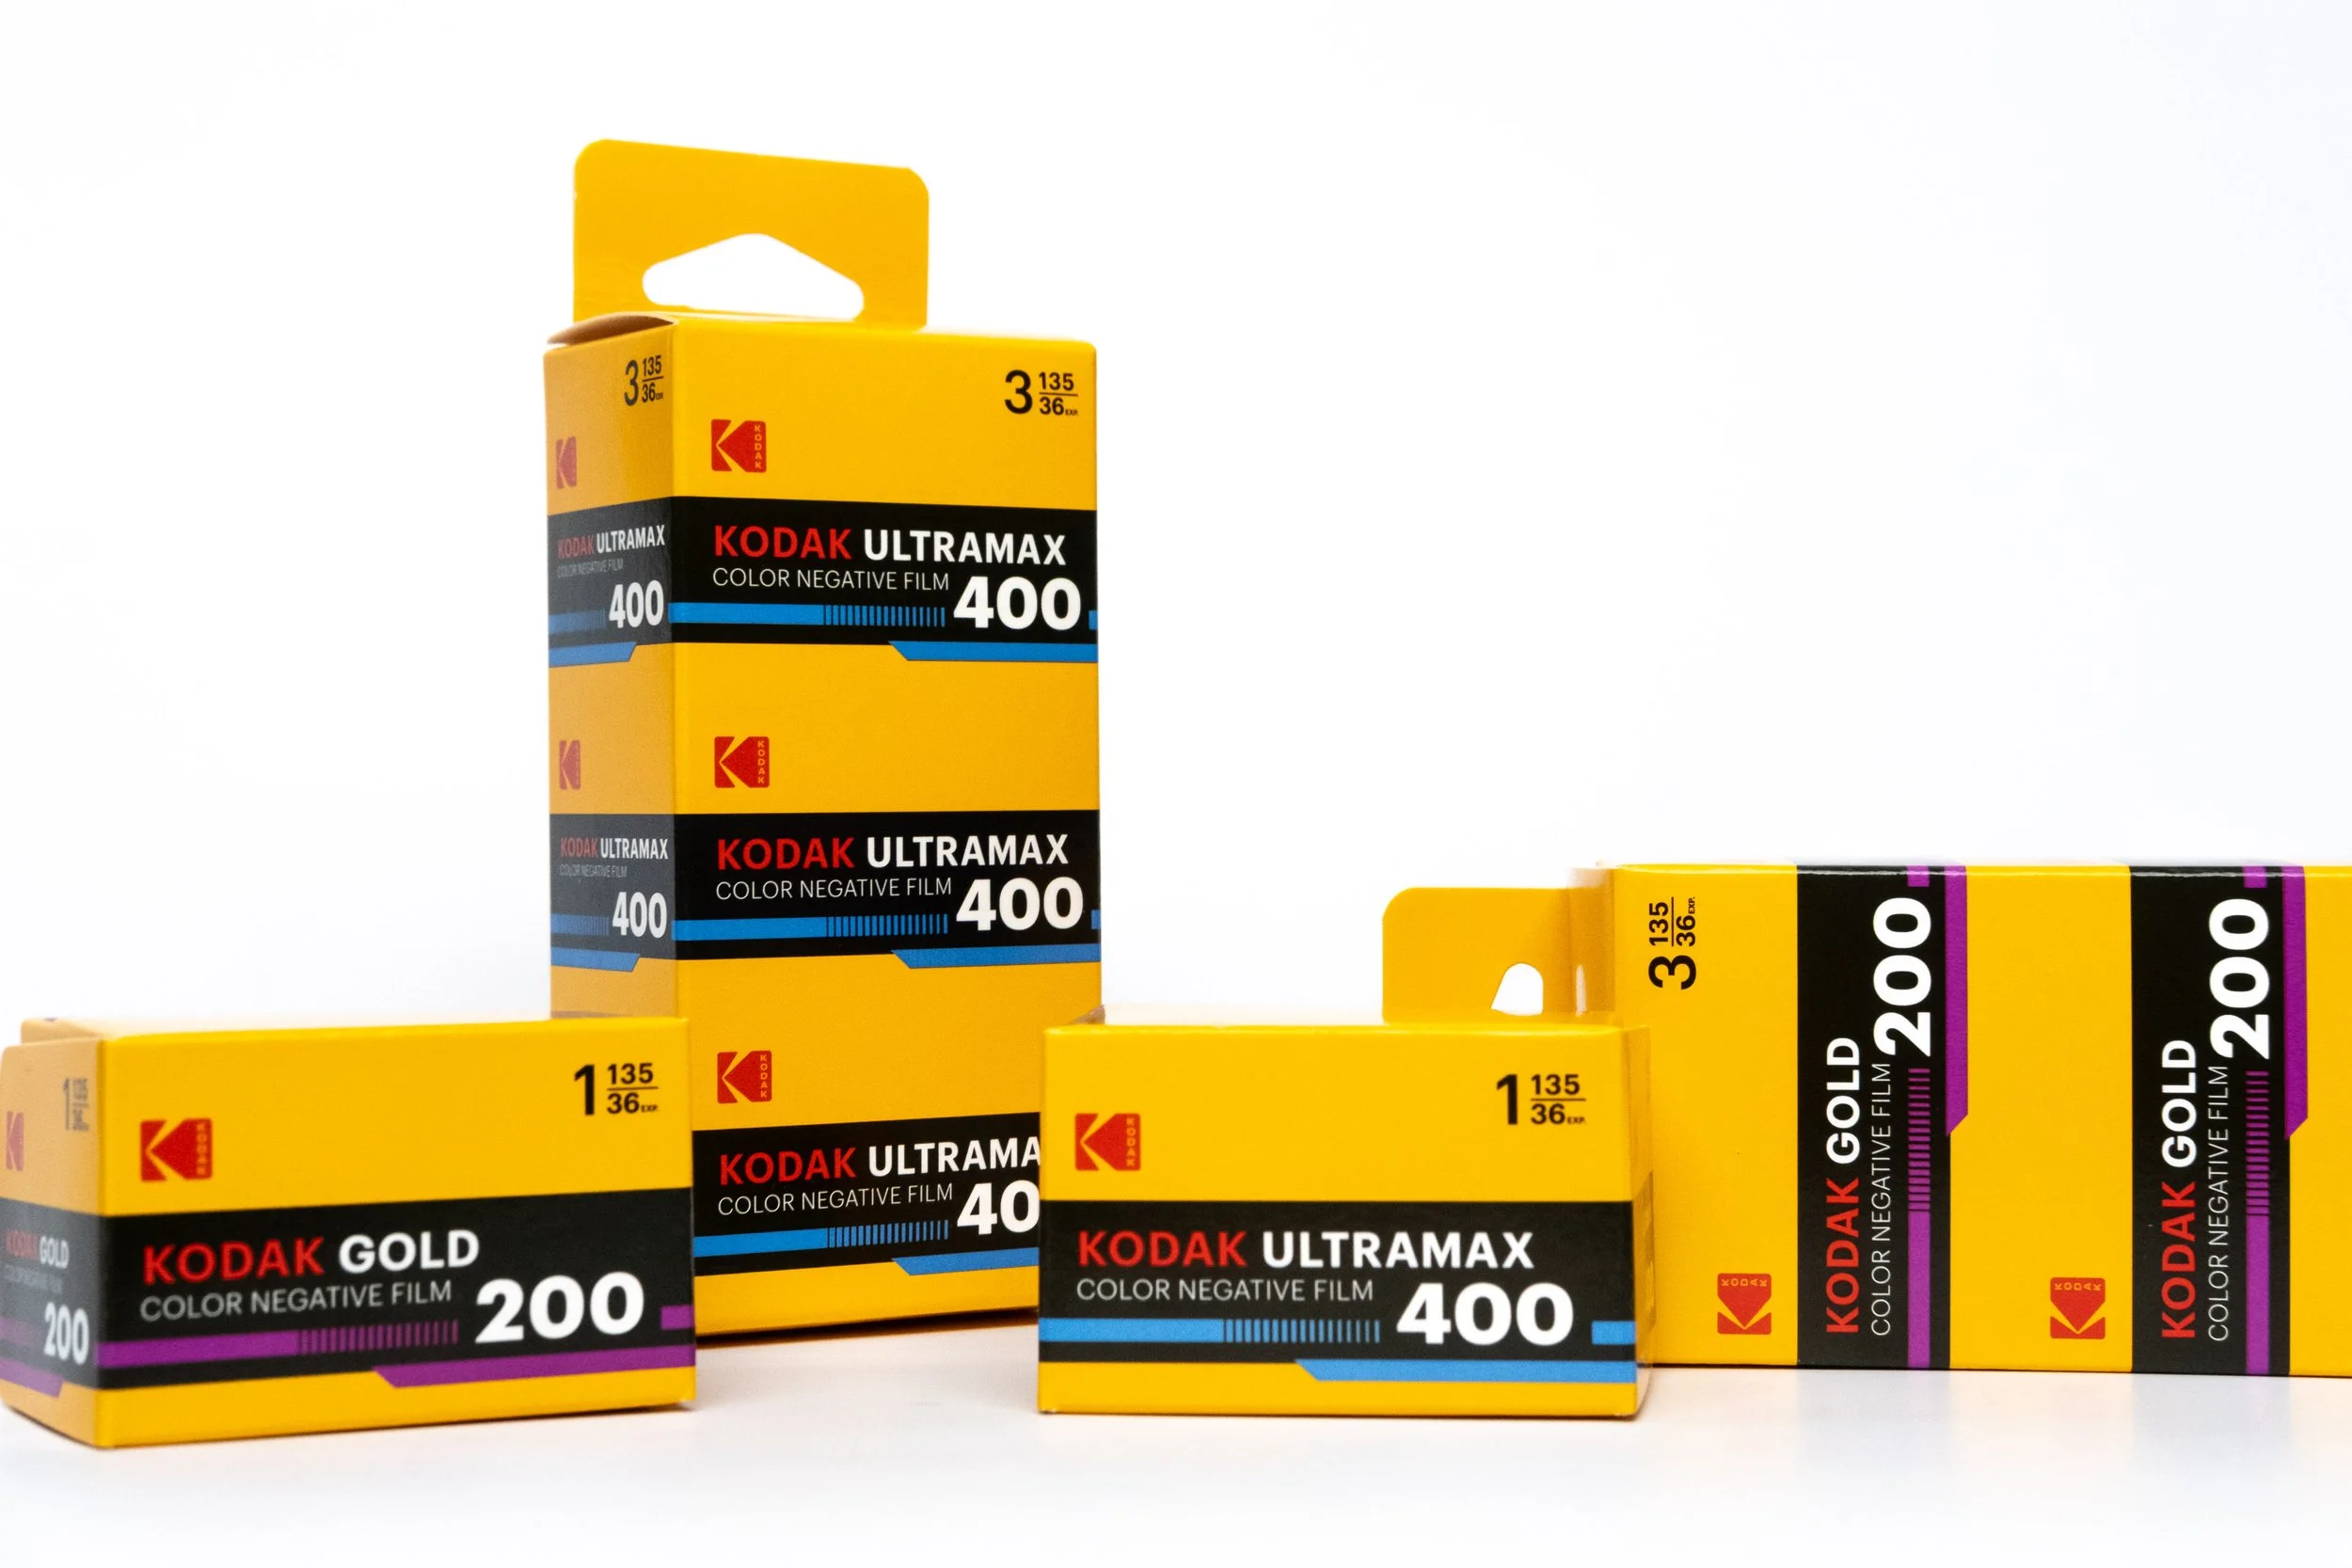
Kodak Is Back with Kodak Gold and Ultramax
Eastman Kodak is now releasing Gold 200 & UltraMax 400 directly — is Kodak taking back control of film again? Here’s what you need to know.
Eastman Kodak out of Rochester New York has shocked the film photography world for a second time in very short time. 35mm film photography news is also ways somewhat slow as development and release of new cameras and films takes a long time and the entire industry is mostly stable thanks to a very reliable and predictable customer base. But Kodak has done something none of us were expecting and now, they’ve done it twice!

For years, if you wanted fresh Kodak color film, it always flowed through one familiar channel: Kodak Alaris.
Alaris was the company that handled the retail distribution, the consumer branding, and the “Kodak” film boxes we all know. Meanwhile, Eastman Kodak — in Rochester, NY — actually manufactured the film.
It’s always been a two-company system. There were two Kodaks.
But now something big has shifted.
Recently, Eastman Kodak began offering Kodak Gold 200 and Kodak UltraMax 400 directly from themselves instead of routing all sales through Kodak Alaris. That means the Rochester factory is now directly handling the product release and distribution on two of the most iconic consumer color films still being made today.
This follows right behind October’s surprise launch of Kodacolor 100 and 200 — which were also released directly by Eastman Kodak.
This isn’t just “new packaging.”
This is a distribution model change.
And it raises a lot of questions.
What does “direct from Eastman Kodak” mean?
So far, what we know is this:
Eastman Kodak is promoting and selling Gold 200 and UltraMax 400 directly to retailers and distributors.
New packaging has been revealed that matches the retro look of the Kodacolor boxes.
Multiple retailers have already started showing “coming soon” listings with the new packaging.
Kodak Alaris pages still list these films — which means both companies now appear to be active at the same time.
This is the first time since Kodak’s 2012 bankruptcy that Rochester has stepped in this visibly toward the consumer still-film market.
Why would Kodak do this?
There are several very possible reasons:
1. Demand is way higher than supply
Film demand has blown up since 2020. Kodak has even publicly stated they had to pause production lines to upgrade equipment just to keep up.
2. Cutting a middle layer could reduce friction
If Rochester sells directly to retailers, they may have more control on inventory allocation, and MAY be able to keep pricing steadier.
3. Brand ownership
Kodak Alaris is technically a separate company that licenses the Kodak name. Eastman Kodak might be trying to bring more of the Kodak film identity back “home” to Rochester again.
Which films could be next?
Right now, only:
Kodacolor 100 / 200 (already announced direct by Eastman Kodak)
Gold 200
UltraMax 400
are confirmed flowing through this new channel.
But if this continues… it opens the door for:
Portra family
Ektar 100
Tri-X 400
moving under the Eastman direct model too.
If THAT happens — then the entire still film division may end up being unified under one Kodak again.

What does this mean for the future of film?
Optimism + uncertainty.
On the optimistic side:
If Rochester is taking the reins, we might see better stock availability.
We might see less of the random price swings.
We might see more new product development (Kodacolor proved they still have the chemistry + creativity to release new films).
BUT — there are questions that still haven’t been answered:
Is Kodak Alaris being phased out?
Or will both companies continue to handle film?
How will retailers manage inventory during a transition?
How will pricing shake out once the supply chain reconfigures?
Right now we’re seeing the first moves of a shift — but not the full road map.
For labs and shooters, the bottom line is this:
Kodak film is not dying.
If anything, Kodak is getting more active.
They’re reorganizing and re-positioning.
And Rochester is stepping up and taking a more direct position in the film photography economy again.
We may look back on late 2024 / early 2025 as the moment where Kodak decided to “own film again” — instead of outsourcing the brand to a license holder.
And if Kodak wants film to keep growing, this is the strategic move that makes the most sense.
So… should we be encouraged?
Honestly?
Yes — cautiously.
More direct control tends to make markets more stable, not less.
More products coming from the manufacturer directly tends to mean they are investing, not retreating.
And a company doesn’t redesign packaging and launch new emulsions if they're planning to shut the lights off.
This looks less like “Kodak might shut film down”
and more like
“Kodak wants film to be a bigger part of their direct business again.”
That’s huge.
The next 6–12 months will tell us how deep this shift goes. If Portra or Tri-X start appearing in the same direct pipeline — then this new Kodak film era is fully real.
Until then: stay tuned, stock your fridge as needed, and keep shooting.
Film is not just surviving — it appears to be reassembling itself to survive long-term.
Film Photography Gift Guide 2025
From film stocks to cameras to creative lab kits, this 2025 Film Photography Gift Guide has everything your favorite film shooter will love — whether they’re brand new or seasoned in the darkroom.
The Best Gear, Film & Lab Gifts
There’s something especially magical about opening a gift and knowing it’s going to fuel someone’s creativity — especially when that someone shoots film. Whether you’re shopping for a seasoned 35 mm enthusiast, a disposable-camera weekend warrior, or a complete beginner curious about the analog world, this gift guide has you covered. From excellent film stocks to must-have accessories and lab-friendly upgrades, here are top picks that fit the film-photography vibe.
🎁 Gift Categories & Top Picks
I’ve grouped the options so you can match gifts to the type of shooter or budget level. Each item includes a bit of context, why it works for film shooters, and what makes it special.
1. Film & Consumables — Give the Shot Themselves
Because the best film gift is more film.
Lomography Metal Film Case
– A stylish and practical way to store film rolls. Holds six 35 mm rolls (or mix in 120 if they shoot multiple formats).
– Why it’s great: Film photographers often have a drawer bursting with rolls; a dedicated case gives them a tidy, safe way to carry or store them.
– Bonus: It’s inexpensive (~$9–10) so it works as a stocking stuffer.Sissi Lu DO NOT X‑RAY Film Pouch
– A protective pouch to shield unexposed film from airport security X-rays.
– Why it’s useful: For anyone traveling with film (holiday trips, road-trips, visits to grandparents), this gives peace of mind.Film Rolls (not a product listing here, but highly recommended)
– Although I haven’t pulled a specific stock here, plenty of sources suggest that gifting premium film (e.g., Kodak Portra 400, or Lomography LomoChrome) is always a hit.
– Tip: Choose a classic, high-quality film that the shooter might hesitate to buy themselves as a treat.
2. Beginner / Starter Gear — Hook Them On Film
For someone new to film, you want something approachable but still meaningful.
Kodak Ektar H35 Half‑Frame Film Camera
– A half-frame 35mm camera: meaning you get twice the number of frames per roll (great for experimenting). Built-in flash, compact 22mm lens.
– Why: It’s fun, less intimidating for someone starting analog, and the half-frame format invites creativity (and less wasted film).Film Photography Pocket Guide
– A compact, digestible book covering the basics of film: loading rolls, exposure tips, composition for 35mm.
– Why: Shooting film can feel a little mysterious when you’re used to digital. A guide like this lowers the barrier and makes it fun rather than intimidating.
3. Accessories that Make Film Life Better
Once someone is already shooting film, accessories become the “aha” gifts—they refine & upgrade the experience.
Kodak Mobile Film Scanner
– A clever way to digitize negatives/slides via smartphone. Back-lit base, simple setup.
– Why: Many film shooters want to share or archive their work digitally. A scanner makes that smoother.Negative Supply Basic Film Carrier 35
– A more advanced tool: helps flatten full-length 35mm negatives for scanning with a digital camera.
– Why: For the film enthusiast who also scans and edits, this is a thoughtful upgrade—not super cheap but very appreciated.Moment Reusable Travel Film Pouch
– A tough, water-resistant pouch designed for film rolls or small gear.
– Why: For the film shooter on the go (vacations, carry-on, bag switching), good storage makes a big difference.
4. Lab & Development Gifts — For the DIY or Service Lover
Especially if your audience is into developing their own rolls, or you want to highlight lab services (hey, like your business!).
Ilford Film Processing Starter Kit
– A full kit: tank, chemicals, measuring cylinders—everything needed to develop 35mm (or 120) at home.
– Why: Developing film yourself is part of the analog ritual. This helps someone take that step.
5. Fun / Miscellaneous Film-Themed Gifts
Small gifts that show you get film photography and the personality around it.
Eco‑Friendly Film Lover Tote Bag
– A simple cotton tote printed with a film-inspired design (“Real Photographers Use Film”).
– Why: Fun, affordable, and perfect as a bonus gift or add-on.Camera Sticky Note Film‑Lover Gift
– A quirky notepad styled like a camera for jotting down thoughts, shot notes, or lab orders.
– Why: Film shooters often track frames, settings, moods—this is a fun way to lean into that habit.Polaroid Photo Album
– A classic photo album (though styled for instant photos) stores prints or contact sheets.
– Why: Film yields physical prints/negatives, and having a place to store and show them completes the experience.
🧭 How to Use This Guide (and Choose the Right Gift)
Here are tips for picking the most fitting gift:
Newbie vs. Seasoned: If someone is brand-new, go simple (film, a starter camera, a guidebook). If someone already shoots regularly, pick something they may not have (scanner, carrier, lab kit).
Format & Style: Know whether they shoot 35 mm, 120 (medium format), or both. Accessories and film vary accordingly.
Budget: Film rolls and pouches can be <$20; cameras and lab kits can range significantly higher. Choose accordingly.
Personality: Some shoot film for nostalgia and fun; others are serious analog artists. Tailor: fun tote or sticky notes for the former; high-end carrier or chemical kit for the latter.
Add a Personal Note: For instance: “Enjoy your next roll on me!” or “Let’s develop together this year.” That kind of personal touch goes a long way in the analog world.
✅ Why These Gifts Matter for Film Photographers
From gift-guide research: film shooters are often looking for tools that facilitate creativity, experimentation, and upgrading their workflow. For example:
One forum user advised: “Niche film stocks and camera straps are great ideas! … a toy camera like a Holga or Lomo Diana or a reusable disposable + film can be a fun gift.” Reddit
A curated list of film-photographer gifts emphasized everything from film containers to inspiration cards and adapters. Haelio Photo
Another recent guide noted: “From cameras and must-have film stocks to modern accessories and DIY darkroom kits, here are the top 10 gift ideas that will delight any film photography enthusiast.” Kelsey Smith Photography
Film photography isn’t just about the final print—it’s about the process, the tactile nature of it, the waiting, the surprise, the grain. A great gift acknowledges that process, not just the outcome.
🔔 Bonus Tip: Gift Your Film Lab Service
Since your business is running a lab and shipping nationally, don’t forget to include gift subscriptions or gift cards for lab services in your guide.
A “Send me your roll” mail-in kit is a perfect gift for someone just exploring film.
Or a “Develop + scan” package for a film shooter who already has gear but wants polished results.
You can include this idea alongside product gifts as something uniquely you: e.g., “Pair this nice film roll + lab credit — you shoot, we develop, you relive.”
📝 Final Thoughts
Film photography is a combination of craft, nostalgia, surprise, and reward. When you give a gift that speaks to that, you’re not just helping someone take photos—you’re helping them build memories, experiment, make mistakes, wait (the best part!), and get delightfully surprised when the prints come back.
Whatever you choose from this guide, wrap it with a little note: “Let’s shoot a roll together,” or “Here’s your next adventure in analog.” That little extra means more than any gadget.
Here’s to excellent gifts, rich rolls, beautiful grain, and more stories told on film in the year ahead.
Happy gifting — and happy shooting!

Shoot Film This Christmas: 10 Holiday Photo Ideas for 35mm and Disposable Cameras
Rediscover the magic of Christmas through the grain and glow of film. Here are 10 festive photo ideas for 35mm and disposable cameras that will make your holidays unforgettable.
If you’ve ever looked back at a box of old family Christmas photos—the slightly out-of-focus tree, the weird flash shadows, Uncle Dave blinking mid-blink—you know exactly why film is perfect for the holidays. Film photography captures not just the image, but the feeling of the season: warm lights, real smiles, and a bit of imperfect charm that digital just can’t touch.
Whether you’re dusting off your trusty 35mm camera or picking up a few disposable cameras for the family, shooting film this Christmas is one of the best ways to preserve the magic. To help you make the most of it, here are 10 holiday photo ideas to try with film this year—plus a few tips to make sure your rolls come out looking merry and bright.

1. The Christmas Tree Glow-Up
There’s something timeless about a Christmas tree on film. The warm glow of string lights, the shiny ornaments, and maybe a little chaos as the kids (or cats) get involved.
🎞 Tips:
Use a high-speed color film like Kodak Ultramax 400 or Fuji Superia 400 to handle the low light indoors.
Skip the flash and let the glow of the lights shine. Try bracing your camera on a steady surface or using a tripod.
Shoot a few frames wide to show the full tree, then move in close for ornament details.
💡 Pro move: Take a before-and-after shot—the tree as it’s being decorated, and again on Christmas Eve when it’s fully lit up and surrounded by gifts.
2. Candid Family Chaos
Forget the posed group photo—some of the best holiday shots happen in the middle of the action. Grandma laughing at a joke. Kids sneaking extra cookies. Someone struggling to tape the last piece of wrapping paper.
🎞 Tips:
Keep your disposable camera or 35mm loaded and nearby all day.
Don’t stress about perfect composition; these moments are all about real emotion.
Try shooting from the hip—you’ll capture authentic expressions and reactions.
📸 Film choice: Color negative film like Kodak Gold 200 or Lomography 400 gives a warm, nostalgic tone perfect for family moments.

3. Christmas Lights and Bokeh Nights
Holiday lights at night are basically film photography magic waiting to happen. Whether it’s your front yard, the neighborhood display, or a trip to a local light show, this is your chance to experiment.
🎞 Tips:
Use 800-speed film (Cinestill 800T or Lomography 800) if you can find it—it’s made for low-light conditions.
Try focusing manually to create big, soft light circles (bokeh).
If you’re using a disposable camera, shoot a mix—some close-up with flash, others farther away without it.
💡 Pro move: Hold a sparkler close to the lens (carefully!) or shoot through a frosty window for dreamy, glowy results.

4. The Gift Unwrapping Explosion
You know that moment—wrapping paper flying, ribbons on the dog, the pure joy on someone’s face when they get what they wanted (or the confusion when they don’t). Those are golden frames.
🎞 Tips:
Use the flash indoors if the light is dim, especially with disposable cameras.
Shoot fast! Once the paper starts flying, it’s over in seconds.
Capture reactions from multiple people—givers and receivers alike.
📸 Pro move: Give everyone a disposable camera before gift time and see the day from multiple perspectives. You’ll get hilarious and heartwarming shots you wouldn’t have caught otherwise.
5. A Roll of Memories: Christmas Morning on Film
The soft light creeping in, the smell of coffee, the excitement in the air—it’s cinematic perfection. Christmas morning is your chance to slow down, shoot intentionally, and tell the story of your family’s holiday.
🎞 Tips:
Start with the little details: stockings, breakfast, the view from the window.
Capture the atmosphere before everyone wakes up, then the joyful chaos that follows.
Don’t burn through the whole roll in 10 minutes—space it out to capture the full morning.
💡 Pro move: Choose one roll of film specifically for Christmas morning. Label it and store it with your negatives year after year. It’ll become a tradition worth keeping.
6. Holiday Portraits with Character
Forget stiff, over-posed Christmas cards. Film portraits have a softness and authenticity that’s unbeatable.
🎞 Tips:
Use natural window light whenever possible. Film loves it.
Ask your subject to hold a cup of cocoa, a pet, or a prop—it helps them relax and adds personality.
If you’re outside, try shooting around golden hour when the sun is low and warm.
📸 Film choice: Portra 400 or Kodak Gold 200 for warm tones and soft skin color. Disposable cameras also do surprisingly well here—especially for candid close-ups.
💡 Pro move: Set up a simple holiday backdrop (like twinkle lights or wrapping paper) and shoot an impromptu photo booth for friends and family.
7. The Ugly Sweater Party (Film Edition)
If there’s ever a time to shoot a roll of film just for fun, it’s an ugly sweater party. These nights are full of laughter, bad fashion, and unpredictable moments—perfect for disposable cameras.
🎞 Tips:
Bring a few disposables and pass them around. Let everyone take a turn.
The flash will make colors pop and capture that hilarious vintage energy.
Don’t worry about composition—this one’s all about fun.
💡 Pro move: After developing the film, make prints and mail them to your friends as “vintage party photos.” Everyone loves seeing their goofy selves through film grain.
8. Winter Walks and Cold Weather Film
Not every holiday shot needs tinsel and lights. Winter walks—bare trees, cloudy skies, cozy coats—make for moody, cinematic film photos.
🎞 Tips:
Overexpose by one stop to keep snow scenes from turning gray.
Be gentle with your camera in the cold—keep it inside your jacket between shots.
Black-and-white film (like Ilford HP5 or Kodak Tri-X) looks stunning in winter landscapes.
💡 Pro move: Shoot a few frames on both color and black-and-white film to compare the mood. The difference is striking.
9. The Holiday Film Swap
This is a fun one for the community-minded shooter. Grab a friend, each shoot a roll during the holidays, then swap and double-expose it. The results are unpredictable—and often beautiful.
🎞 Tips:
Use ISO 200 or 400 film to keep exposure balanced.
Shoot big shapes and colors; avoid overly detailed scenes.
Label your rolls clearly so you don’t forget which is which.
💡 Pro move: Post your results and tag #ShutterJunkiesFilmSwap. You might inspire others to try it next year.
10. Preserve the Past: Scanning and Sharing Your Holiday Film
Shooting film is half the magic—developing and sharing is the rest. When your rolls are ready, send them to a trusted lab (like, say, Shutter Junkies Photo Lab) for high-quality developing and scanning.
🎞 Tips:
Choose “high-resolution scans” for prints or digital sharing.
Save your negatives—it’s your physical backup.
Consider ordering doubles of your prints to share with family or to tuck inside Christmas cards next year.
💡 Pro move: Create a “Holiday Film Album” on your computer or a physical photo book. Add to it every year and watch your family history unfold in grain and color.
Why Film Feels Right at Christmas
There’s something poetic about using film to capture the holidays. It forces you to slow down, to think before you click, and to embrace imperfections. Every frame becomes intentional—every moment feels earned.
Digital can document, but film remembers.
You’ll see the warmth of tungsten bulbs, the texture of wrapping paper, the real color of candlelight. Even the occasional blur or lens flare feels like part of the story. Film photography turns ordinary holiday chaos into timeless memories.
And when your rolls come back from the lab weeks later, it’s like a second Christmas morning.
Final Tip: Make It a Tradition
This year, challenge yourself to shoot one full roll of film every Christmas. Label each with the year, the film type, and maybe a few notes on the back of the prints. Over time, you’ll build a visual timeline of your family’s holidays—captured in all their grainy, glowing glory.
So grab a few rolls of 35mm film, toss a disposable camera or two into the stockings, and get ready to shoot film this Christmas. The memories you make will last far longer than the batteries in your phone.
📬 Ready to Bring Your Holiday Film to Life?
Develop your rolls with Shutter Junkies Photo Lab — we process 35mm, disposable cameras, 120, 110, and Advantix film right here in Greenville, TX, and ship across the U.S.
Order film developing at:
👉 www.shutterjunkies.org
Disposable Cameras Are Back (Again) — And Here’s Why That’s Awesome
If you’ve been scrolling through social media lately, you’ve probably seen them — that nostalgic flash, the film grain, and those wonderfully imperfect snapshots. Yep, disposable cameras are having another big moment.
But this time, it’s not just a throwback trend. Companies like Fujifilm and Kodak are releasing new versions of their one-time-use cameras, showing that film photography isn’t just surviving — it’s thriving.
A New Generation Discovers the Joy of the Click-Wind-Wait
For anyone who grew up in the pre-iPhone era, disposable cameras were the gateway drug to photography. You took 27 shots, dropped the camera off for developing, and waited to see what you got — sometimes gold, sometimes total blur, always a surprise.
Now, Gen Z is rediscovering that exact magic. Influencers are bringing disposables to parties, weddings, and concerts. The “film aesthetic” is trending hard — and for once, it’s not being faked with an Instagram filter.
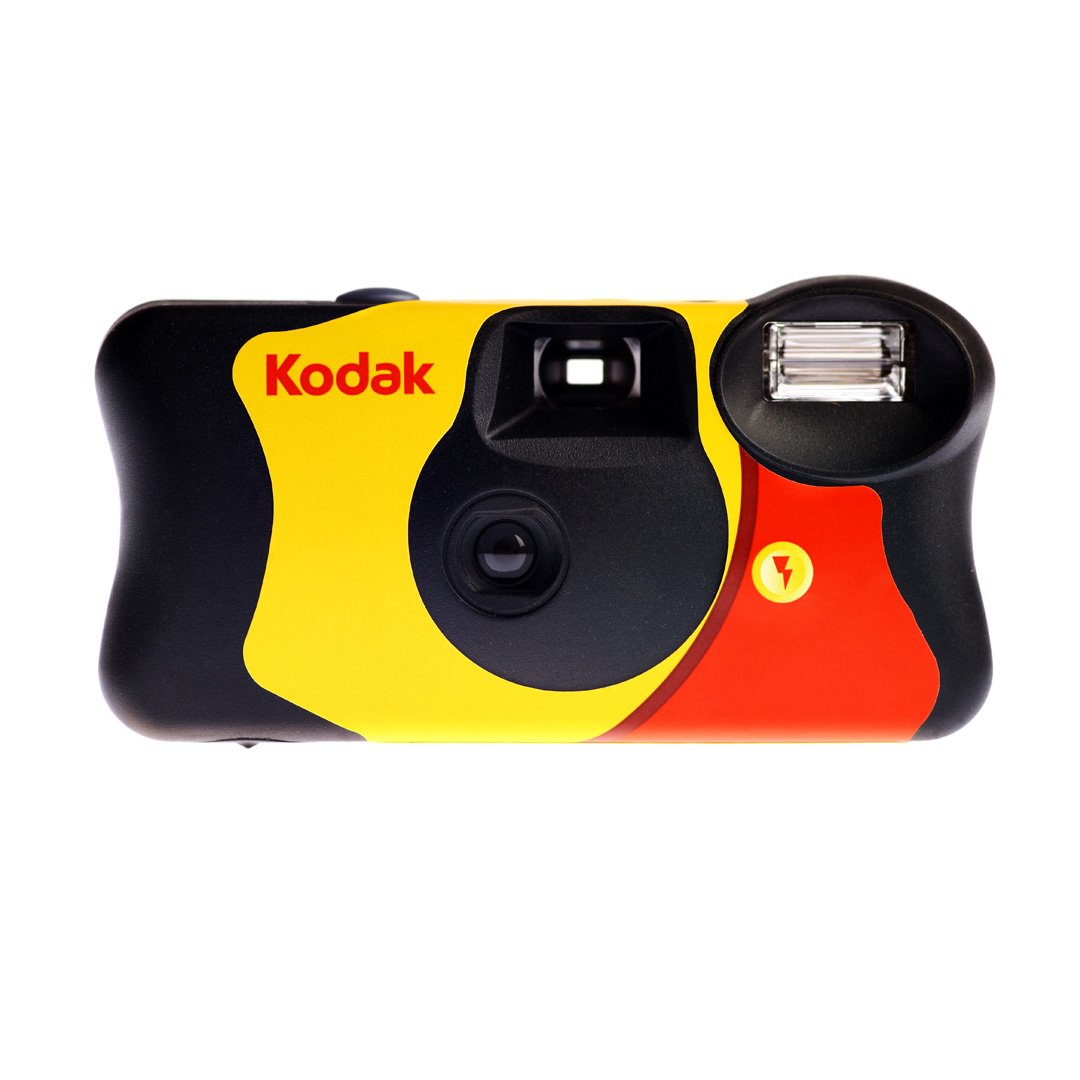
That demand spike has caught the attention of film giants. Fujifilm recently released a new QuickSnap 2025 edition pre-loaded with Fujicolor 400. Kodak, never one to miss the nostalgia wave, is experimenting with new packaging and even hybrid “digital disposable” devices aimed at the TikTok crowd.
And you know what that means for labs like ours? More film to develop, more grainy goodness to scan, and more happy customers reliving their favorite moments the old-fashioned way.
What Makes Disposables So Appealing in 2025
Sure, smartphones can outshoot them technically. But that’s not the point. Disposable cameras offer something that digital never will — intentional imperfection.
They slow you down. You only get a few dozen frames, so you think before you click.
They build anticipation. You don’t know how your photos turned out until you develop the roll.
They’re worry-free. No batteries to charge, no settings to fiddle with, no screens to distract you.
For parties, road trips, weddings, and family gatherings, they’re pure fun. Everyone can join in — no photography degree required.
And now, with fresh stock hitting the shelves from Fujifilm and Kodak, they’re easier to find (and more reliable) than the expired rolls that pop up on eBay.
The Shutter Junkies Take
Here at Shutter Junkies Photo Lab, we’re thrilled to see this comeback. We’ve been developing disposable-camera film for years, and it’s one of the most satisfying parts of the job. Each batch feels like opening a time capsule — laughter, chaos, and unplanned beauty, all captured on 35 mm.
So, whether you’re picking up the new Fujifilm QuickSnap or dusting off a classic Kodak FunSaver, we’re ready to develop, scan, and print every frame with the care it deserves.
Want to join the trend? Grab a few disposables for your next weekend adventure, then send them our way at ShutterJunkies.org. Because film photography never really died — it just needed a fresh flash. 💥