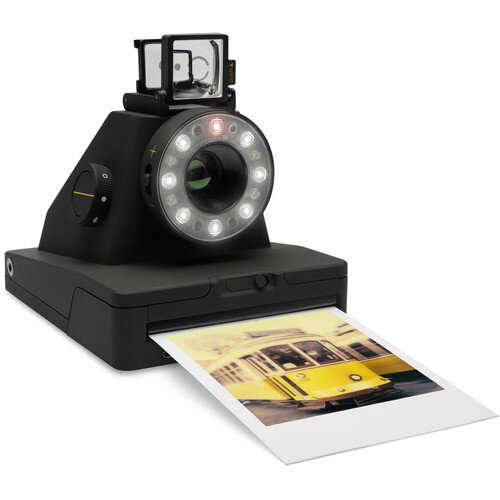
The Impossible I-1 Instant Camera - A Polaroid Film Camera
The Impossible I-1 Instant Film Camera has been out for a few years but its still an amazing device and takes great photos and Polaroid I-Type film is available everywhere!
I have a lot of instant cameras. It honestly is a real problem for me. They are all just so fun and cute! But among the dozens and dozens of modern and vintage instant cameras I own, there’s one instant film camera that is my absolute favorite! Today we are going to be talking about that camera, the positives, negatives, and everything in between!
What is the Impossible I-1 Instant Film Camera
It was the first newly designed Polaroid instant film camera to be released in decades. The Impossible Project had been recreating Polaroid instant film for years when they decided to branch out into camera design. Its solid matte-black finish and really almost minimalist design made it unique in the world of colorful and find vintage instant cameras from polaroid and even the Fuji Instax cameras. The I-1 comes equipped with Bluetooth, an app for your iPhone or iOS device as well as Android, and for the first time in a Polaroid Camera, it comes with an internal, rechargeable battery. The I-1 can use Polaroid 600 film but was designed to use I-Type film, The Impossible Project’s film that came without a battery pack.
The Impossible I-1 has a built in LED flash system which produces a significant amount of light. The flash can be turned off using a switch on the side of the lens. There’s also an exposure adjustment switch on the other side of the lens with a + and - allowing you to make minor adjustments in the exposure level.
The Impossible I-1 Instant Film Camera Specs
Optics
Focal Length - 82-109mm
Aperture - f/10 to 67
Focus Type - Auto & Manual Focus
Minimum Focus Distanc - 1 foot/.3 meters
Exposure Control
Shutter Speed - 1/250 to 30 seconds
Flash
Built-In LED
General
Tripod Mounting Thread - 1/4”-20
Battery Type - Built In
Dimensions (WxHxD) - 4.3 x 5.7 x 4.3” / 10.9 x 14.5 x 10.9cm
Weight - 15.5oz / 439.4g
How Do You Use the Impossible I-1 Camera?
Using this camera is really easy, even if you’re completely new to instant cameras. Most of the cameras functions are automated by default, but can be overridden using the app. Here’s a quick run down on how to use the Impossible I-1 camera.
How do I Load I-Type or 600 Type Film?
Loading film into the camera is easy. There’s no difference in how you load the film, regardless of what type you are using. I-type and 600 type film load exactly the same way. On the front of the camera is a small slider switch. While holding the camera facing you, slide the switch to the right and then pull down on the front film door. Open your pack of Polaroid I-Type film or 600 Type film and slide the cartridge into the camera, narrow end first. Your film pack will reach a point where it stops sliding easily and appears to almost be in place. Give the pack one more little push, which will force the narrow plastic tab down on the front of the film cartridge. Now simply close the film door. The camera should automatically eject the dark slide. Once the dark slide is ejected, you’re ready to use your camera!
How do I take Pictures with the Impossible I-1 Camera?
You have a couple of options with the I-1 instant film camera. You can just use the camera and snap away, or you can use the app to take photos. Both options work great and mostly depend on what kind of photo you are trying to take.
To use just the camera, you turn the side rotary switch to the solid white circle, which turns the camera on. The LED ring flash will light up and indicate how many images you have left in your pack. From here, you can turn the flash off or on and adjust the exposure by using the switches on either side of the lens.
Once you have everything set, its time to frame up your picture. For me, this is the most frustrating part of using the camera. The viewfinder is a dual element device that requires you to align a smaller circle on the back element with a larger circle on the front element. It works but it just doesn’t feel precise to me. I find myself struggling to get it right sometimes. But it does always give me a pretty accurate image when comparing the picture to what I actually saw through the viewfinder. The viewfinder is held on magnetically so make sure that it is always snuggly in its correct position as it can be knocked off easily.
A screen shot of the Impossible I-1 Camera’s app as it appears on iOS devices.
Using the app to take photos is a little more complicated. The app allows for the following modes:
Remote Trigger
Manual Mode
Self Timer
Double Exposure
Noise Trigger
Light Paint
Color Paint
Additionally there’s a scanner mode that allows you to take a picture of your polaroid with your phone. There’s also a handy link to help you buy a new Polaroid Instant Camera under the “upgrade” button.
A screenshot of the app in manual mode.
Each of these modes is pretty much self-explanatory. I use the remote trigger quite a bit as well as the manual mode. I love the manual mode because it allows to make sure I’m getting the right exposure rather than wasting film. The manual mode uses your phones camera as a light meter and helps you to adjust the settings manually to get the exposure you want. Its very handy!
Double exposure is fun also, as is the light and color paint features. I’ve personally never used the Noise Trigger, but its a nice option to have.
Are There Any Problems with the Impossible I-1 Camera?
No camera is perfect, so definitely yes. After several years of use, I really only have two complaints about this camera. The first is the viewfinder, as I’ve already said it can easily be knocked off or the elements won’t extend all the way when you release them. It is a little difficult to use sometimes as well. But the biggest issues I’ve found is the internal battery. Every time I pick up this camera to use it, the battery is dead. Now this is probably completely my fault, but its just a pain to remember to put it on the charger ahead of time. I understand why Impossible designed the camera this way, but I can also see why Polaroid originally put the battery packs inside the film cartridges. If you just make sure and put this camera on the charger ahead of time, you’ll never have an issue!
If you’re having problems getting your images to come out, make sure you check our post about troubleshooting your Polaroid Film by CLICKING HERE.
A Few Impossible I-1 Camera Tips
Low-Light is not this camera’s friend - us it in places with lots of light!
Every time you power up the camera, the LED’s on the flash tell you how many exposures you have left in your pack of film
Double check your viewfinder to make sure it is on snuggly and that the elements are both in their full upright positions.
Charge your battery often!!!
Can I still buy an Impossible I-1 Instant Film Camera?
Yes! But finding one can be a bit tricky. They are available on Amazon for $199 in new condition. They are also available on Ebay for various prices ranging from $179 to over $250. You can find them in used condition in a lot of different places from Facebook Marketplace to Craigslist. These cameras haven’t been produced in several years so finding new cameras is only going to get more difficult as time goes on. But this is a great camera to have and has been extremely reliable and offers quite a bit of control over the image when shooting in manual mode with the app!
Where can I buy film for the Impossible I-1 Instant Camera?
It is actually available at a lot of different places! You can head on over to the Polaroid Website and by film directly from them! Or, check out my earlier blog post about “Where Can I Buy Polaroid Film” to find a shop near your or to order film online!
And when you get ready to put all of those amazing photos you’ve taken in to an album, read all about The Best Photo Album for Your Polaroids Here!
Is Kodak Gold 200 a Good Film for Beginners?
Kodak Gold 200 is an amazing film for beginners to use in daylight situations!
When you’re just getting started with film, it is really hard to know what film is best to start with. Film is hard to find in local stores and there aren’t a lot of film photographers around so finding individuals to talk with and compare notes with is almost impossible. There are resources out there on the web but most are really technical and not really friendly for a new film photographer.
In this article, I’m going to try to keep things simple and talk about one specific film, Kodak Gold 200 35mm and answer the question:
Is Kodak Gold 200 a Good Film for Beginners?
To get the point, absolutely! And mainly because of its affordability in comparison to its quality. Kodak Gold 200 has a definite look to it. While you can coax some very beautiful images out of it, it has a point-and-shoot quality kind of feel to it. It’s grain can be a little course in low light situations, but it can be a really nice effect.
The film is rated at ISO 200, so it works best in bright daylight. It has a decent enough latitude to work in the shade and even indoors with a flash. The film really struggles and the images begin to fall apart in low light scenes with out a flash.
Where Can I Buy Kodak Gold 200?
Kodak Gold used to be available in pharmacies such as CVS and Walgreens, but it isn’t carried their any longer. Walmart and BestBuy have dropped it also. You can still purchase Kodak Ultramax at some of those stores, but Kodak Gold 200 has gotten really hard to find.
We carry Kodak Gold 200 in our online store and you can purchase it HERE. You can also find it readily available on Amazon by click HERE. Beyond that, you can keep an eye out in stores because it has a tendency to pop up from time to time!
Ideal for Bright Daylight: With an ISO 200 rating, Kodak Gold 200 performs best in well-lit, outdoor conditions, delivering vibrant colors and fine grain.
Versatile for Various Lighting Conditions:
Performs well in daylight and outdoors
Performs ok shaded areas or indoors with a flash.
In low-light settings without a flash, images may have increased grain and reduced clarity.
Affordable and Beginner-Friendly:
Combines affordability with quality, making it accessible for beginners to experiment without high costs.
Its warm tones and natural color reproduction are particularly appealing for novice photographers.
Availability:
Previously common in local retail stores, but now more accessible online through various retailers.
Recommended for Beginners:
Kodak Gold 200 is user-friendly, cost-effective, and produces high-quality results, making it a great starting point for those new to film photography.
What's Wrong with My Polaroid Film?
Troubleshooting your Polaroid film can be frustrating! This easy guide will give you an idea of where to start!
Last Updated: April 2, 2024
You got finally got your Polaroid camera and film and you’re excited about finally getting to take some photos. You get your model (your cat, dog, mom, dad, friends, whoever) posed just right and click the shutter release and hear that oh-so-pleasing motor noise as the first frame is eject. You wait patiently as the image slowly appears. Its kinda faint and has some weird coloring, got some smears but those are hopefully fading, but there’s an image there. You wait some more… And some more, for what feels like forever. When finally you figure the image is done. But as you behold your first polaroid image, the excitement melts into disappointment.
“Did I do something wrong?” is always your first thought.
“Maybe its the camera?”
“Maybe its the film? Is my film bad?”
What’s Wrong with My Polaroid Pictures?
There are a lot of things that could go wrong during the process, so don’t feel bad if your first images aren’t coming out right. Here’s a quick reference guide of things you can do to help make sure you get the best possible images when using Polaroid Film.
1. Don’t Let Any Light Hit the Polaroid When it Ejects from the Camera
Most of the newer cameras come with a frog tongue already installed in the slow where the film is ejected for this very purpose. The old Polaroid films were not as sensitive to light as the modern film is. Beginning with the Impossible Project and then Polaroid Originals and now back to Polaroid, all of the modern film suffers from a very serious light sensitivity issue. I didn’t learn this was an issue for quite some time back in the Impossible Project days and so a lot of my images were ruined from light exposure early in the developing process.
The best way to protect your film is to immediately get it out of any light, even if its still under the frog tongue. I make a practice to have a dark bag or keep the film box handy and as soon as the images are ejected, I put them directly in the dark somewhere and don’t look at them until they are completely developed.
If you’re using an older camera, like a Polaroid SX-70, you can purchase a frog tongue for your camera and its very easy to install. I have one for my SX-70 and it has saved me a lot of heartache with the developing process.
2. Temperature Control is so Very Important for Polaroid Film
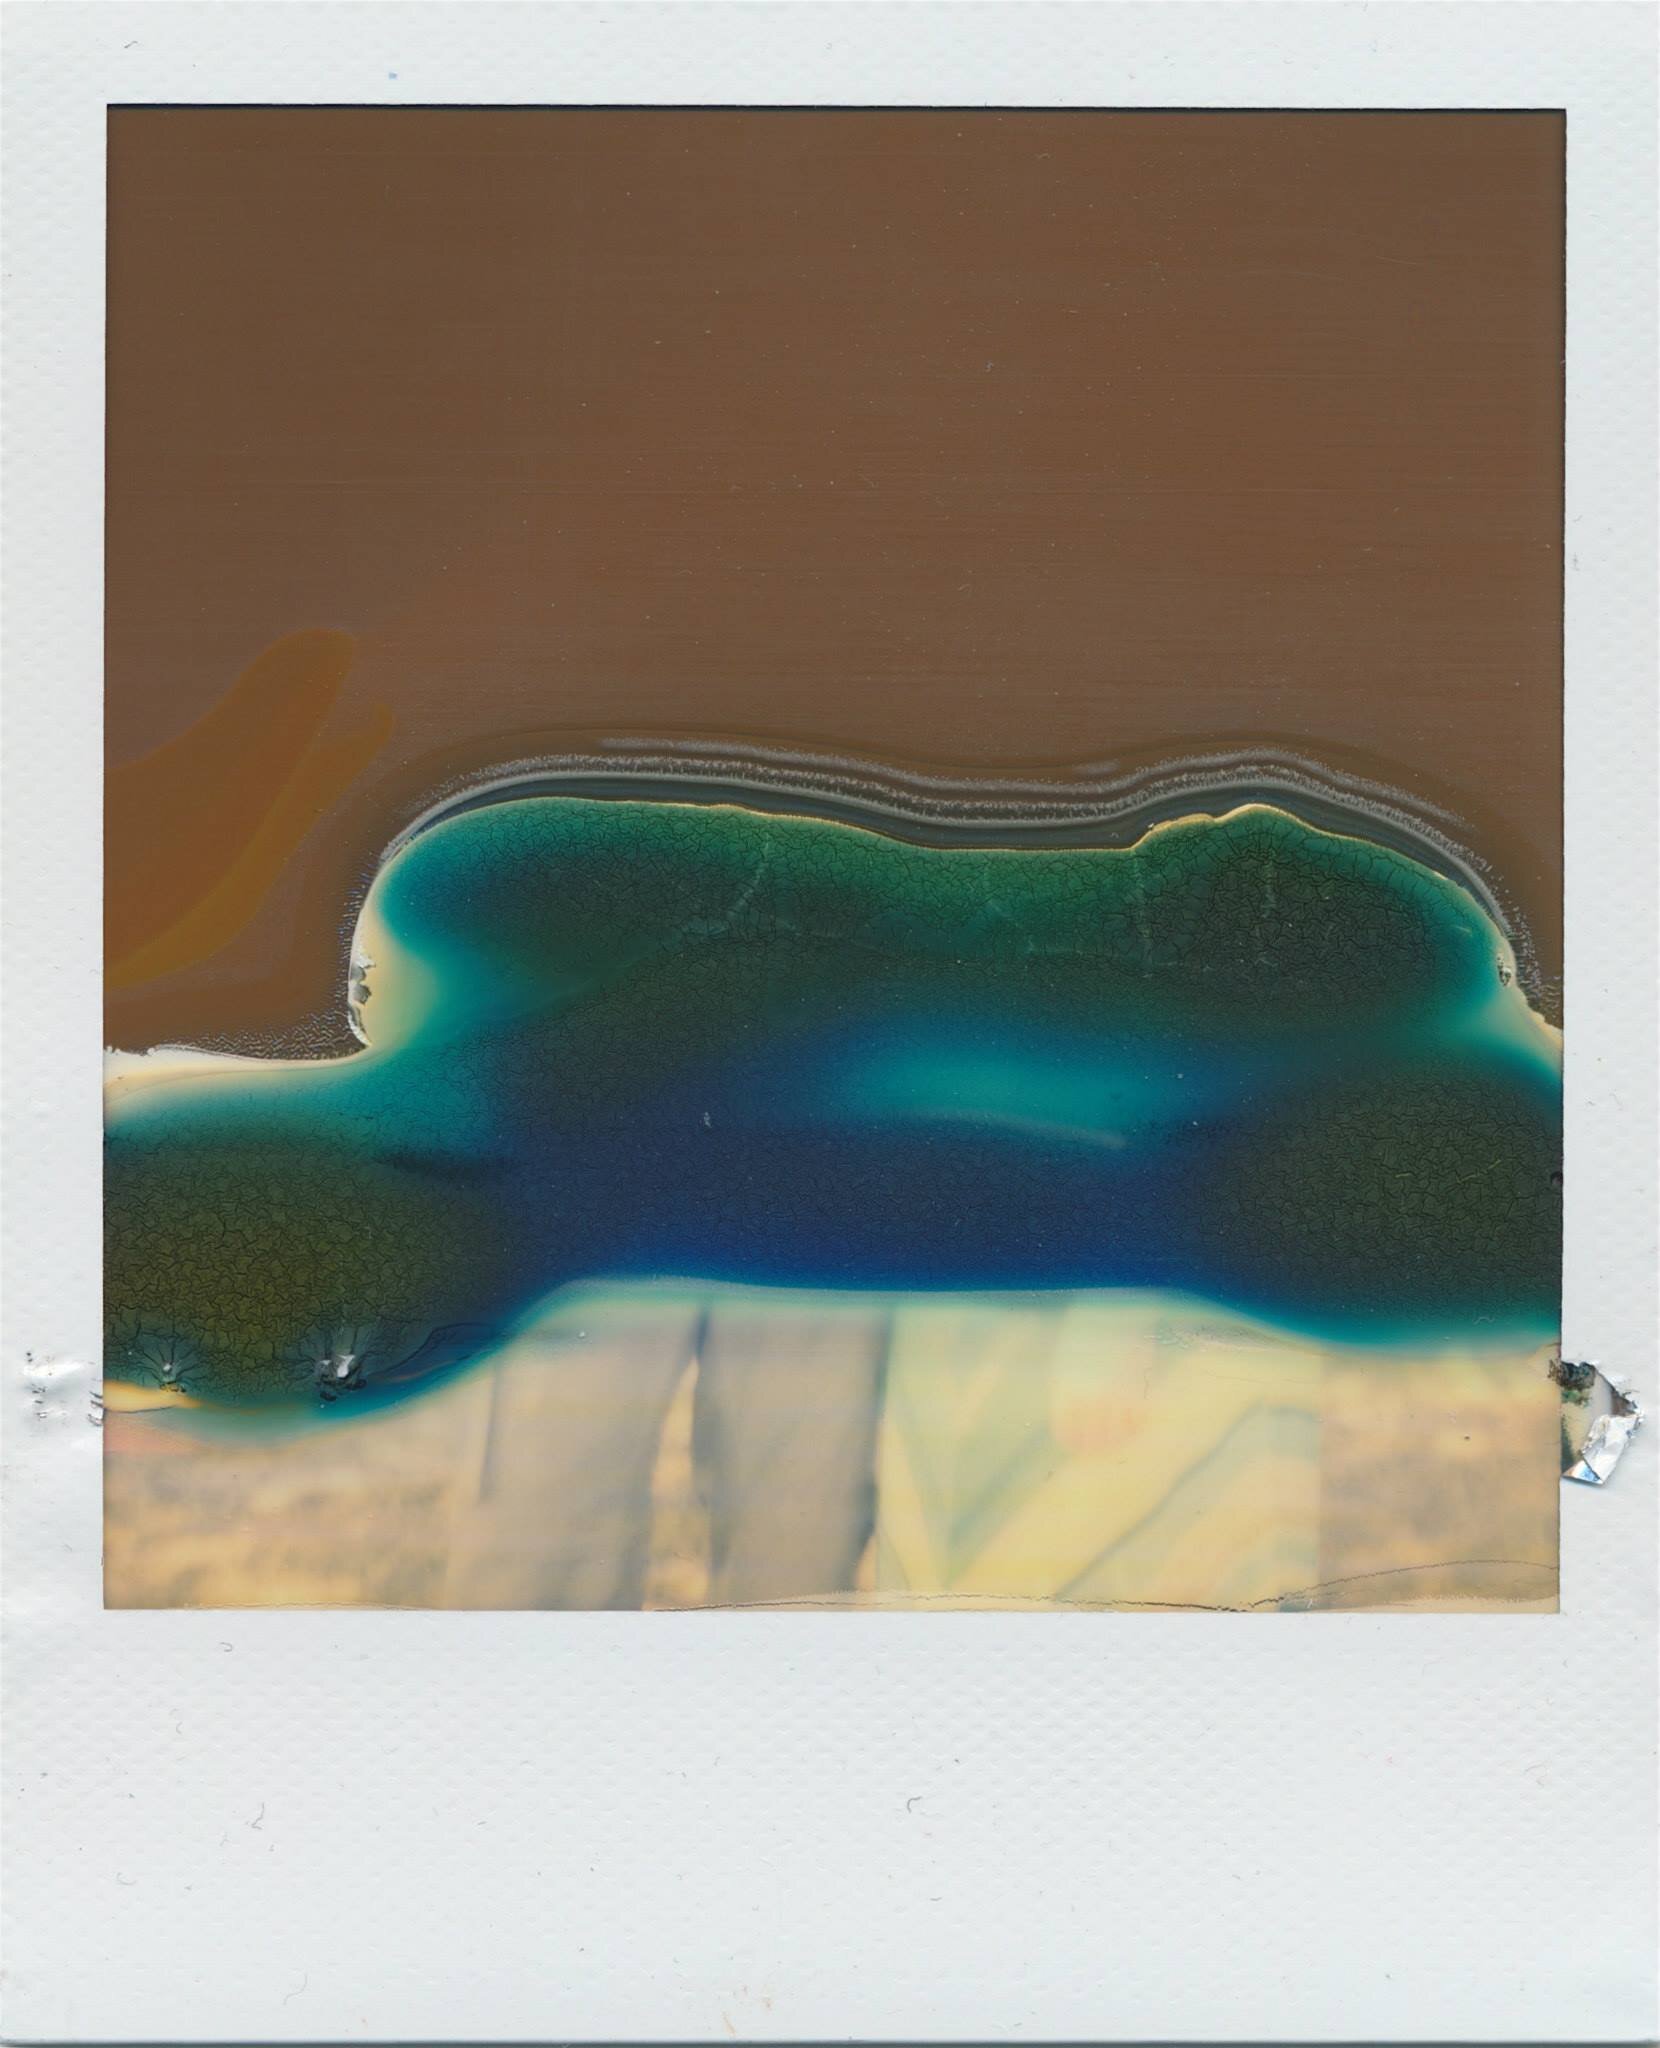
Unused film exposed to heat and cold will cause a drastic color cast in your final image. Developed film will have either a yellowish or purple hue. Its definitely noticeable and once exposed to drastic temps, the film will not develop correctly.
Polaroid film also needs a stable temperature to develop correctly. If it’s cold out, stick the film in a pocket close to your body to keep it warm. If its warm out, get the frame somewhere cool as quickly as you can. Polaroid produces what is a fair weather film and using it in any harsh conditions means that you must give the film special care.
3. Avoid Purchasing Older Polaroid Film Packs
As Polaroid film ages, it doesn’t always seem to produce as good of results. Many of the film packs actually have their manufacture day stamped subtly somewhere on the box. Look for it and try to get the newest, freshest packs you can get.
Also, Polaroid does continually make small shifts and adjustments to their film. The new films generally offer the best results. While you can buy Polaroid film from local retailers like Target, Walmart, BestBuy, and others, I have found that ordering it directly from Polaroid gets me the freshest film packs.
4. Keep Your Rollers Clean
In the beginning, it was very common for the chemical pods in the films to leak out a little. Often the rollers of your camera would have dried chemical build up on there after a few photos and that will cause the rollers to struggle to spread the chemical evenly across the exposed film. A Q-Tip and a little Isopropyl Alcohol will clean those rollers right up!
5. I’ve got Blue Streaks on my Polaroid Film
This issue first showed up after then name changed from The Impossible Project to Polaroid Originals. The blue streak issue has mostly gone away with the newest of films, but it occasionally still shows up. Especially in older films. Unfortunately, there isn’t really anything you can do for the blue streak issue. They can sometimes add to the look but more than likely they’ll just mess up your image. This phenomenon has a specific name, Opacification Failure.
6. My Polaroid is Blurry
More than likely, its motion blur from a long shutter speed tryin get film exposed properly. If you’re images are turning out blurry, then you can move to an area with better lighting, or add/turn on the flash on your camera.
It could also be an issue of you being too close to the camera. All cameras/lenses have a minimum focal range. The minimal focus range for most Polaroid Instant Cameras is about an arm’s length. Anything close just won’t focus.
7. My Polaroid is Too Dark
The image is under exposed. Polaroids require a decent amount of light. Daylight or a flash are almost always required to get a proper exposure. Try turning your flash on, using a reflector to move some light around, or move your subject to a location where there is plenty of light.
Polaroid 600 and I-Type film work a little bit better in darker situations than the SX-70 Polaroid film does. Polaroid SX-70 film requires ridiculous amounts of light to expose correctly!
Other Polaroid Trouble Shooting Resources
If these tips don’t help you get the best photographs ever, then head on over to the Polaroid trouble-shooting page HERE. There are a lot of resources there to help you figure out what exactly might be going on with your film.
I’ve got a few other resource posts on Polaroid Film - take a look at those post by clicking the links below:
Is Polaroid Bringing Back Peel-Apart Film?
Where do I get Disposable Cameras Developed?
You’ve got options when it comes to disposable camera developing. Depending on your needs you can select from local shops, big box stores, and mail-in photo labs.
Last Updated: May 16, 2025
Even in 2025, disposable cameras are still so much fun to use and the photos turn out so great. But when the last picture is taken - where do you go to get a disposable camera developed? Most people end up just throwing their cameras in a draw for a few moths, or a few years, and some just never get them developed at all. How tragic is that!! In this blog post, we are going to focus on help you getting those images out of that camera and on to your phone, social media, or printed and in your photo album!
The good news is that a disposable camera is really just a plastic camera with a roll of film inside. Any place that can develop film can develop your disposable camera. There are a lot of options to get your disposable camera developed. There are few things to consider however when looking at your options, especially if you’re looking for the cheapest place to develop disposable cameras. Here’s a list of things you should check on before entrusting your images to someone.
The Price and what it includes
The Scans (what resolution and how are they delivered)
The Prints (are prints included and can you order prints after you get your images back)
The Negatives (do you get your negatives back or does the store dispose of them after scanning)
Where can I get my disposable camera developed online?
There are a lot of great places to get your disposable camera developed online. Typically, these photo labs are referred to as Mail-In, most offer great pricing and a relatively quick turn around, often times not much more than it takes to go through a local big-box retailer. Most online film processing companies offer more options and a better value for your money. Here are a few of my favorites:
Shutter Junkies Photo Lab - The Disposable Camera Experts
Total cost - $12 to $27 per Disposable Camera
Shutter Junkies specializes in Disposable Camera developing (also known as Single Use Cameras) For $12, we will process and scan your images in a higher resolution. You can purchase 4x6 prints at the time of your purchase for an additional $12. But if you would rather wait and see how your images turn out before you order prints, you can easily order them from your online gallery and have them delivered right to your door! Negatives are returned to you also!
A Lab Dedicated to Disposable Cameras, Single-Use, and Simple-Use Cameras
Only $12 for our Basic scan size
We return your negatives to you so you can scan and print from them as much as you like in the future
Shutter Junkies is a small business photo lab that focuses on quality and customer service. While we do develop all types of film, we work mostly with disposable cameras. Old disposable cameras are not a problem for us either. Underwater disposable cameras are also something we work with regularly. We can also handle any brand of disposable camera, from Kodak disposables to Fuji disposables. If it’s a disposable or a single-use or simple-use camera, we can develop it!
If you’re looking for great customer service and a personal touch, we’re the lab for you! Click the button below to order processing for your disposable camera!
The Darkroom
Total cost - $16 to $32 per Disposable Camera
The Darkroom is the largest online film lab and while they do develop disposable cameras, it isn’t their main focus. Their pricing starts at $15 and they will return your negatives to you. Here’s what you get as part of the basic package at The Darkroom:
Small Scans (good for web usage only) are included
Medium Scans (small prints only) add $3
Large Scans (large prints and good for archiving) add $8
Color Prints (4x6) add $9
Negatives returned
If you are going to use the Darkroom I would advise spending the extra $8 to get the large scans so you can print them on your own. There are also options for your prints such as borders and glossy or matte finish. The Darkroom does recycle your disposable camera as well. Click here to check out their page and get more information.
Richard Photo Lab
Total cost - $22 to $32 per Disposable Camera
Richard Photo Lab is another great lab that caters more to professionals. They have a lot of really detailed options to choose from, which can be a little overwhelming for some customers.
The prices are Richard Photo Lab are really reasonable and the quality of their work is amazing. Developing a roll of 35mm c-41 film is $10. From there, you’ve got a lot of options to choose from. Here’s a pricing breakdown:
Developing Only - $10
Small Scans (good for web usage only) add $12.98 ($22.98 Total)
Medium Scans (small prints only) add $14.98 ($24.98 Total)
Large Scans (large prints and good for archiving) add $21.98 ($31.98 Total)
Color Prints (4x6) add $5.40
Negatives returned
You’ve also got options to push and pull your film (over or underdevelop) and you can choose if you want your negatives cut or returned in a roll. Check out Richard Photo Lab by CLICKING HERE!
Process One
Total cost - $10 to $22 per Disposable Camera
Process one is another great lab with really great rates! Developing your Disposable camera starts at $4.99 per roll and 4x6 prints can be added for $0.40 each. Digital scans are all an additional $4.99. Process One’s options are a little more compartmentalized when it comes to ordering, but if you’re shopping for something very specific or aren’t concerned with scans, they are a good option to consider!
MPIX
Total cost - $14 and up per Disposable Camera
While MPIX primarily works as a photo prints business, they do develop 35mm film and scan as well. For $13.95, MPIX will develop your disposable camera, scan it, and upload your images to an online gallery. There’s an option to get advanced scans also for an additional fee. MPIX also returns your negatives, which is a plus.
What’s the Process for Developing my Disposable Camera online?
While there are several different online photo labs you can choose from, the process for each is almost the same. Here’s how to develop your disposable camera online:
Purchase developing from the companies website.
Mail in your film to the specified address - usually instructions are included when you purchase processing and will be emailed to you. If you’re worried about your film, make sure and get a tracking number so you can make sure it arrives safely. We recommend using USPS Ground Advantage as it is the most affordable way to ship with a tracking number, but you might want to check with the lab you are mailing you cameras into to see what works for them.
Wait…. This is the hard part. Most labs do not email you to confirm that you order has arrived, but Shutter Junkies will send you an email to let you know that your order has arrived and is ready for processing. The wait time to get your film back can vary for a lot of reasons, but normally it takes between 2 to 6 weeks to get your film back from an online photo lab.
Check your email! Once your images are developed almost all online film labs will send you an email with the link to your online gallery. Usually a tracking number is also mailed out for prints.
Check your mail for your prints order!
Where Can I get My Disposable Camera Developed Near Me?
If you’re looking for some place local to get your film developed, there are plenty of options out there and one of these stores is probably close to you. Know what you’re wanting when you go in and ask questions if they do not have information posted about packages and pricing. You definitely need to ask if you will get your negatives back. Negatives are your originals and you can actually scan and print from them infinitely. As a professional, I always want my negatives back and I avoid certain stores because they do not return your negatives. If the negatives aren’t really important to you, then this won’t be an issue.
Here are some stores that have locations nation-wide that you can visit to get your film developed
Develop Disposable Cameras at Walmart
Walmart does still develop disposable cameras. You’ll have to drop off your cameras at the store and wait for the digital images to be emailed to you later. Walmart does not return your negatives to you, so you’ll just receive the scanned images in digital format for download from their site.
Once you arrive at your local Walmart, you’ll need to make your way to the electronics section. Disposable camera developing is something not everyone in the store knows how to do so you’ll need to find an electronics associate to help you. They can take down your information and take your camera from you. When your prints are ready, you’ll pick them up in the same location.
Cost to Develop Disposable Camera at Walmart
Walmart charges around $10.96 to develop a disposable camera with 27 exposures, which includes 4x6 prints. You can also select double prints for an additional fee. Walmarts pricing model is based on the number of exposures rather than a fee for processing like most other labs charge.
Develop Disposable Cameras at CVS
CVS is a very familiar and convenient stop for many! If CVS is a regular stop for you, then dropping your disposable camera off at CVS might be your best option. CVS develops color disposable cameras and color 35mm film. They do not return your negatives but the will upload your images to an online gallery for you and you’ll receive a set of prints.
Once you arrive at the store, you’ll need to make your way to the photo center. At our local CVS, there is almost never anyone even near the photo center, but usually if you just find an employee either they can help you or they can find someone who can.
Cost to Develop Disposable Cameras at CVS
CVS uses a similar method as Walmart and charges you according to the exposures on the camera. Since most disposable cameras have 27 exposures, the cost to develop is $14.99. This price includes a set of 4x6” prints and you’ll receive digital copies of your images in an online gallery. CVS does not return your negatives and often times they are quite slow to return your images to you. Their website advertises that it only takes 7 days to get your disposable camera images back, but many of our customers have reported that it often takes 2 to 4 weeks.
|
Store |
Website |
Price Per Camera |
Scans Included |
Digital Delivery |
Prints Included |
Negatives Returned |
|
Walmart |
$10.96 |
Yes |
CD |
Yes |
No |
|
|
CVS |
$14.99 |
Yes |
CD, DVD, Or USB |
Yes |
No |
|
|
Walgreens |
$15.99 |
Yes |
CD |
No |
No |
2025 Update on Using Big Chain Stores…
Since the beginning of 2021, I have been getting reports of ridiculously long lead times to get your film returned to you by both CVS and Walgreens. I’ve been hearing the prices are as high as $25 per camera and 12 weeks weeks to get your images back. CVS, Walgreens, and Walmart have also started using a 3rd party company to process their film, which means when you drop your film off, it gets shipped somewhere else. We’ve had many customers send us their disposable cameras and tell us that CVS and Walgreens just flat out refused to develop them. Save yourself lots of time and money and head over to our website and GET YOUR CAMERA DEVELOPED FOR LESS!
Several larger cities have film developing labs locally, a simple Google search will help you to locate any labs that might be nearby.
Don’t let those disposables just sit around!
There are a lot of great options out there for developing your disposable cameras! But letting them sit around can be a bad idea. Kodak and Fuji recommend getting your disposable cameras developed immediately after exposure. If you keep them in the fridge after using them, you could possibly wait up to 6 months, but the images will begin to deteriorate the longer they are not developed. If you’re wondering if you can develop old disposable cameras, then CLICK HERE to check out my article on the topic to get more information.
If you need more information about disposable cameras, like where to buy disposable cameras or which disposable camera is the best, check out our blog post with everything you need to know about disposable cameras by clicking HERE!
The Summer '21 Trend You Don't Want to Miss!!!
Make memories this Summer with Disposable Cameras!
Summer is almost here and there are all sorts of new trends in fashion, music, movies, and fun on the horizon. But today we want to talk with you about one new photo trend that on the rise on Instagram and Twitter and is set to be the BIG DEAL for Summer 2021.
And that big deal is…
Disposable Cameras!
Why Disposable Cameras are Great for Summer
When it comes to summer and fun, you don’t want a camera that’s going to slow you down! here’s why disposable cameras are great for everything you’ve got planned:
Small & compact
Cheap
Flexible for any shooting environment
Easy to use for anyone that wants to pick up a camera and get great photos!
Night or Day - The Look is Amazing!
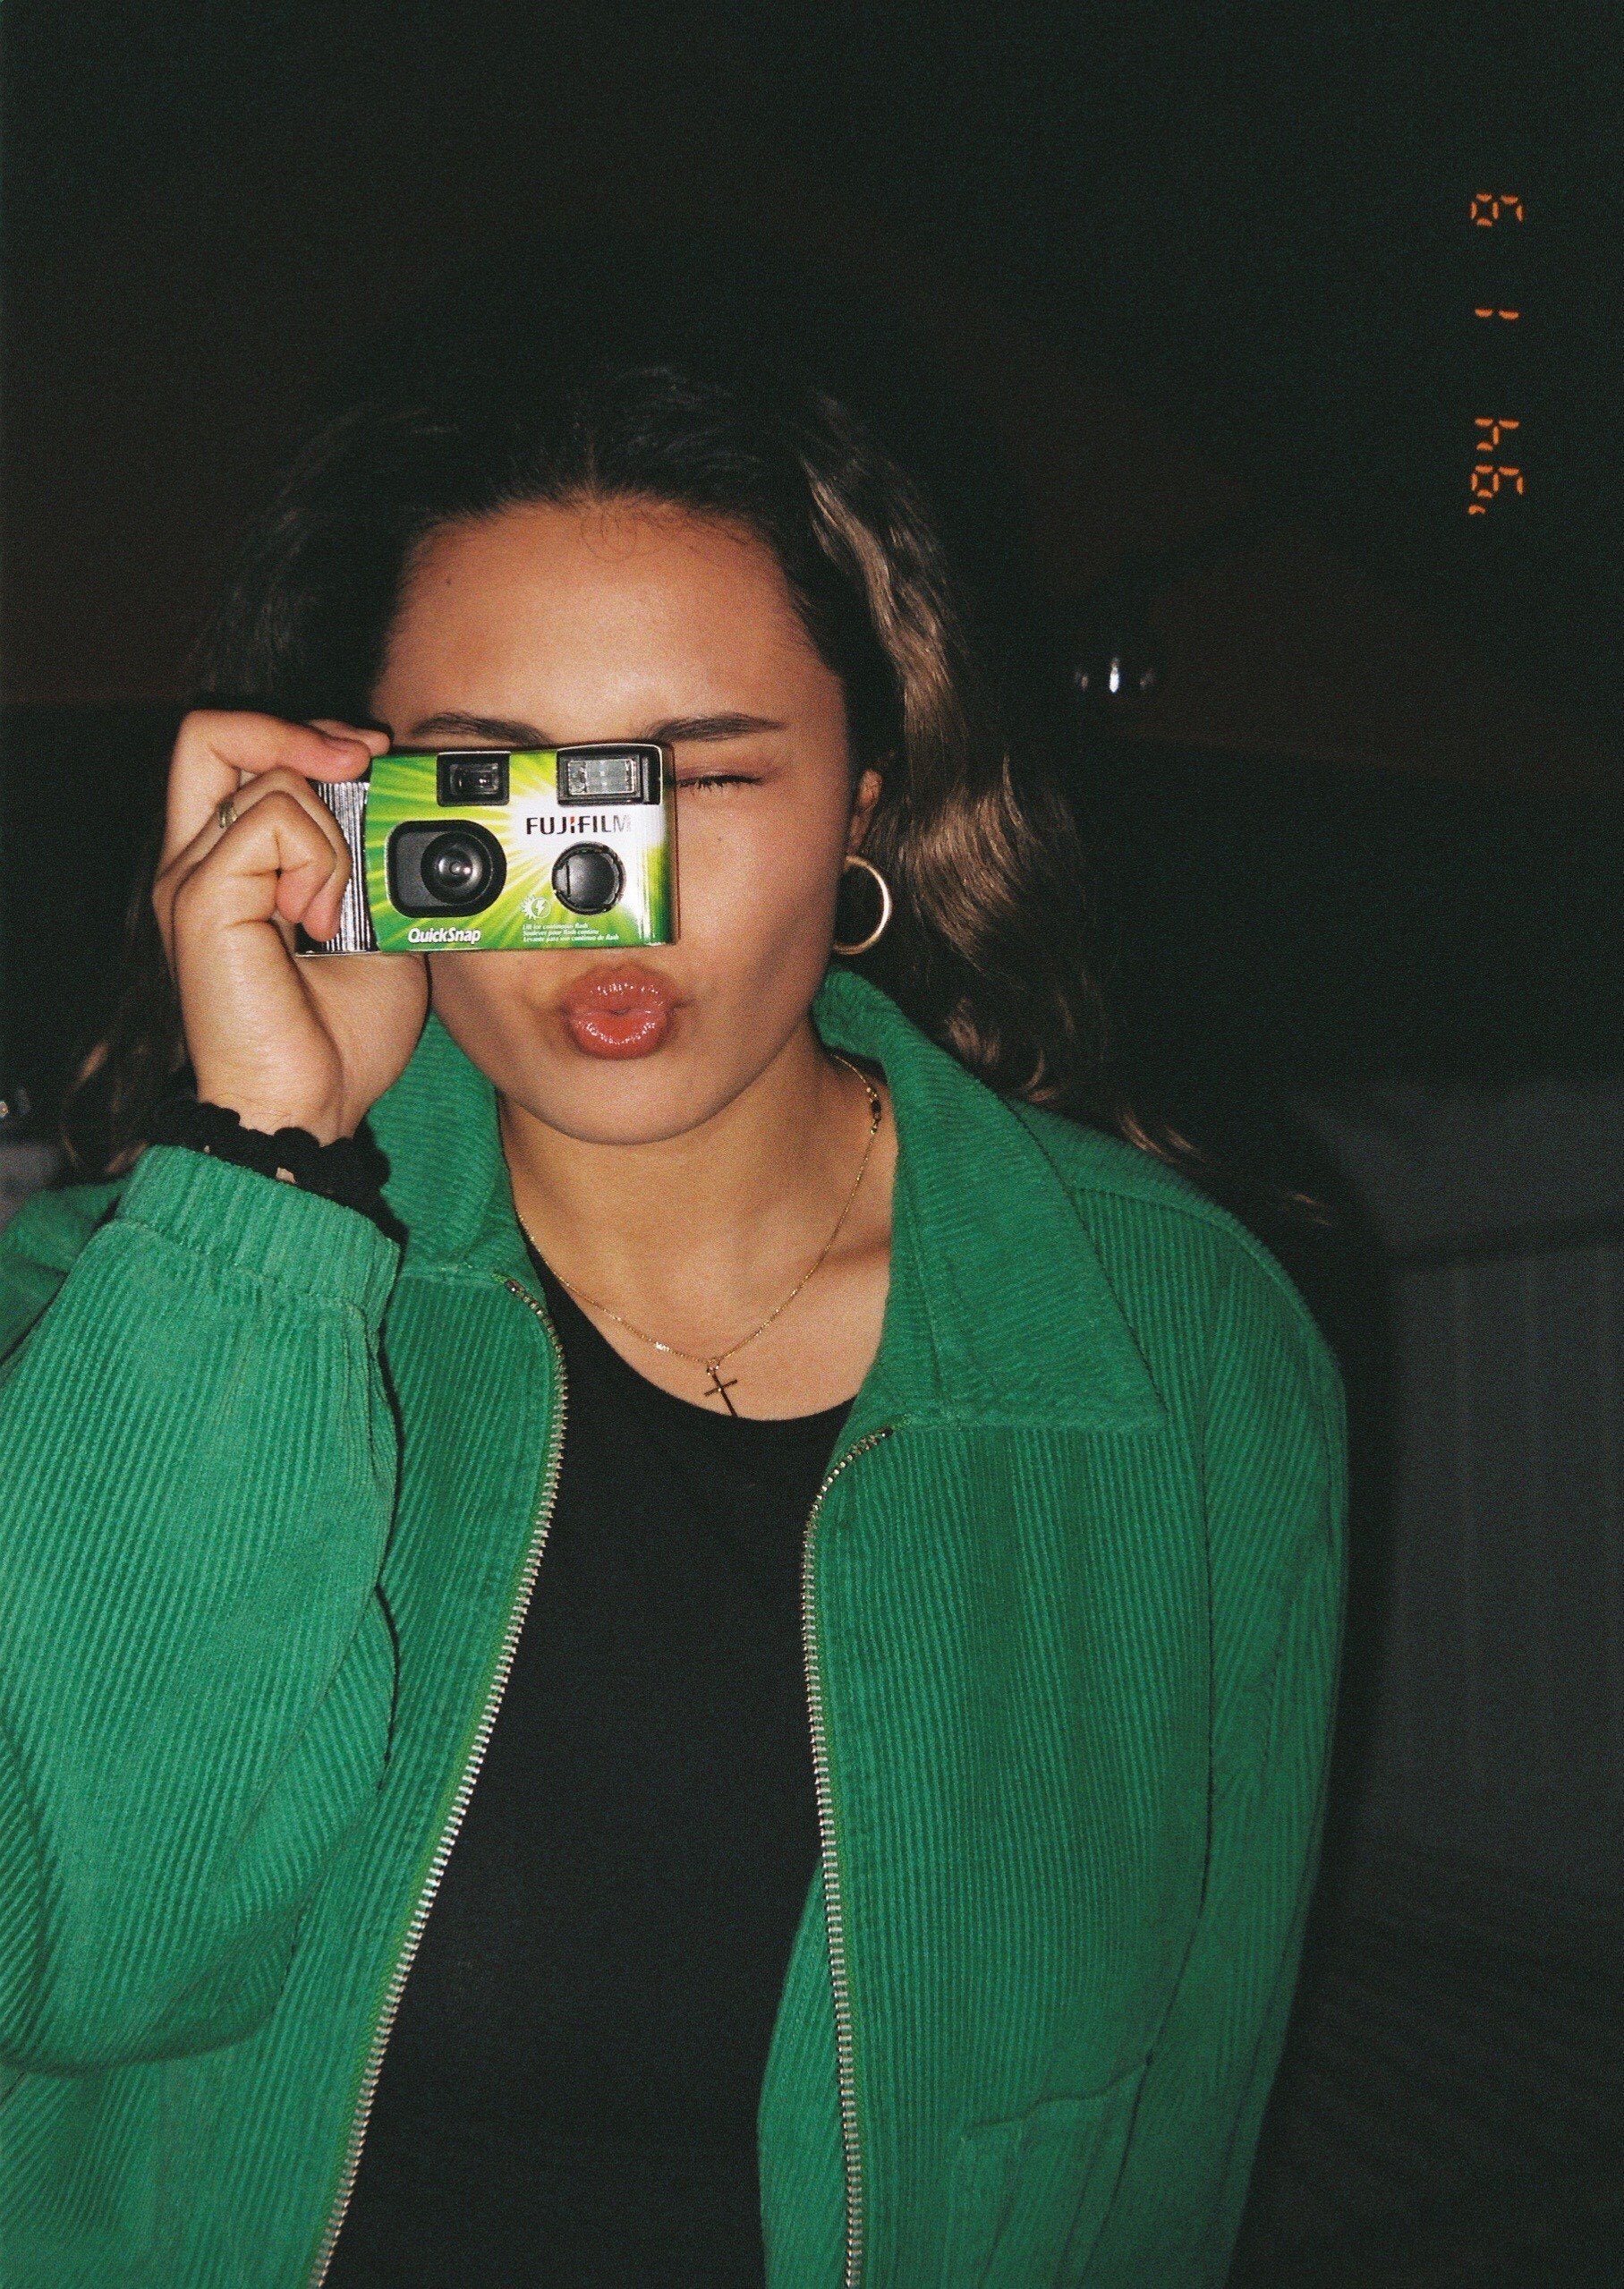
Disposable cameras produce a really unique look. The plastic lens, the front facing high discharge flash tube, the grain and look of the film, and sometimes the occasional finger that gets in the way, disposables produce a really unique vibe that’s defining the Summer of ‘21. If you’re shopping for a camera you can use day or night, then you definitely want to pick up the 800 ISO film speed models. We carry the Kodak FunSaver in our online store - CLICK HERE TO CHECK IT OUT! - its a great night or day disposable.
Getting the Film Developed is Easy!
Even if you’re on the road, you can just drop your camera (or the film by itself if you want to open up the camera - follow this helpful guide to get the film out of your disposable) in the mail or simply stop by a CVS or Walmart! Depending on who you use, you can have your prints sent directly to your house and your scans (digital images) will be emailed to you! In a couple of days you can have your images back just in time to share them with family and friends!
Don’t Forget to Share those Images on Instagram!
Tag your photos with #disposablecamera to make sure people are taking note of what you’re doing this summer!
How to Develop Film at Home - Everything You Need and Need to Know!
Developing your own film at home doesn’t take a lot of expensive equipment or a masters degree in chemistry! Here’s a quick guide to get you started in developing your own film at home.
When you think about how sensitive film is to light and how careful you always have to be with it, many people are absolutely terrified by the thought of developing your own film at home. I know I was. When I started researching how to develop my own film, I immediately noticed the warnings on each step. Each one pointed to how easy it would be to screw up your film at that particular step. Developing your own film almost felt like being Indiana Jones trying to navigate your way through a labyrinth of traps and tricks designed to kill you at any misstep.
But learning to develop film is actually easy and developing film at home can save you a ton of time and money! For years, I developed film at my own home, in my bathroom. You don’t need a big space or a lot of super special equipment, just a few things and the willingness to explore something new and create something beautiful!
In this blog post, I’m going to be sharing my process, the equipment and tools and chemicals that I use to develop color negative film (CN-41) at home.
Developing Color Film Guide
First, this process is only for color negative. Usually the chemistry required to process the film is listed on the cartridge. But generally, you just know. Color Slide film must be processed in E-6 chemistry and black and white film is a different chemistry and process all together. This guide will help you develop your Kodak Portra, Ektar, Ultramax, etc films.
Equipment List
The equipment is going to be your biggest investment. Here is a complete list of the gear I need to develop film at home.
1 Liter Glass Bottles - 4 ea - Find them on Amazon
Thermometer - 1 ea - Find one on Amazon
Bottle Cap Opener - 1 ea - These Work Great
Scissors - 1 ea
Funnel - 1 ea - Find them on Amazon
Film Spool - 1 to 3 ea - Find them on Amazon
Developing Tank - 1 ea - This Tank Comes with Spools!
1,000 ml Measuring Beaker - 1 ea - Find them on Amazon
Plastic Storage Container - 1 ea
Stirring Rod - 1 ea - Find one on Amazon
Warm Water Circulation System - 1 ea - Available from B&H
Film Squeegee - 1 ea - Find one on Amazon
Film Clips - Several - Find them on Amazon
I’ll include links below to purchase the exact equipment I use. I’ve been using this gear for years and have a pretty decent groove going. Every photographer might do things a little different or have a different set up, but this works best for me!
Chemistry
There are several options out there for chemistry. In the beginning, you could easily get chemistry shipped to your house in both liquid or powder form. But over the past few years, that has changed. And the quality and availability of the chemistry has changed also. I’m not going to spend any time here reviewing chemistry options, rather, I’m going to cut to the chase with my recommendation.
For color chemistry (C-41), I prefer to use the Cinestill CS41 Color Negative Film Kit. This kit can be ordered in both liquid and powder form, which is helpful as sometimes shipping the liquids can be an issue. The liquid kit is almost always in short supply also. I have used both the powder and the liquid kits and have gotten the same consistent results from both. Cinestill’s kits are easy to use and come with detailed and color instructions to help you get the times and temperatures right.
Chemistry does become exhausted pretty quickly as you process and/or let the chemistry sit around. I have a tendency to try to keep at least one powder kit on hand just in case my chemistry is exhausted. It is ok to push the chemistry, but it’s more of an art than a science and you need some experience before you start trying to use almost exhausted chemistry on photos for clients or your own cherished moments!
Mixing the chemistry is actually quite easy, but it does require that you use water at specific temperatures, which is where your thermometer will come in handy.
Prepping Your Film for Processing
This part is honestly probably the most difficult because the film canisters must be opened and spooled in complete darkness. It can take a little bit of practice to get really fast at it, but it is not hard to do as long as you do a little planning and know what you’re doing before you turn out the lights.
Step 1 - Find/Make a Completely Dark Space
I’ve had a lot of luck using bathrooms. When I say completely dark, I absolutely mean COMPLETELY DARK. Turn off the lights and let your eyes adjust. If you can see anything at all, there’s too much light in the room. Generally, I stuff towels under the doors and/or hand a quilt or other thick blanket over the door. You know you’ve done it right when you cannot even see your hand in front of your face. This level of darkness can be a little disorienting, so be careful and be aware of your surroundings as you work. Remove any obstacles or objects that might cause you to trip or be hurt in the dark. Also, be sure to remove your Apple Watch or other smartwatch or fitness device. Take your phone out of your pocket as well. I actually ruined a roll of film because I forgot that my Apple Watch was still on and when I flipped my wrist it illuminated and the film was completely fogged.
Once you’re sure your space is light-tight, you are ready to move on to step 2.
Step 2 - Lay Out your Film and Equipment
This is important because it helps to know exactly where everything is before you turn out the lights. When I first started developing film, I did not have a lot of countertop space, which made laying things out difficult. Ideally, you want to lay things out in the order that you will use them and with enough space between the objects that you may not knock something over in the dark and not be able to find it. Once you start, you won’t be able to turn on the lights until you have the film in the developing tank with the lid secured. Until that moment, even if you drop everything, you cannot turn on the lights because the film will be ruined. Here’s what you’ll need to prep the film:
Exposed Film
Scissors
Bottle Cap Opener
Developing Tank (including the lid, and also the center spool if included)
Film spools
Normally I set my gear in a left to right configuration. The bottle cap opener on the left, then the roll(s) of film, then the scissors, then the film spools on the right.
Step 3 - Open and Spool the Film
Finally, we get to the fun part. Close the door, make sure everything is super light tight. make sure that there are no electronic devices nearby that are going to light up and fog the film. And in my case, make sure that there are no little kids that are going to burst into the room randomly, as my children like to do. Now let’s open up that film canister!
With the lights off, take your first roll of film and use the bottle cap opener to pry up on the side of the canister that does not have the protruding cylinder. I like to use the little cylinder to push the film out of the canister, so I open the other end. Once the bottom cap is removed, discard it (I throw it on the floor and clean it up later). Push up on the cylinder and remove the film roll and discard the canister. Hold the film by the plastic spool and do you best not to touch the film. Some spools might be included to spring loose so be careful to listen/feel for the film unspooling. More often however the film will remain tight against the spool. Pull the film leader away from the spool (the leader is the first part of the film that has the notch cut out. It’s what you use to spool up the camera), and cut the leader when the film is at its full width. Try to cut as little of the full width film as possible. Carefully, holding the film by its edges, insert the film into the uptake spot on the film spool. You might want to practice this part in the light with some old film before you actually try it with an exposed roll. Depending on the spool type you are using, they can sometimes be difficult. Once the film is started on the spool with a couple of rounds on the spool, carefully make sure you do not drop the film or let it hit the ground and begin to spool the film until you hit the film’s little black spool.
It is a little bit of a trick to be able to hold the film carefully and spool it. It would definitely be worth grabbing an old or cheaper roll of film and just practicing this in the light before you try to do it blind.
Now you take your scissors and cut the film away from its original spool and finish spooling it onto the development spool. Normally the film is held on by tape, but sometimes the sprocket holes are fed into a center spool. Either way, you are going to have to cut the film to free it.
Once you have spooled the entire role, I always go ahead and place it in the developing tank, especially if I have more rolls of film to open. That way, there’s less chance of it getting dusty or exposed to light if anything happens. When you have all the rolls you are going to develop spooled up, place the lid on to the developer tank and make sure it’s locked down and light tight. From here you can turn on the lights and clean up the mess!
Step 4 - Prep the Chemicals
At this point, the instructions that came with your chemicals take precedent over whatever I say here. Mix them according to the instructions that came with them. I generally allow them to sit and settle a few hours before I use them to develop with. But I’ve also used them immediately so that’s up to you. Generally however, all of the chemicals will need to be heated to well-above room temperature. The Cinestill kit I use requires heating the chemicals to 102 degrees Fahrenheit or 38.9 degrees Celsius.
To heat my chemicals, I get a plastic tub and fill it with water. I then insert the Cinestill TCS-1000 and allow it to circulate and heat the water. I used to do this by using really hot water only and then just immersed my chemicals and monitored the temperature but this was really unreliable. After I purchased the TCS-1000, the process has been soooooooo much easier! I normally set the TCS-1000 to 104 instead of 102 degrees so that chemicals will make it over the last little hump of getting to developing temperature. I use my thermometer to monitor the temps in the chemicals and once they reach the correct temp, I ready to move ahead to Step 5!
Step 5 - Run the Film Through the Process
Here’s the tools and equipment you will need:
Again, the instructions that came with your chemicals will guide you through all of the specifics. You need to pay close attention to temperatures and times. As well as notes about agitation methods. Developing temperature, developing time, and film agitation can all have various effects on the final result so if you’re new to film developing, you definitely want to follow the instructions exactly.
For most color film developing, the process is the same with only a few variations. Here’s the basic process:
Pre-Wash (tap water at developer temperature)
Developer
Blix
Rinse
Stabilizer/Photo-Flo
Dry
To pre-wash, I usually just adjust the hot and cold taps until the running water is approximately that of the chemicals (102 for me). I simply hold my thermometer under the water and make adjustments until it gets to the correct temperature. Normally, you run the developer tank full of water and just let it sit for the prescribed time. Usually around a minute or so. Then you simply dump out the water. Don’t be shocked if the water comes out green or purple or brown or blue or some other color. The films are coated by the manufacturer and part of the pre-wash is to remove that coating.
Immediately after the pre-wash, I pour the developer into my tank with the film and begin agitations. During the entire developing process, I leave my TCS-1000 running to keep the chemical temperature consistent. When I’m not agitating, I put my tank back in the warm water to keep the chemicals from losing temps.
When it comes to agitation, there are a couple of different methods for you to consider using. Most developer tanks come with a little peg/handle that you can insert and rotate the film inside of the tank. They also come with a rubber lid that can be installed allowing you to agitate by inverting the tank. I have used both methods with similar success. Lately, however, I have noticed some lighter edges on my film around the sprocket holes which might be caused by turbulent developer swirling around the plastic spools as I spin them with the peg. I have been inverting more lately and have not seen those lighter edges.
The developer generally stays in for somewhere around 3:30 but that varies so check the instructions that came with your developer. As I’m developing, I go ahead and put the funnel in the developer bottle and get ready to pour the chemical back into the bottle. I also go ahead and open the bottle of blix so that I can be ready to pour. I get kinda obsessive about things when I’m developing and I like to make sure the same lids go back on the bottles they came off of. So opening ahead of time helps me to be organized enough that I don’t get things mixed up.
As soon as the developer is out, the blix goes in. Blix generally takes several minutes longer than the developer. Be careful not to spill the blix during the process, it can sometimes leave a nasty stain. While I’m blixing, I go ahead and put the lid on the developer and set it aside (or back in the heating tank if I have another batch to do). I also rinse the funnel and move it to the blix bottle to be ready to pour when the time has finished.
Once your blix process is finished, the film is no longer light sensitive and you can remove the lid without damaging the images. I usually pour the blix back into its bottle and then begin the rinse. Your rinse water needs to be warm, generally around 102 degrees and your rinse time can vary, but normally is around three to five minutes. Don’t get impatient during the rinse, just let everything get rinsed really well.
I normally allow the tank to fill completely up and then remove the lid and dump out the water and refill. You will need to dump the water several times during the rinse process. There will usually be a slight color tint to the water at first, but this should completely fade away as you rinse and dump.
Once rinse is complete, you can stabilize. Not all chemistry kits include a stabilizer. I normally mix in a drop of Kodak Photo-Flo with my stabilizer. But literally only add one drop. Too much and things will get really sudsy. If your chemistry doesn’t require stabilization (the Cinestil kits do not) then I go ahead and fill the tank up one more time with water and put a very small drop of Photo-Flo in and agitate for a few seconds.
After this, drain the water and you’re ready to move to the next step!
Step 6 - Drying the Film
Once the liquid is drained from the tank, the drying process has already started. As film dries, it can develop water spots, which are kind of a pain to get off. So to start the drying process, I usually try to get as much water as I can off of the film before I hang it up to dry. My practice is to leave the film in the spool and give it a good shake to get as much water off as I can. I then pull the film out of the spool and use a squeegee to get even more water off.
Using a squeegee is a hotly debated practice because there is the risk of scratching the film as you squeegee it. I’ve actually done it before and its heart-breaking. I’ve learned to be careful and make sure everything is clean and all surfaces are free of debris before I start. Your film will dry just fine without the squeegee, I’ve just found it leaves fewer water spots when I use the squeegee.
Next, you simply clip the film onto a film hanger and find a nice quiet cool and preferably dark place to let the film dry. The drying process takes a few hours and you generally want your film to be completely dried before you store or scan your film. Film loves to attract dust, and water spots are just a pain you don’t need in your life so hanging your film somewhere without a lot of air movement or light will allow the film to dry with less issues.
Sometimes, especially with 35mm film, the film can curl up as it dries. I usually attach another film drying clip to the bottom to hold the film straight, and it also helps a little with the curl. The film can curl up or it can kinda form an arch, both are difficult to deal with when storing or scanning so every step you can take to prevent it will help. You will discover that some films are worse than others when it comes to curling.
After Processing
Once your film has dried, you’re ready for the next step, which could be storing in film holders, scanning, or printing in a darkroom. Either way, the hard part is over and you’ve developed your first roll(s) of film! Congrats!
Be warned, once you start this process, film developing is kind of infectious. I love developing film at home and look forward to shooting so I can develop my next rolls. It’s almost a magical process honestly!
If you have any questions or run into any issues, please feel free to email me at tony@shutterjunkies.org or find me on Facebook - I’ll be happy to help you out!
If you’re just exploring and interested in find out more about film options, check out a few of my previous blog posts!
3 Best Kodak Films for Beginners
Good luck and keep shooting!!
Terrell High School Prom 2021 Photos are Ready!
The Prom Photos from Terrell High School’s Prom are ready!
We’ve gotten all of the images edited and uploaded to our online gallery! You can find your 2021 Prom Pictures by going clicking the button below!
You can download web-sized copies of the photos FOR FREE! If you’d like to print your own images, you can purchase a high-resolution image for only $5. These are large enough that you could print a billboard from them! You can also purchase prints, photo books, and other great print products as well!
How to Get the Film Out of a Disposable Camera
How can you get the film out of your disposable camera with out damaging it? Its easy! Just follow this simple guide and you’ll have your film in hand in no time!
A Basic Overview
After reading my previous blog post about Disposable Cameras - I’m sure the excitement and motivation completely overwhelmed you and you ran out immediately and bought a fun little disposable camera to take some photos with. You spent time with friends and family, snapped up all 27 exposures before you had even realized it and then that familiar feeling as you try to advance the film - clickity clickity clickity, nothing is catching. You’re out of film.
So what do you do next…
You have some options as far as developing your film goes. You can actually just drop the entire camera off somewhere and get it developed. The bad thing is that most of the location places that will develop your film also won’t return your negatives and we definitely don’t want that. You can always develop it yourself or your can mail the film into a trusted lab that can process the film and return you negatives to you. These are both great options but sadly, both of them require you to get the film out of the disposable camera before you do anything with it.
Here’s a quick step by step guide on how you can get the film out of your disposable camera!
Getting the Film Out of Your Disposable
Step 1 - Remove the label/wrapper
The disposable camera itself is just a general plastic camera. Each company puts their own branding on the cameras in the form of an adhesive label or a loosely fitting card stock type wrapper. In most cases, you will need to remove the label to get the camera apart. Its normally easy to do and it does not matter if it gets torn or damaged. On some cameras, like the one in the photos, the label doesn’t really wrap around or interfere so it can simple be left on.
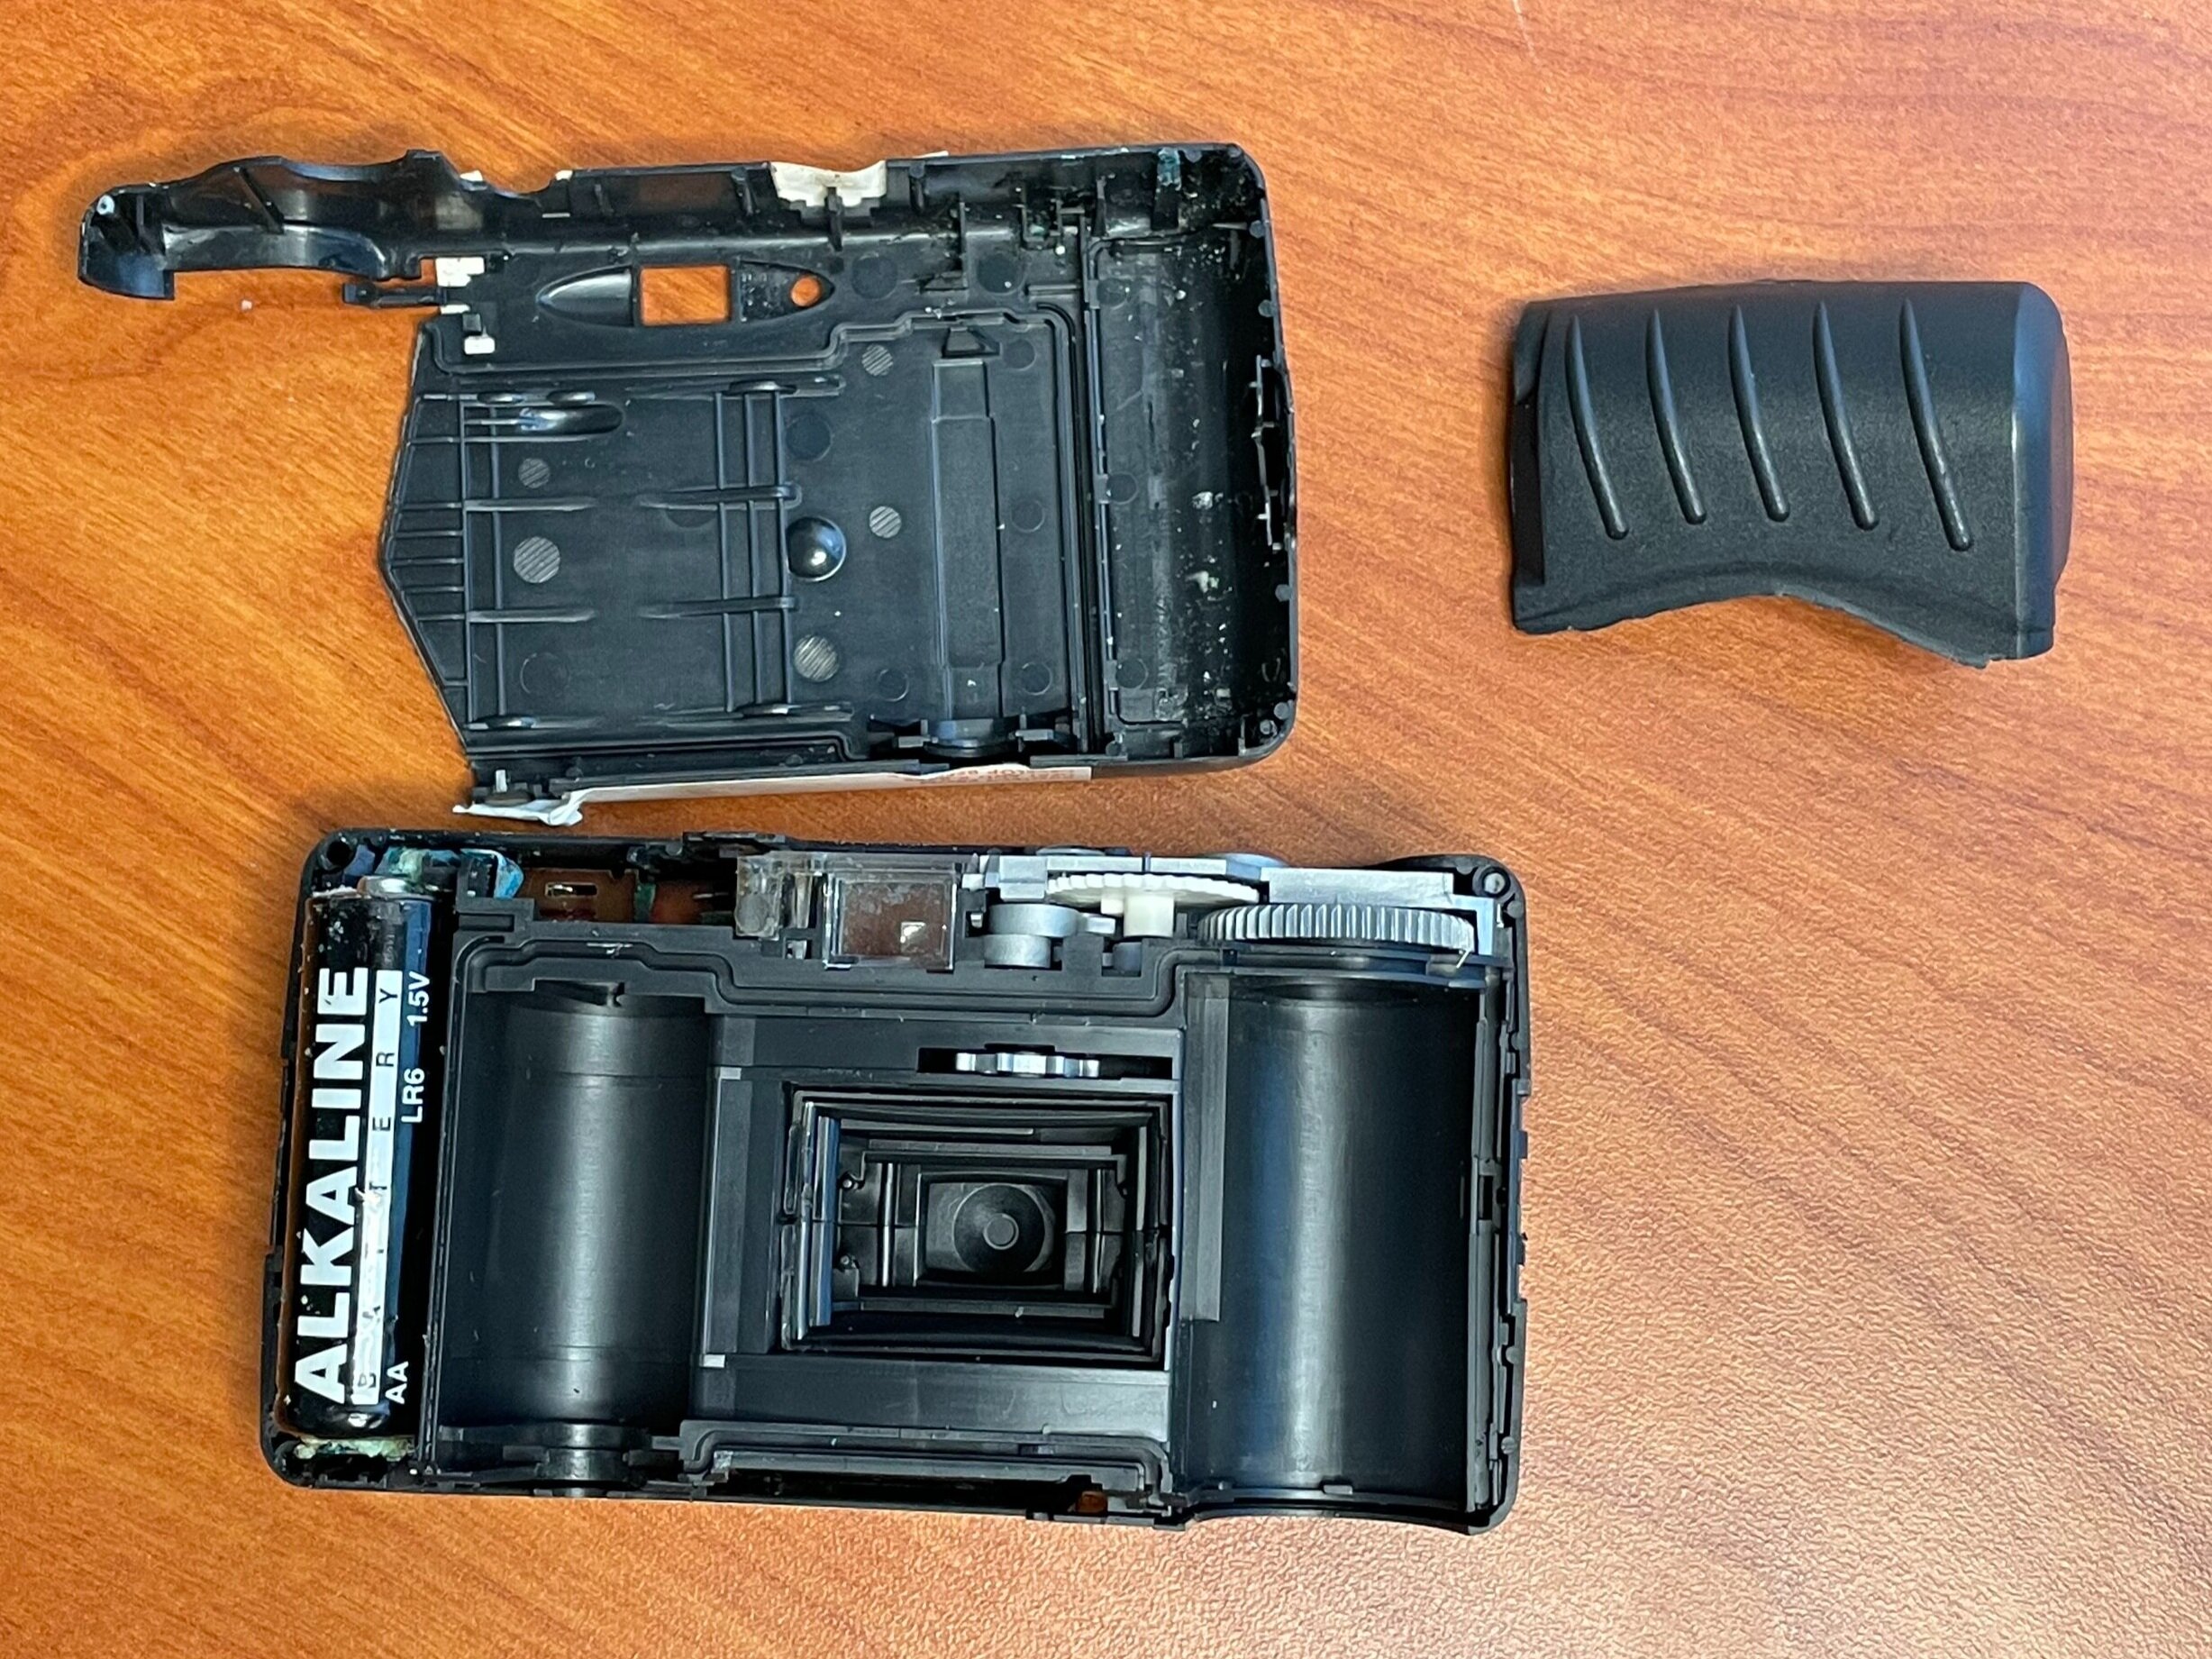
Step 2 - Locate and Pry Open the Tabs Holding the Camera Together
Usually these tabs are located on the sides of the camera. If you are just wanting to get the film out of the camera, all you need to do is pry on the right side (the side with the film advance) of the camera. Almost all cameras are designed to break easily, almost like a built in film door. Of course, only removing the part covering will completely break the camera, so reusing it is out of the question. Most disposable cameras will have tabs on both sides however so that you can pry up and remove the entire back. There are usually other little tabs of various types along the top and bottom that simple help to keep the back in place and light tight, these may require a little pressure/prying to get loose.
Step 3 - Remove the Film
I don’t need to say much here. It literally just falls out. Really simple. Its self-contained in the little 35mm film cartridge, just like any other 35mm film.
Step 4 - Remove the Battery
Most of these cameras have a flash and are powered by a AA or AAA battery. For the 27 exposures you used, you barely drained any energy from this battery. Take it out and use it somewhere else! You know you never have a battery around when the TV remote dies!
On a side note, if you did not remove the entire back from the camera, you will not be able to access the battery.
Step 5 - What Do I Do with the Camera?
You have a few options. If you can separate the components its possible to recycle some of them. I actually put my disposable cameras back together, leave the battery in them and let my kids have them. They love to pretend they are taking pictures just like their dad! Its a super cheap but fun toy. You can also just throw it away. They are made to be disposable after all.
Don’t Let Your Disposable Camera Film Sit Around!
A lot of people shoot their 27 exposures and then put their cameras down because getting the film developed is a bit of process and they never come back to them. I have people come up to me all the time and ask about what they should do with the box of disposable cameras they have. Image quality does degrade over time, especially if your disposable cameras end up in the attic. Get those photos developed and start enjoying them! We do offer film processing for mail in and drop off film. If you have a bunch of old disposables that need to be developed, give us a call or send us a message and we can negotiate a bulk rate for getting them all developed and scanned! Click the button below to order film processing and lets get those images out of that plastic disposable and onto your phone or Facebook or printed on paper, anywhere that they can be enjoyed!
Want to see a video of how to do this?
Check out this very short how to video that will show you exactly how to get film out of a disposable camera!
Disposable Cameras - Everything You Need to Know!
Disposable cameras are still around and they’re as fun and easy to use as ever!
Disposable Cameras in 2025
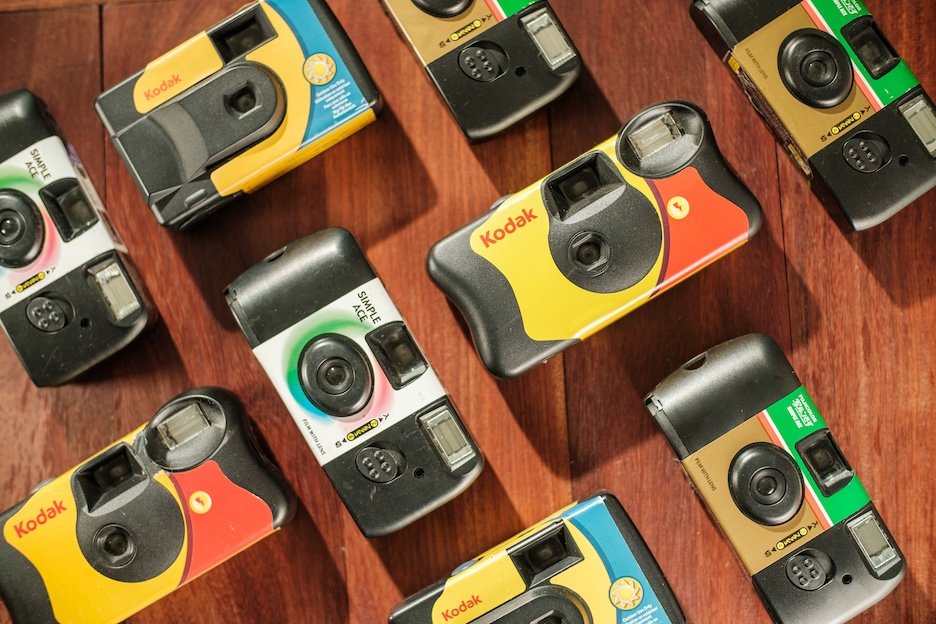
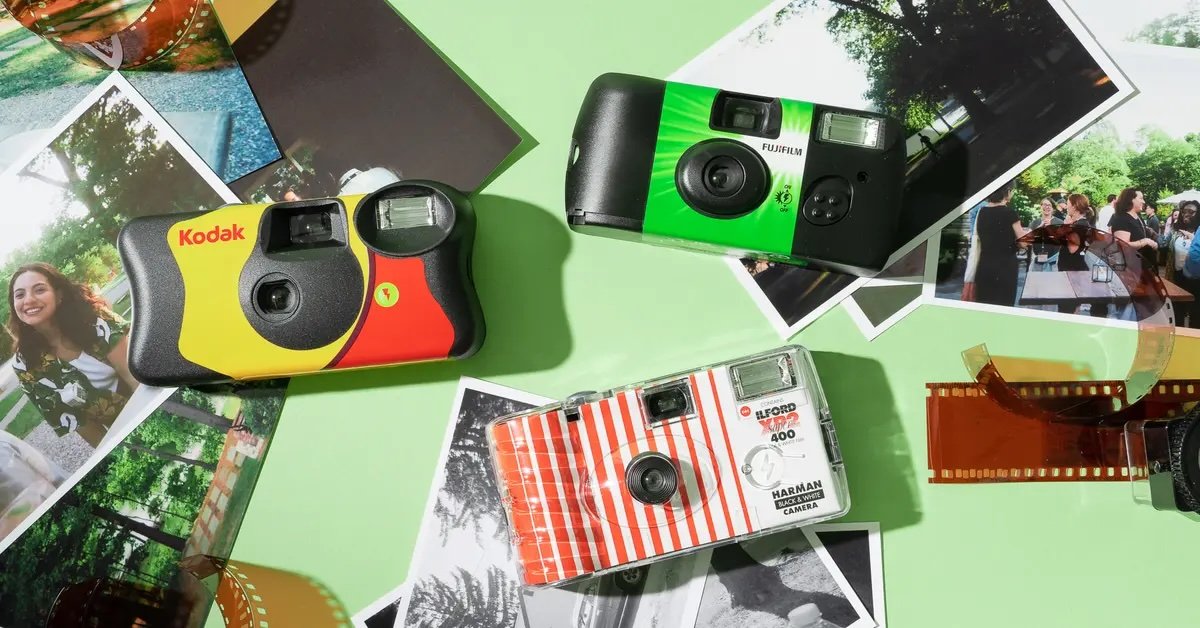
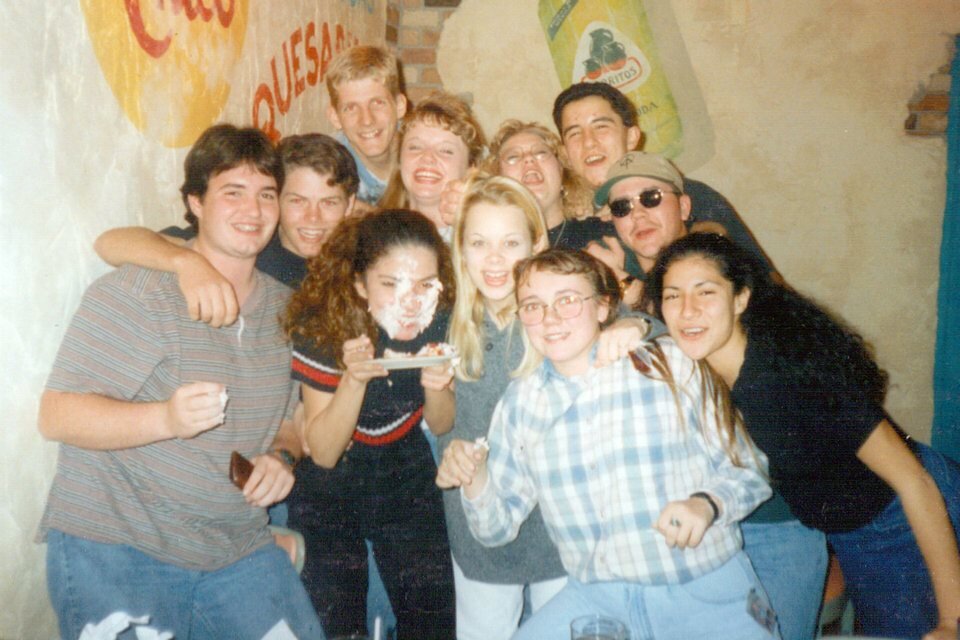
In the late 1990s, disposable cameras were all the rage. As a completely irresponsible teenaged high school student, my parents would have never trusted me their real camera, so every time I went on a trip or out with friends, I always had to stop and pick up a disposable so I could at least record a few of the moments from the event. They were available everywhere and getting them developed and prints made was easy. But then came camera phones, the internet, social media, and the film industry and infrastructure took a huge hit. People stopped using disposable cameras and companies stopped producing as many of them, but they never stopped producing them! You can walk into any Walmart or CVS or Walgreens and still pick up a disposable camera! And, let me tell you, they are still completely amazing! If you’ve never shot with one, you absolutely should! They are a great way to get into film and with the resurgence of film photography in the last few years, the infrastructure is building back up to get your images developed and scanned!
What is a Disposable Camera?
It’s a very simple, very cheap pre-loaded roll of 35mm film loaded into a plastic body with a simple mechanical shutter and film advance and some very basic electronics and a battery. Originally, they were made to simply be dropped off at the local film collection center so you didn’t even have to deal with disposing of the camera and they could be easily recycled. Nothing is adjustable - everything operates in a fixed mode. The lens is fixed and plastic, the aperture is fixed, the shutter speed is also fixed at around 1/100th of a second. The only variable is the film speed. You can usually purchase disposable cameras in ISO 200, 400, and sometimes 800. The flash is usually decently powerful and is normally off. You normally have to press a button to charge the flash before you click the shutter. The recharge button has to be pressed each time so that you can have the flash charged for each shutter click.
These cameras are still made to be taken/sent directly to a film lab for processing, but they can easily be processed at home and if you want to save money on postage when you send your film in, you can open up the camera and send the roll of film in by itself.
Disposable cameras all come loaded with film, there are several different options ranging from basic color to black and white to some crazy film stocks. Disposables come in a lot of different film speeds also, so it gives you a lot of flexibility
Where Can I get a Disposable Camera?
Disposable cameras are available at a lot of places! They are sold in-store at CVS, Walgreens, Walmart, and Target. Mostly these stores either carry a Fujifilm or Kodak disposable in a single pack, a multipack, and a waterproof model.
You can also pick them up online from Amazon and several other retailers. Amazon and other online retailers have a much better selection!
| Store | Description | Price |
|---|---|---|
|
|
||
| CVS | Fujifilm QuickSnap Flash 400 Camera | $14.99 |
| CVS | Fujifilm QuickSnap Flash 400 Camera, 2 Pack | $25.99 |
| CVS | FujiFilm QuickSnap Waterproof Camera | $23.99 |
| Walgreens | Kodak HD Power Flash Single Use Camera | $19.99 |
| Walmart | Fujifilm QuickSnap Flash 400 Camera | $14.96 |
| Walmart | Fujifilm QuickSnap Flash 400 Camera, 2 Pack | $24.96 |
| Walmart | FujiFilm QuickSnap Waterproof Camera | $11.75 |
| Target | Fujifilm QuickSnap Flash 400 Camera | $12.99 |
| Target | Kodak HD Power Flash Single Use Camera | $12.99 |
| Target | Kodak Water Proof Camera | $18.99 |
How Do You Use a Disposable Camera?
Disposable cameras are great because they are so very easy to use. The only thing you need to worry about is buying the right camera/film speed. Because the settings are all locked, there’s no flexibility in exposing the film. While you could maybe use a 200 ISO film in a darker room, an 800 ISO film might not be the best for a bright sunny day. Fortunately, the cameras are all labeled with what lighting environments they are best suited for. All you need to do is make sure you select the right one.
After that, you literally just point and shoot. The focal range is pretty big on these cameras. The biggest thing you need to remember is that the minimal focal distance is going to be your biggest concern. You can’t put the camera right in your face and expect the image to be in focus. Generally, I’ve found that about an arm’s length away is the minimal focal distance for these cameras. If you’re in the shade or a shady area, you should definitely always use the flash. In fact, even if you are out in the sun, use the flash any way as it helps to fill in the harsh shadows on the face. In most situations, you can never have enough light!
It is important to note that when you are taking a photo, looking through the viewfinder only gives you an approximation of the image you are taking. There is no optical view finder or ranger finder, its simply a hole in the top of the camera for you to look through. You need to take parallax into consideration when taking photos of objects close to you as it might change the final composition of the actual image.
Where Can I Get My Disposable Camera Developed?
There are still quite a few places out there that process film. Unfortunately, most of them are not local for the majority of us. I created a blog post talking about your options for getting your disposable cameras developed. Check out that blog post HERE! There’s a lot of great information there that will also help you with disposable cameras. Walmart, Walgreen, and CVS still process film, but you won’t receive your negatives back. Even if you’re new to film, one thing you need to know is that YOU ALWAYS WANT YOUR NEGATIVES BACK! If a service doesn’t return your negatives, don’t use them. If you have your negatives, you can reproduce the image as many times as you want. The digital scans are no replacement or substitute for the film negatives.
We also offer disposable camera processing! Unlike some of our competitors, we handle your images ourselves and we always return your negatives. Click HERE to get your order started! You can also send it off to a number of really great labs out there. Richard Photo Lab is great as well as The Darkroom. Almost all labs will give you scanning options as well as prints and other options. If you’re mailing your film in, you. might want to remove it from the camera so save on postage. If the lab you are sending your film to offers a pre-paid label, I would just send the whole thing in. Most labs have places to recycle the cameras and batteries and it beats throwing all of that away yourself.
How to Get Disposable Camera Pictures on Your Phone
Almost every lab the processes your negatives will offer scanning services. With The Darkroom, you can have your images scanned and they go to a gallery where you can download them onto any device, including your phone. I usually opt for higher resolution scans so that when I download them to my phone or tablet, I’m getting an image that’s decent enough quality that it could be printed. You can also purchase a film scanner yourself and scan your negatives. It is a little more work but it gives you a little more control over the scans and the final product.
Simple Use Vs. Single Use Cameras
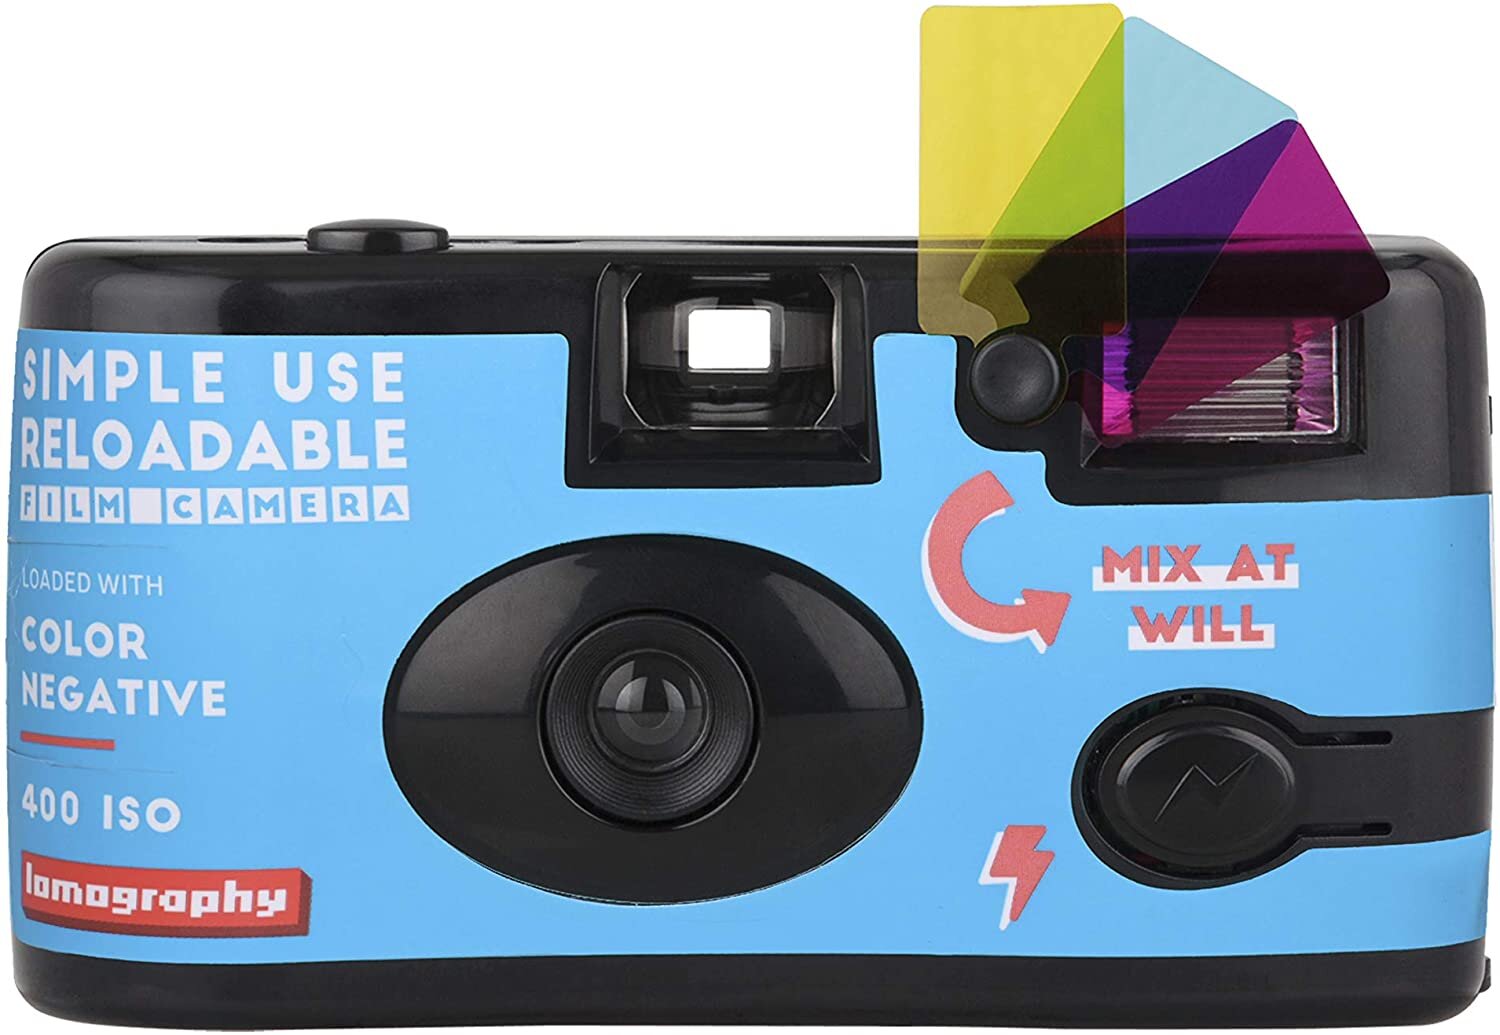
There are two other types of cameras out there on the market which fall into the disposable camera family, in my opinion. Recently, Lomography.com released a new line of cameras call Simple Use Cameras which shared the design and simplicity of a disposable camera, but were made to be reloadable. Disposable cameras have to be essentially broken to get the film out and while you can reload and tape up the camera and use it again, it’s pretty much trashed. Lomography’s Simple Use Cameras come pre-loaded with film and are easily reloaded and reusable. The price for these cameras is significantly higher than traditional disposables, but you have to take the reusability into consideration when looking at the price.
Single-use cameras are merely a rebranding of disposable cameras. With sustainability and conservation being very popular some companies decided to move away from the disposable moniker because of negative connotations associated with the word disposable. Single-use cameras are no different than normal disposable cameras.
Disposable Cameras are So Much Fun!
I have a large number of cameras, both film and digital I can shoot from at any given moment, and I still love using these disposable cameras! They’re just fun and almost stress-free! And I love the look of the images they produce! These are great to give to the kids to take on trips but they're also great to grab and have some fun with friends. As a camera, they are way less intimidating than a mirrorless or an SLR, or even a cell phone. Anyone can pick one up and start shooting and that’s the magic of these cameras and why they have never gone away in spite of the roller coaster that film has gone through.
Jump on Amazon and check out what’s available or run down to your local Walmart and pick one up and have some fun! You won’t regret it, I promise!
The Best Ring Light Kit of 2021
Whether your a teacher or an instagram influencer, a ring light can make all the difference in your videos and photos!
As the effects of locking down for the pandemic began to really blossom, I was spending much of my day on Zoom calls in meetings, on Facetime trying to figure things out with clients, and creating videos where I used to just meet with people in person. But as I zoomed, facetimed and recorded, I noticed one consistent thing - I looked so terrible and old and it was all because of the terrible lighting! Tired of looking like a distant cousin of the Adam’s Family on camera, I started setting up my video lights. I have a lot of lights, all very professional and very expensive and they did an amazing job, but the problem is that they were not very movable and often times, I needed to set up and do videos in different locations. It would have been impossible to pack up all of that gear and move it, set it back up and and shoot for 15 minutes only to take it back down and move it back. I decided it was time to give and do what ever 12-25 year old girl on Instagram has done: Get a Ring Light…
What is the Best Ring Light Kit of 2021?
It shouldn’t be a surprise that the market is absolutely flooded with ring light kits. While I know a lot about lighting, I know nothing about ring lights. So I began my search for ring light on Amazon. There were literally more options than I could count. It was immediately overwhelming. I was looking for a quality ring light, but I didn’t want to spend $700 for one. I left my ring light Amazon search and instead headed over to YouTube where I watched a ton of reviews for different lights. Here’s what I discovered…
Ring Light Features
The features the ring light comes with really do make or break a lot of products out there. Even if the price is low, if the ring light doesn’t have some key features then it becomes almost useless really quickly. Here are some of the key features you should consider when shopping for a ring light.
Color Temperature
Some of the cheap ring lights out there only offer one color and its usually a daylight kind of blue color. If you’re going to only be filming in one location and that color works with the ambient lighting you’re using then you’re good. But if you’re going to be moving your light around, shooting in different areas or want to have any control over white balance, you are going to want a ring light with a color temperature range so that you can adjust from daylight blue to tungsten orange as needed. I even use this creatively by turning the light to the tungsten range and adjusting my cameras white balance, which gives me a blue-colored background. Some of the cheaper lights out there offer clip on plastic panels which act as filters to change the light color. This isn’t a bad option if it keeps you in your budget, but those panels are just one more thing to keep up with. Its just so much easier to turn a knob and get a different color out of your light.
Ring Light Power Options
Many of the cheaper options out there only offer one option. You either are going to have to leave your ring light plugged in all the time or you’re going to be relying solely on battery power. If either of these options fits your needs then it opens up a broader range of options for you. But again, if you’re needing some flexibility with your ring light power options, then you definitely want to opt for a light that will let you use both battery and plug-in as needed. There have been moments when I have needed to shoot for longer periods of time and so leaving the ring light plugged in gives me the stability and duration I need. But there have also been moments when I needed to be in a place that didn’t have power and being able to plug in a battery and still get the same power and options has been a life saver. Of course, any time you are on battery you have a limited amount of time and I have pushed mine too far on occasion and have my ring light shut-off in the middle of filming, but live and learn I guess lol.
Ring Light Stands
I’ve got stands. A lot of stands. But I’ve learned something, one more stand couldn’t hurt! If you don’t have any stands you definitely want to get a ring light with a sturdy and durable stand that is also compact. The effective range of these lights isn’t a very big space so you’re not going to need a 20’ stand and sandbags, but you want something that will at least work for what you need it to and not get in the way. As I shopped for ring lights, I realized that many of them out there were ok ring lights, but the stands they came with were absolutely awful. If you get a great ring light and an awful stand and the stand falls over and your ring light gets smashed now just have an awful stand and no ring light. Make sure the stand you’re getting with your ring light is decent quality.
Ring Light Adjustability
I guess you could just move the light further away or closer to you. But what I noticed when using an iPhone or Android phone with a ring light is that ambient light can really mess up your camera’s automatic exposure while taking photos or video. There were times when I was shooting in a darker area that I was just completely blown out by the ring light and I couldn’t get my camera to adjust correctly. And let’s face it, if you’re using a conferencing app like Zoom or Google Meet, they did not spend a lot of time on the camera controls for the apps. Having the ability to adjust your power settings gives you greater control of the light and of the look you’re going for. You definitely want a ring light with an adjustable power setting.
Which Size Ring Light Should I Buy?
This is another great question. The larger the light, the better, but if you’re on a budget, a smaller ring light is infinitely better than no ring light at all. And if it comes down to price, I would skimp on the size before I skimped on the features. Get the biggest, feature rich, ring light you can afford!
Should I Buy a Ring Light Kit?
Unless you are in a very small group of individuals who already have a lot of equipment, you definitely should just shop for a kit. Almost all of the right light kits on Amazon, Adorama, and B&H have everything you need to get started. You really just have to consider the price, the features, and the quality. And don’t just stop at looking at the reviews on the website. I found that YouTube was full of really great reviews of every single one of the top selling ring light kits.
The Ring Light I Bought
Of course, is this ring light the best ring light of 2021? Well for me it is, but your needs could vary wildly. As I started shopping, I knew I would be using this light for Zoom calls, Facetime, and recording videos and I knew that I would a great deal of flexibility and a lot of features. After watching a ton of reviews and checking out some of the ring lights my friends were using, I decided on going with the Westcott 18” Ring Light Kit. This kit came with two batteries, a battery charger, a plug-in power supply, a stand, an iPhone holder with flexible arm, and a case. For the money, it was definitely what I felt would work best.
I’ve used this ring light from Westcott almost daily for the past year. Zoom calls for work, zoom calls with doctors for check-ups, job interviews, recording digital content for classes (instruction), YouTube videos, church, you name it, I’ve used this light for it! It provides a ton of light and the color temp is adjustable. The power level is adjustable too! It can be battery powered or plugged in and it comes with a stand that can get pretty tall but also folds up to fit really nicely in the well-built cases that was included.
The light itself is great but the materials for everything aren’t the highest quality. The plastic housing around the light is very flimsy. The stand also has some issues with the legs staying in place. Often times, these legs will slowly settle to the floor. Especially if you have a camera attached. I’ve had to really tighten that nut down to keep it from moving while I’m shooting.
The price is higher also, which could be a deal breaker for you. But after looking at a lot of lights and considering the price, I would get one of the cheaper lights. You’re not really asking for much when you purchase a light for under $200. But this light beats out almost all of its competitors for quality in this price range. I could have gotten a light for much cheaper, but feel like I would not have gotten the life and usability out of it. If you’re looking for a ring light for zoom calls or a ring light for streaming you could possibly go with something a little more affordable. But if you’re going to be trying to create quality content for YouTube or classroom instruction, this light is the one you want to pick-up.
There are a few other quality lights out there. I strongly considered the 18” 55w Ring Light Kit from Neewer. It was a much more affordable option and if you’re working inside of a tight budget, this light would be a great budget buy!
Getting a Ring Light will Improve Your Video and Photo Quality Dramatically!
Teachers, a ring light is going to help your videos look so much better! YouTubers, stop sitting in front of that window and enjoy the flexibility that a ring light can give!. Instagram influencers, you know you need this! Do some research and take the plunge!


